Sections:
Servicing A Zeiss Contarex Body
A Couple of Contarex Warnings
Lenses:
This section applies only to the ContaREX lenses and DOES NOT apply to the Contax I, II or III, IIa or IIIa Rangefinder cameras nor does it apply to the ContaFLEX line of 35mm SLR cameras or the ContaFLEX TLR..
The only exceptions to these Contarex lens warnings are the Contarex 250 mm Olympia Sonnar, the 180 mm Olympia Sonnar, the two Zoom lenses, the 35mm Schneider, the Bellows Tessar, and the 21mm Biogon. All other Contarex lenses are the object of the following warning sections.
A General Warning:
The Internet is full of self-help sites providing "advice" about do-it-yourself camera and lens repair. Repair 'manuals" are regularly sold on Ebay. I hear from people regularly who have been become victims of these sites and other media wrongness resulting in damaged equipment.. My advice is simple. If anyone wants to enjoy these as an innocent form of entertainment there's no harm in this; but attempting to repair, service or modify your equipment using these instructions is a more like taking a scalpel and operating on your big toe than it is anything else. My advice is simple: don't do it. Cameras and lenses are complex, full of tricks, made of very expensive or unavailable parts and when a well meaning unqualified, inexperienced, and under equipped person works on them trouble is likely, damage highly probable and success is virtually impossible.
The only advice I can possibly provide to anyone who has worked himself into a corner by being seduced by do-it-yourself instructions, a U-Tube video or any other kind of instructions or advice that has resulted in damage is I cannot base a repair estimate on anything other than a direct examination of the equipment. No amount of verbal descriptions, videos or pictures can provide enough information to provide me with enough information upon which to base a reasonably accurate repair time and expense estimate.
Just the other day I received a very expensive Zeiss lens full of acid mold. When it was taken apart it was full of new wrong grease applied over old dirt and this new grease had fed and supercharged the growth of this mold. There were other abundant signs of recent amateur bad work. The last worker had slathered new grease of the incorrect kind over old mold infected dirty grease and had simply wiped the mold off of the lens surfaces so that the lens looked clean and the focusing control was smooth. The oil from this grease had quickly spread and filled the lens. Then mold quickly returned. U-Tube and other Internet sites are fueling a lot, and I mean A LOT, of bad amateur incorrect and dangerous lens work these days.
It is normal when examining a lens prior to purchase to check the operation of the focusing and aperture controls. It is not possible to examine a lens for its optical quality. These days a lot of people are doing their own lens servicing to "improve" the feel of the focusing and aperture controls of a lens they intend to sell. This gets a better price for the lens. But the real purpose of the lens is optical and it is its optical performance that is the most important thing in the long run. The use of the wrong grease combined with incomplete cleaning result in incomplete work that makes a lens feel good temporarily but with it's optical quality as it was to begin with.
A word About Lens Grease:
Lens manufacturers do not sell the greases they use to lubricate the lenses they make. These are only available and used only when their lenses are returned to them for adjustment, servicing and repair. Many lenses are no longer serviced by their makers and so original grease is not available for them. In many cases the lens maker is no longer in business or in the lens making business.
When a lens is designed the metal alloys and other focusing helical thread characteristics are aimed at the use of a particular grease. This grease is then custom manufactured for the lens maker by a lubricant specialist manufacturer. These compaines typically have very large mnimum order quality requirements and may no longer provide grease made using the original formula provided to the original lens maker.
An old lens may have an absolutely wonderful focusing feel and the goal of many do-it-yourself lens fixer uppers is to dupliate this. But this is a mistake. The reason an old lens has a wonderful focusing feel is the lens grease is at the end of its life. When lens grease ages it releases its oil. When this process starts the oil will sit in a thick film on the grease solid components that stick to the focusing helical threads. This layer of old oil imparts a very light and smooth feel to the focusing control; but this does not last long. Once the oil moves on into the lens what is left are the solid grease components which are sticky and give the focusing control a stiff feel. The goal of a fixer upper is to get a nice light focusing control feel. This always means the use of a very light grease and this always means a low disassociation temperature and a short disassociation age.
There are some people selling Lens Grease on Ebay that is made in Japan for very large amounts of money. This grease is actually lithium sewing machine grease that has been repackaged. It is not suitable for many lenses. The Nikon Co. did use a super high quality custom made lithium grease in its cameras and lenses; but they did not sell it. It's white, just like any other lithium grease and so it's easy to mistake any ordinary hardware store lithium grease for it.
All greases are a mixture of solid components and an oil. All grease formulas are trade secrets of the grease maker. The purpose of the solid components are to hold the oil. It is the oil in the grease that provides the lubrication and prevents wear. All greases have a "disassociation" temperature and a "disassociation" age. These are the temperatures and the age at which the solid components no longer hold onto the oil and release it. When this happens the oil moves into the lens. A lens maker will know these values for the grease it uses. The problem with all greases used in lenses is that the higher the disassociation temperature and the longer the disassociation age the thicker the grease is and the heavier the focusing feel of the lens focusing control will be. All greases available for use by the do-it-yourselfer come off of Ebay our out of a hardware store. None of these are suitable for use in lenses. The reason for this is shown in this picture:

This is a highly magnified picture of a tiny spot the lens owner found had suddenly developed in a very expensive lens he had recently purchased on Ebay. This is a mold spot but not just any kind of mold. It is acid producing mold. This kind of mold feeds on the oil film that is on the lens surface resulting from oil released into the lens by the focusing grease. The acid released by this kind of mold will etch and ruin the coatings and eat into the lens glass very quickly. When this lens was taken apart it was possible for me to identify the particular grease used when this lens was "serviced" prior to sale. Its name is "Selvyt Clock Grease". This grease is made for clocks and it is very light so it gives a very good and light focusing feel. But it has a very low disassociation temperature and a very short disassociation age. It is also very good food for mold as you can see. The grease used in this lens gave up its oil in about six months then it took about three months for the mold spots to appear. This is when the owner contacted me about the lens..
The one and only way to obtain a lens grease that is both safe and effective is to have it custom made at an original custom lubrication maker. This costs thousands of dollars but there is absolutely no other way. There is no grease sold by watch or jewelers maker supply stores, hardware stores, or on the Internet that are suitable for use in lenses. Years ago I paid the price and bought a very thick lens grease and a thin lens grease from the same maker who made grease for Zeiss. These are the same greases as were provided to Zeiss by them. They are compatible with each other and can be mixed together so for each lens overhauled here it's possible to make a mixture of them that has the correct lightness and the correct lubricating properties to provide both the best possible focusing control feel and to prevent premature wear. A lens with a lot of use wear needs a grease that is a better lubricant to prevent wear in the future. A lens that is better preserved can use a lighter grease to get a better focusing feel. All old lenses are not new and so each needs a custom approach to the best lubricant for it. This particularly applies to Contarex lenses. They have aluminum-to-aluminum focusing helical threads and this is an inherently dangerous metal combination from the standpoint of rapid wear and other forms of permanent damage.
A good high quality lens grease is also formulated by the maker to prevent mold growth. This is not true of other greases like Selvyt Clock grease or sewing machine grease..
When a lens grease releases its oil this oil will eventually move on into the lens and coat everything in the lens before moving on and coating the exterior of the lens. This external oil layer of oil is the reason so many old lenses look good. Just wipe an old lens with some windex and you'll see the oil film go away and can see the real condition of the lens. The big problem with this oil film is that once it is on the lens surfaces it ruins the optical performance of the lens elements. Lenses must be absolutely clean in order to bend the light the way they are designed to do. An oil film changes the optical properties of the lens but not in a good way. A lens fixer-upper never takes the optical part of the lens apart. Why should he? He's not interested in the quality of your pictures; he's interested only in his profit on the lens sale. If a lens looks clear enough to a fixer-upper then it's good enough for sale to the victim. A complete lens overhaul must always involve the complete cleaning of each and every lens element in the lens; but this is a lot of very skilled work that you won't find in any U-Tube video.
A. Lens Warning 1:
I have been contacted by an ever increasing number of people running into trouble while "servicing" Contarex lenses recently asking me for advice about how to get out of trouble with a lens in progress. Many people are putting themselves into the Contarex lens servicing business or "upgrading" them prior to sale to get a better price. There are also innocent U-Tube victims taking screwdrivers to their lenses after having been seduced by a U-Tube video that makes everything look simple. What I've been told by these workers allows me to conclude that these lens "servicing's" are always confined to work to make the focusing mechanism of the lens lighter and smoother. The aperture control system is ignored because Contarex lenses have no aperture control rings to worry about and taking the lens part of a lens is a risky thing to do.. This makes "serving" a Contarex lens low optical risk because the lens part of the lens can safely be ignored by these workers and left in original condition. The result of this is the lens will have a tremendous tendency to produce over-exposures when it is mounted on a Contarex body. This very strong tendency of the lens to be responsible for over-exposures is, for the most part, blamed incorrectly by the camera owner on the camera body shutter or light meter.
These are the reasons why the refusal to completely clean the lens part of the Contarex lens when it is "serviced" leads to over exposures:
First a little background:
The purpose of this warning is to explain why it is absolutely necessary for any Contarex lens you intend to use on a Contarex body must absolutely be completely properly cleaned and adjusted; including most importantly the lens aperture control system and all of its parts.
A. The Contarex put Zeiss out of the camera business. The reason for this was the very high return rate of Contarex cameras for warranty service. The service centers were overwhelmed with cameras returned by their professional owners. The service centers were overwhelmed and they could not solve the problem of the cameras producing over-exposures. In the camera repair business there is one and only one way to solve a the problem of too many returns and this is to go out of business.
The Contarex was made for sale to professionals. It was far too expensive for amateurs. Back then professionals primarily used slide film. At that time slide film had a very narrow exposure latitude. In order to obtain a slide exposed good enough for professional publishing use the film had to be exposed within 1/10 f stop of the ideal exposure. The Contarex could not reliably provide exposures with this extreme degree of accuracy. The main reason this exposure accuracy could not be provided is the aperture control system in the lens could not operate fast enough.
In order for the Contarex to provide accurate and reliable exposure accuracy the automatic aperture control in the camera body must shut the lens aperture to the selected f stop before the shutter begins to open. If this does not happen the result will be an over-exposure or variable exposure across the focal plane because the aperture in the lens will not have fully closed to the selected f stop before the shutter opens and closes. The amount of over-exposure depends upon how fast the aperture closes and the shutter speed acting together. The faster the shutter speed the faster the lens aperture must close before the exposure. The faster the shutter speed the greater the degree of over-exposure.
My experience over the past 20 years overhauling Contarex lenses is that most Contarex lenses will produce over-exposures unless they are very carefully corrected. This experience is that all lenses being sold today are far more liable to produce over-exposures and larger over-exposures than the were when they were new. Here is why:
The spring in the camera body that operates the lens aperture control is tensioned when the camera is wound. The higher the resting tension of this spring the more force is needed to push the camera winding lever. If too much force is needed to push the winding lever to its stop the more likely the lever is to not be pushed to its limit stop. This makes the camera liable to refuse to release the shutter when the release button is pushed. This is because the Contarex shutter has very accurate and tight incomplete wind exposure prevention interlocks. These are designed to prevent shutter speed unreliability due to incomplete winding. This puts a limit on the allowable resting tension of the aperture operating spring and this tension limit is low enough to make friction in the lens aperture control system very important to exposure accuracy.
The relatively low level of force provided by the lens aperture operating spring in the camera body results in the aperture control system in the lens needing to operate with almost no friction and absolutely no hang-ups.. The more friction or reluctance in the lens aperture system the greater the amount of over-exposure the lens will produce.
The Contarex camera body does not have a manual f stop control feature. It is completely automatic. This design decision places complete reliance for exposure accuracy on the ability of the camera and the lens to work together so that the selected f stop is obtained in the lens before the shutter opens. In most cases the camera shutter and light meter is very good and this means the most common cause of over-exposure is reluctance, friction and/or hang-ups in the lens aperture control system.
There are four reasons for a lens aperture control to become loaded with excess friction to the point where overexposures are produced:
1. An oil film on the aperture blades. All old Contarex lenses with un cleaned aperture blades suffer from this and have a sticky oil film binding the aperture blades together. The only reason to open a Contarex lens to clean and grease the focusing threads is stiffness of the focusing control ring. A stiff control ring is due to hardening of the original grease Zeiss used at the factory. When this grease ages and hardens it releases its oil into the lens and the solid grease components remain behind making the focus control stiff. The released oil is sticky. It's deliberately made to be sticky so that it will hold onto the grease solid components. When it is released into the lens it makes things sticky. The only opening into the optical part of the lens is where the aperture control operating lever passes through the lens cartridge. This means the sticky oil coats the aperture blades first and most. When the oil is first released the aperture blades will appear wet and the oil can easily be seen. But, in time, the oil will move on and the aperture blades will appear dry but they will still have a sticky layer of oil on them. This sticky oil binds the aperture blades together. These blades have a lot of contact surface area so all it takes is a tiny amount of oil to produce a lot of operating friction and the aperture control system in the lens becomes harder to operate.
2. Original factory aperture control plate slot or other dimensional problems. The Contarex lens assembly workers at the factory did not understand how important it was to ensure the aperture system in the lens operated with an absolute minimum of friction or the severe consequences of a reluctant lens aperture control system. They just put the lenses together. The result of this is aperture control parts were not selected and adjusted or tested with the required amount of care. The consequence of this is a large fraction of Contarex lenses have original factory aperture control systems that require some very careful examination and adjustment before this system will be able to produce reliable exposures when the lens is mounted on the camera body.
The problem with working on a Contarex lens aperture system and its parts is the people with the courage and taste for risk to do this work need some very rare eye-to-hand coordination skills, extraordinarily great patience and experience with the Contarex system. There are no parts available so working on Contarex lens aperture parts is always high risk. Taking apertures apart and putting them back together is always an acquired taste. It also requires a number of special tools that must be made and cannot be purchased. But with all Contarex lenses today aperture cleaning, adjustment and testing is absolutely necessary. The problem is many people can grease focusing threads but extremely few people are born with the rare necessary inherent talents necessary to work on apertures.
3. Use wear and tear. The aperture control system is just like any other mechanical thing. its parts are subject to wear with use. It is entirely possible for a Contarex lens that has been used by a professional in the past to have made so many exposures that it is simply worn out. These lenses require the most delicate eye-hand coordination, perceptions and judgment to be identified and to be satisfactory corrected. Huge patience is necessary. I've had lenses that have taken days to get the aperture control system right; days of the most delicate possible work.
4. Design limitations. I am sure that if the lens designers had realized just how important the operation of the lens aperture control system was to overall customer satisfaction with the camera system that the aperture control system would have been much more carefully designed to eliminate friction and sources of hang-up. In all Contarex lenses the aperture control system is a very simple system and this renders it liable to operating reluctance from a great number of possible causes. It would have been much better for everyone if the lens aperture control system was designed using miniature ball bearings; but it wasn't and this leads to all kinds of friction and hang-up problems that can be very difficult to identify and correct.
Here is how you can test a Contarex lens for yourself. This is a very easy test:
1. Mount the lens on the camera and release the shutter. This will close the lens aperture to the f stop value set on the camera body control..
2. Set the aperture at the smallest aperture for the lens. This will vary from lens to lens. Note the size of the lens aperture opening.
3. Cock the camera and set the shutter at 1/1000 speed.
4. Remove the back from the camera.
5. Hold the camera so you can view through the shutter. Aim the lens at a bright light.
6. Release the shutter and view the size of the light dot. Do this several times viewing the focal plane from edge to edge and not just in the center. Do this at least 10 times.
7. If the size of the light dot is larger than it should be or if its size varies from side to side there is too much reluctance and friction in the lens aperture control. This means the lens needs a complete overhaul.
8. Perform this test at various aperture settings to detect any hang-up or uneven friction in the lens aperture control system.
B. Lens Warning No. 2.
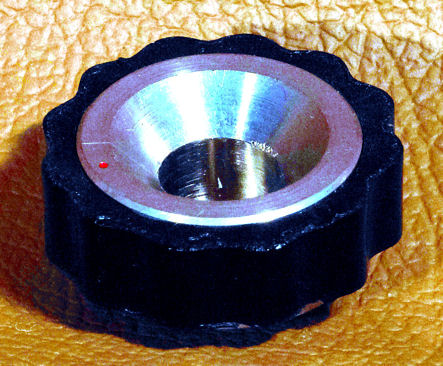
The Contarex lenses have become very popular with people using adapters to mount them on modern digital cameras. For the most part these new Contarex lens owners, being inexperienced in film cameras, have no idea of the risks entailed in putting a 50 year old lens into regular use. There is a great danger of complete loss of the value of the lens in this. All Contarex lenses have a hidden built-in self-destruct that can happen suddenly and without apparent warning. This problem is the result of the lubricant used by Zeiss when the lens was assembled and also by the particular aluminum alloy used to make the focusing helical threads. This aluminum alloy is extremely highly susceptible to friction welding. Friction welding is metal welding that happens due to friction without heat. It will occur when clean aluminum bare metal is rubbed against itself. When the focusing threads of a Contarex lens become friction welded there is no possibility of repair. The focusing assembly is welded permanently and cannot be separated non-destructively. There is no lubricant or treatment that can separate the moving parts that have been friction welded together. A friction welded focusing assembly in a Contarex lens is permanently ruined and there are no spare parts other than donor parts lenses and these have disappeared from the market. The lubricant used by Zeiss was supplied by a lubrication company in Germany that is still in business. I contacted them to inquire about obtaining a quantity of this lubricant. They replied to say that the lubricant is no longer available and was originally made of a product called "shin oil". This is oil distilled out of the shin bones of cattle. The problem with this lubricant is that a lot of it was infected with a very slow growing mold at the Zeiss factory or when it was manufactured. The lubricant is composed of shin oil and thickeners. The mold slowly consumes the oil and does not consume the thickeners. The time frame for the action of the mold to completely consume all of the shin oil in the lubricant is ending right about now. Just how long it takes for the mold to consume the shin oil depends upon the storage conditions of the lens. A lens stored in warmer wetter conditions will have lubricant that deteriorates faster than one stored in cold and dry conditions. When all of the oil is eaten by the mold only the thickeners remain and they are not a lubricant and not only do they not prevent friction welding, they promote it.. Friction welding can take place in about one to three turns of the focusing control. It happens so suddenly it surprises the lens owners. The most dangerous thing you can do is to try to loosen up a Contarex lens whose focusing action has become sluggish. This is the sure sign the mold is at or very close to the end of its work and that the lens is susceptible to friction welding. I recently purchased three 135mm Contarex lenses whose action is sluggish. The next time their focusing controls will be moved is when they are disassembled and then only after their focusing threads have been lavishly drenched in special oil.

This is a picture of the seized friction welded focusing helical of a Contarex 135mm f.4.0 Sonnar lens. The large blackest part attaches to the focusing ring. You can see on the top the bright aluminum where the set screws scratched their attachment points when the owner used force to try to get the lens focusing control to move. You can see how the original black anodizing of the male threads has faded due to wear and the action of the acid produced by the mold as it consumed the lubricant. It took only two turns of the focusing control from 1 meter to infinity to permanently ruin this focusing helical set. You can pay $1600.00 for a 55mm f1.5 Planar and then have it turned into a complete ruin in about 30 seconds. The same thing can happen to any other Contarex lens because they all used the same aluminum alloy and the same lubricant that is susceptible to mold growth.
The original manufacturer of the Zeiss lubricant originally used in the Contarex has manufactured and supplied me with a large quantity of a modern synthetic lubricant that serves the same purpose but it is not susceptible to mold growth. The second problem with the particular aluminum alloy used in the Contarex lenses is that it needs a special lubricant to prevent premature wear and friction welding. The particular aluminum alloy chosen by Zeiss must have a specially prepared lubricant in order to prevent very rapid premature wear. Zeiss originally hard anodized the focusing threads, but this treatment does not last forty years as you can see in the photograph above. All of the Contarex lenses I have seen have had patches of threading where the hardened anodized portions have been worn through to bare metal and this bare metal is where the friction welding happens. All of the Contarex lenses that I have seen that have been serviced recently have been lubricated with ordinary vaseline grease; the kind you can buy in a drug store. This will prevent friction welding but it will not prevent rapid premature wear. All of the lenses lubricated with vaseline grease have contained vaseline that is filled with bright shiny aluminum wear particles. Vaseline causes the surface of the aluminum to undergo a process called "galling", this is where tiny flakes of metal chip off of the surface in response to friction. The Contarex lens is a very special thing made of very special materials and it demands that only the proper lubricant be used in it.
The Contarex Body:
When you buy a Contarex there are two things you cannot know and which cannot be known until the end of an overhaul. The first of these is you cannot know how long the camera has been stored fully wound. When a Contarex is fully wound all of the springs in the camera are fully tensioned. Springs will permanently loose their strength over time if they are kept fully tensioned. A Contarex that has been stored for 20 years fully wound, and most of them have been stored fully wound for at least 20 years, is one that cannot possibly be restored to 100% factory shutter speed accuracy. This always shows up in the 1/1000 speed which is reduced as a result of long term storage caused strength reduction to the two shutter curtain springs. There are no replacement parts. The second unknowable thing is the state of wear to the shutter speed controller. The more it is worn the slower the final achievable 1/1000 speed will be. It is possible to clean, lubricate and then properly adjust the shutter speed controller but it is not possible to restore it from the state of wear that it is in. An overhaul will stop the wear and will protect it from future wear. The two factors of the loss of shutter curtain strength and shutter speed controller wear contribute, in my experience, to a possible after overhaul 1/1000 speed varying from 1/330 to 1/800 in most Contarex cameras.
The Contarex camera is very complex. It is extremely difficult and time consuming to adjust to extract from it the maximum performance potential when it is in an advanced state of wear, if the camera you buy happens to have been defective from the factory or if workers over the past 45 years or so have done serious internal damage to it.
It is not possible for me to both remain in business and offer a performance guarantee on this camera line. In most cases my experience with this camera is the best that can be done is to completely disassemble the camera, thoroughly clean, assemble, lubricate and then adjust the camera so that it is as reliable and accurate as it can possibly be, and be protected against continued excessive wear due to dirty and unlubricated parts. There is no performance guarantee on any part of any Contarex camera I service. Your only guarantee is that I will do my very best work on it and will not hold back any available resource that is available to me to restore your camera to its highest level of performance given its state of wear and its maintenance and storage history.
This is all there can be with this camera because most of them were very hard used in professional service, then when they became worn to the point they were not reliable enough to produce income for the professional owner they were sold onto the amateur market where they have circulated for decades up until now. Zeiss made the exterior of the Contarex to be extremely resistant to the effects of use, wear and aging and so it is impossible to tell how restorable one may be from an external examination. It is only when most of the work has been done on servicing a camera and the final adjustments are being made that the degree of performance restoration that the camera is capable of becomes evident.
There's one more thing to consider and this is that the chances are very good the Contarex you buy may never have worked properly to begin with. This runs contrary to modern expectations but it is true. The Contarex put Zeiss out of the camera business because it's return rate for warranty service was too high. The following pictures illustrate this far better than mere words can. These pictures are of a Zeiss manufactured Contarex special tool. It is a the camera winding knob part of the wind tool used to wind and adjust the camera while it's top is off the camera body. The left picture shows the tool from the side and the right picture shows the tool from the inside where it mates with the camera winding shaft:

You can see that the tool has been used up over and over again. The hole for the shaft has been rounded and then been hammered back into usable shape with the use of a chisel and a hammer many times to the point where today it is worn out and not usable because the metal has been made too thin. This tool came from the Zeiss Official Repair Center in Canada. There cannot have been a lot of Contarexes in Canada. This tool was used up when the camera was new and was being actively sold. This tool was used by technicians who had limitless inventories of repair parts and access to factory advice. They had also been sent to Germany to be specially trained on the Contarex. This tool got used up because the camera did not live up to the expectations of its owners and could not be made to meet their expectations completely.
The BIG and uncorrectable ownership problem with the Contarex is that it has always been one of the most expensive cameras. it was expensive to buy when it was new and it's price today is more than high enough. The cost of an overhaul is very high because of all the labor involved. People naturally expect that when you pay a lot you should get a lot and this means a lot of stuff or a lot of quality. The Contarex is not a lot of stuff and so the way things go is it is normal to expect that it should be exceptionally accurate and reliable above and beyond the merits of less costly cameras. Unfortunately, it is not as mechanically good as its price causes one to believe. The one place in the Contarex where the quality is vastly higher than the high cost would indicate is the lenses. They are the greatest 35mm Lenses ever made and in order to get to use them with film you have to live with the lack of perfection in the Contarex body.
The Contarex is a fine camera. With an updated light meter and a full overhaul it will take great pictures and be very reliable. But it was not and cannot be made to be the perfect camera because it never was the perfect camera.
Before considering sending your Contarex for service please read the following sections about your model. Consider carefully that your camera, even though from the outside it may appear to be in mint condition, may have been effectively used up and may require very difficult, time consuming, and expensive repairs to restore to its maximum potential. Zeiss used the highest possible quality materials in the Contarex. The exterior has almost unimaginably high quality thick chrome plating on top of thick high quality brass, the highest quality leatherette and thick amber based paint. All these combine to make the Contarex exterior and so it is normal for a very highly mechanically worn out camera or one that never worked right to begin with to show virtually no external signs of wear. Consider also that the Contarex was a camera system designed and priced for professional use. It is a law of the photographic jungle that high priced professional cameras marketed to and used by professionals do not get sold into the used camera market until they are no longer reliable money makers, have taken many thousands of pictures and are impossible to restore to like new condition. Very few Contarex cameras were sold to amateurs and used gently because the were just so tremendously expensive when they were new.
My experience with the Bullseye camera has been that I have not yet seen one Bullseye that is not in a very bad state due to old sticky grease and/or bad work done on it in the past.
The Secret of the Contarex Body As It is Today Explained:
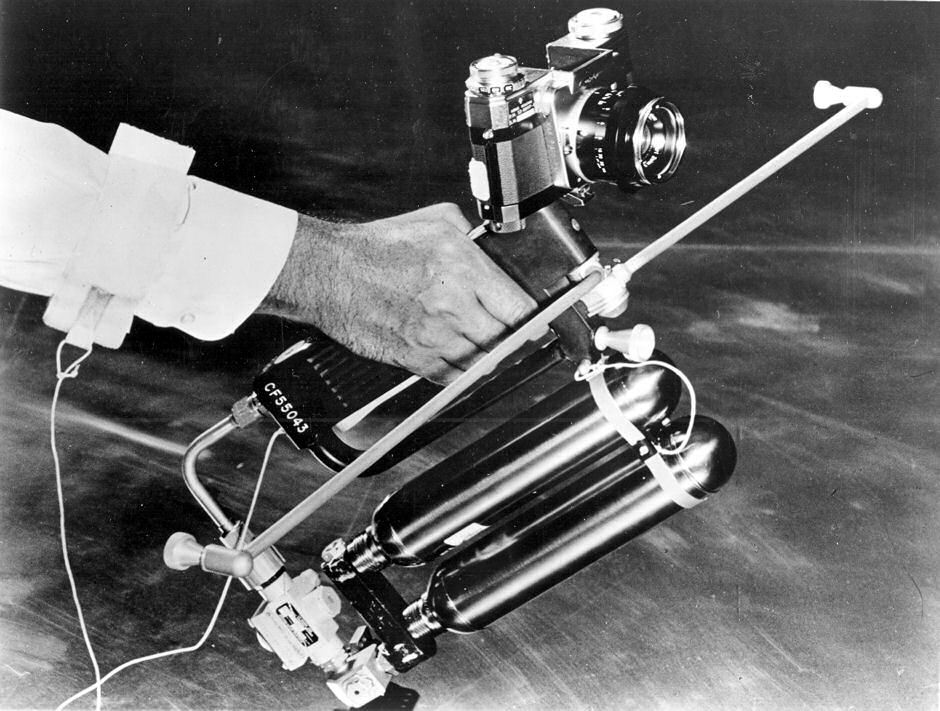
The main modern problem with the Contarex camera body is the reason it's mechanism is so well preserved and this is explained by this picture. It is a picture of the NASA Space Maneuvering Unit used by Major Edward White during the first American space walk during his Gemini flight in 1965. He held it in his hand and used gas vented from it to allow him to move in space.
In the beginning of the American space program there was a huge problem with lubrication. At that time there was no such thing as "Lubrication Science" as it is known today. There were no synthetic oils and greases. Everything was petroleum based and came out of the ground. Back then lubrication technology was primarily the tightly held trade secrets of the makers of oil for car engines and clocks and watches. NASA and Zeiss knew nothing. It was quickly discovered at the start of the NASA space program that In the high vacuum of space ordinary petroleum based lubricants would quickly evaporate and clean metal tended to self weld and stick together. The solution was to invent a new lubricant that could withstand the extremes of space travel and prevent clean metal from self welding in a high vacuum. A lot of money and effort was spent developing this lubricant. The solution was found in industry. Molybdenum disulfide was used in high temperature forges and stamping machines used in heavy industry. The grease that came out of this search is well known today and it is in every car. It is molybdenum disulfide wheel bearing grease that is a thinner version than the type used in industry in 1965. This is what was used in machinery intended for use in space such as the stripped down Contarex Special body mounted on the Space Maneuvering Unit (SMU). The SMU was used during the space walk with its Contarex Special attached to it. This association between Zeiss and NASA and the need to produce a Contarex that can operate in the vacuum and temperature extremes of space explains why Zeiss used wheel bearing grease to lubricate all of its Contarex bodies. The use of wheel bearing grease explains why the Contarex cameras are generally very sticky today. It also explains why a Contarex overhaul is so labor intensive aside from the great mechanical complexity of the camera itself. The axle grease is very difficult, time consuming and labor intensive to remove.
Only Zeiss used wheel bearing grease in it's cameras.. All Contarex Bullseye, Professional, Super, and Electronic bodies are lubricated with molybdenum disulfide grease. The problem with this grease is the solid part, the flaky molybdenum disulfide powder does not hold onto the oil that is used to make it greasy. Over time the oil in the grease migrates away and leaves the dry molybdenum disulfide as a solid residue. The solid deposit of molybdenum disulfide is very effective at preventing wear but it's too sticky to allow the very precise camera shutter mechanisms to operate as freely as is needed.
When a Contarex body is overhauled here it is necessary to remove all of the old axle grease from every part of it. Then the camera must be lubricated using a very special modern grease. The grease used in the Contarexes that are overhauled here is manufactured here. It is a mixture of modern German made synthetic lubricant into which a generous quantity of ultra microscopic nanometer sized round diamonds are added. The "Nano" diamonds are so small they can only be seen using an electron microscope. The are completely round and are so small they fill in all the microscopic pores of the metal forming roller bearings that reduce friction, virtually eliminate wear, and increase the accuracy and reliability of the precision machinery containing them. This nano grease is manufactured here using a proprietary process to combine the grease and nano diamonds. Nano diamond powder is very expensive costing about $1000.00 per gram. But a little bit goes a long way. Nano diamonds are an extraordinarily effective lubricant. The special oil used in the Contarex bodies also contains a generous quantity of nano diamonds also produced by a trade secret process.
The Lost Contarex Lenses:
Just prior to the cancellation of the Contarex Zeiss announced the introduction of three stunning new lenses that were never produced except as prototypes Pictures of these prototypes are shown in the following one page Zeiss literature from 1973:
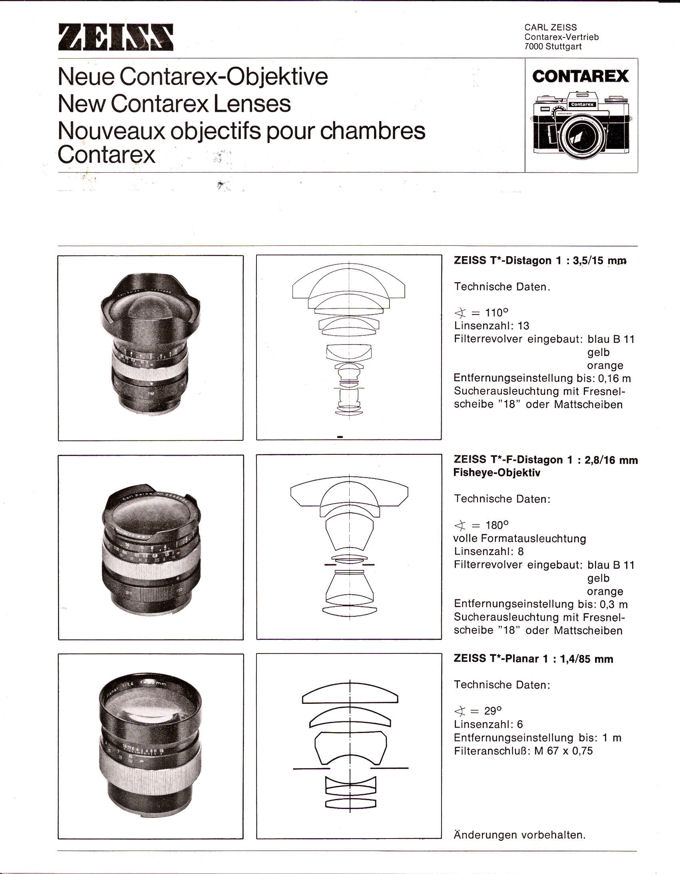
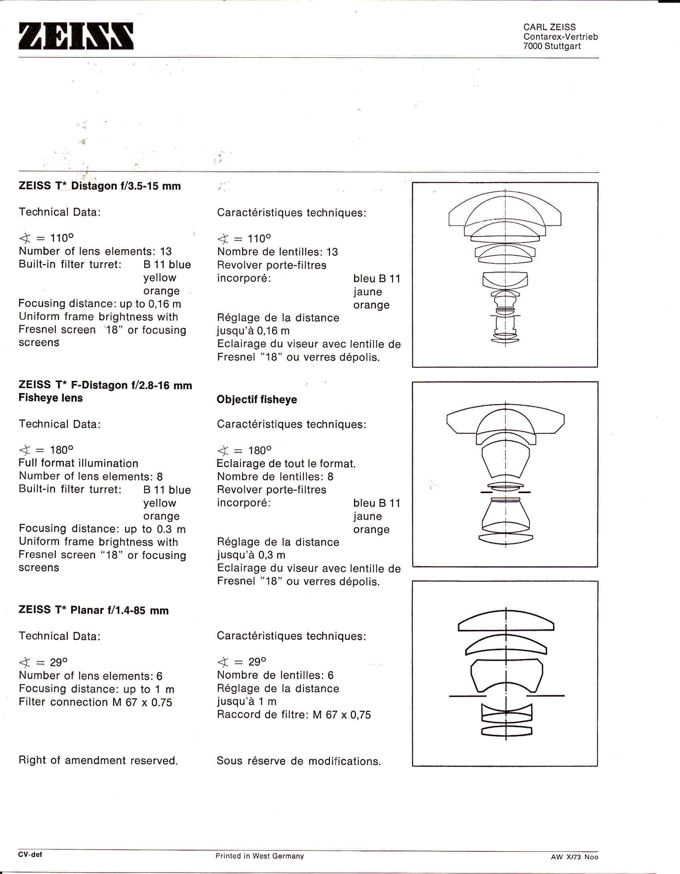
I have seen a Contarex 16mm for sale but not T* coated and have never seen the 85mm T* or the 15mm T* for sale. However, the pictures on this literature demonstrate these lenses were produced as prototypes and still may be sitting on a shelf at Zeiss today. With the renewed interest in the Contarex today it is a shame these lenses are not out there available for purchase.
The Contarex Bullseye

Why the Contarex?
It may seem a little silly to ask, "Why the Contarex", but it is an important question that goes a long way to explain why it is what it is. The shortest, best and simplest answer is "Gold". There are two ways to get gold, you can mine it (lots of dirty work even if you own a gold mine) or you can buy it (clean and easy). Back in the days prior to 1974, when the Contarex was being made, the United States Currency was on the gold standard, but U.S. citizens were forbidden by federal law to own much gold so gold didn't matter to us personally then as it does now. All we were permitted to own then was a small amount of jewelry or to use in manufacturing. There was no such thing as bullion coins or buying gold as an investment like today. U.S. citizens could not buy gold in the USA. But, if you were a sovereign government like Western Germany, you could take all the dollars you got from trade, take them to the U.S. Treasury, and convert them directly into gold bullion. Back then the official gold price was $32.00 per ounce. Gold was a hugely big deal in matters of international trade and most particularly to small countries like Germany who had only one way to get gold and this was to buy it with dollars.
If you were a European government, and you had no gold mines in your country, and you needed gold for international transactions, what would you do? You would probably try very hard to find some product or service that you could market to americans so they would give their dollars (gold) to you. This explains the Contarex and it also provides one of the very good reasons why the Contarex was discontinued the same year the United States went off the gold standard and it was no longer possible to go directly to the U.S. Treasury and turn dollars directly into gold bars.
The Contarex was a wonderful, efficient, and lovely gold mine to the West German government. Zeiss took paint, brass, steel and glass which are very cheap, combined them with local expertise and highly skilled manpower and some electricity, and turned these directly into gold that could be used to finance the reconstruction and prosperity of postwar West Germany. When it was being made a Contarex sold for about 12 ounces of gold at $32.00 an ounce. This is why the Contarex. The Zeiss company is still a big money maker for the German government. This is why even today they print postal stamps with Carl Zeiss and Ernst Abbe portraits on them. This is why even today large silver coins are minted with Carl Zeiss and Ernst Abbe on them denominated in the Deutsche. If you think about it, Carl Zeiss and Ernst Abbe taught the Germans how to turn steel, brass and glass (products of dirt) into gold and everyone's hands are clean and nobody had to go to work in a dirty gold mine like those poor miners today in South Africa.
The simple fact of the matter is that the Contarex is a camera that (would) and could only be made when it could only be paid for in gold; lots and lots of gold. This explains why it is so very very very special and why having one restored is relatively expensive in today's dollars. But if you think of it in historical terms the financing all makes sense.
Suppose you buy a Contarex Bullseye with a 50mm f2.0 Planar for about $700.00 and then invest another $1,000.00 in restoring it to its maximum potential. What are you out? About one and a quarter ounces of gold. Compare this to the 12 ounces it cost to buy originally and this is a bargain. The difference between then and today is that gold costs a lot more dollars to buy than it did back then. There is no doubt in my mind that if Zeiss was to restart production of the Bullseye and build it to the same standards it would easily cost about $15,000.00 in today's dollars. Buying one and having it restored to its maximum potential today for $1700.00 is cheap, cheap, cheap.
A Bit of Advice
Please contact me at superwide@earthlink.net by using this link if you have a Contarex lens that needs service:
Reservations on the waiting list are being accepted for the Contarex line of camera bodies. A small but wide enough supply of original Zeiss new old stock repair parts has been received here. This stock provides the necessary support to allow the provision of the highest possible quality services for the Contarex. Please use the above email link to contact me about your Contarex if it needs service.
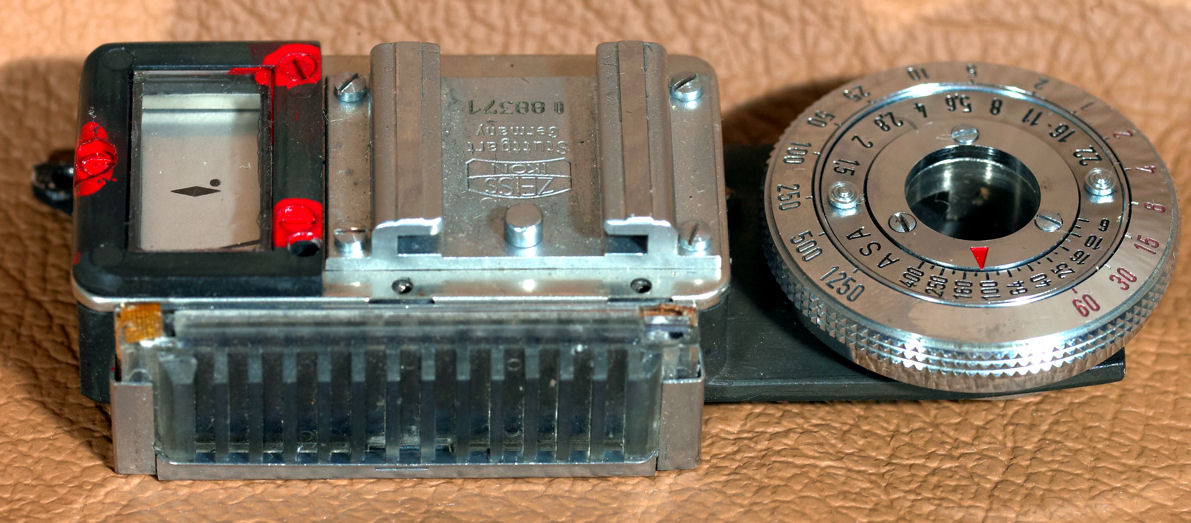
The official Zeiss name for the Bullseye is simply the Contarex. Bullseye is a nickname applied by owners. The Bullseye is the most popular model today and so this Contarex page begins with it. Because the Bullseye light meter is always the greatest cause for concern with modern owners the Bullseye section begins with the light meter.
The Four Types of Contarex Light Meters
There are three types of light meters found in the Contarex as they were originally manufactured and one can be upgraded.
1. The selenium type used in the Bullseye. This kind of meter uses a selenium cell. It generates a small amount of electricity when light falls on it. The brighter the light the more electricity is produced up to the inherent limit of the cell, which is about 0.5 Volts. The selenium cell type of meter is characterized by a short range and loss of accuracy in lower light levels. Prior to the development of the modern CDS type light meter there was nothing other than selenium to use in light meters. At that time, with all its weaknesses and problems, selenium was all there was. This is why it was used in the Bullseye. However, a recent development has made it possible to upgrade the Bullseye light meter to fully modern performance. This is described in light meter type 4. below.
There are two kinds of meters used in the Contarex Bullseye. The first version has a circle on the face and the needle is centered in the circle when exposure is correct. The second version has two red arrows and the needle is centered in between both arrows when the exposure is correct. Internally, both meters are the same. The only difference between then is the appearance of the face.
About 55,000 Bullseye cameras were made compared to about 8,000 of all the other models. The Bullseye is the most popular because it is the most affordable and so the first Contarex covered in this section will be the Bullseye.
The three major problems associated with the Bullseye light meter are:
1. Light Meter Inaccuracy. The big problem with the Contarex Bullseye light meter system is the wires that connect the light sensing cell to the light meter. Zeiss used a type of wire that deteriorates with age. This aging causes a great increase in the ability of the wire to conduct electricity. The solution is to replace the original wire with new solid silver wire. Solid silver wire has the highest degree of electrical conductivity and my experience here is it restores the Bullseye light meter to original factory accuracy.
The service to replace the original wire is included in a standard Bullseye overhaul and it is not an additional service.
2. The ASA/DIN selector dial is for lack of a better word pure nonsense. The Contarex light meter was designed for use with film having an ASA or ISO of 100 at the highest. Putting a film speed selector dial on the camera that goes up to an ASA of 3200 was simply for the purpose of marketing the camera back in the early 1960's. This was commonly done back then because everyone was doing it. It was a safe thing to do because films were very slow. The problem is that the film speed dial on the later CDS metered cameras, the Super and the Electronic, are fully capable of handling ASA or ISO 3200 speed film. This has set up a conflict in modern times in peoples minds with the result that there is a prevailing belief the Bullseye light meter should perform to modern specifications and expectations when in fact it cannot possibly do so.
The Bullseye light meter has a feature that is not obvious until you try to use the camera. This is that the lower shutter speeds are blocked the higher the ASA film setting is set on the light meter. If the light meter ASA setting is set at "0" all shutter speeds are available. If it set at 100 then the shutter speeds below 1/8 are blocked and the camera can only be set at higher speeds. This is unique to this camera. It's a method Zeiss used to disguise the inherent limitations of the light meter. There is no way to overcome this peculiar interlock.
3. The Bullseye light meter cell is highly sensitive to side light. The design of the Bullseye type light meter light sensor gives it a huge wide field of view. This makes it extremely susceptible to extraneous light. This effect is particularly strong in diffuse light situations such as overcast days, snowy or highly reflective scenes generally. This wide field of view includes the area of the lens. This makes the light meter sensitive to the finish of the lens and the length of the lens that is mounted on the camera. There is no way to overcome this. The only way to account for it is your experience with the camera teaching you how to adjust your exposures to obtain a good exposure.
These are problems associated with the CDS type light meters used in the Super and Electronic Bodies:
1. The CDS Type using 1.5 V used in the Super and the Super Electronic Type 2: This type of meter uses a cell whose resistance to the flow of electricity changes in response to the brightness of the light. This meter uses a CDS (cadmium sulfide) cell connected to a 1.5 V button battery. Because the power source is a battery this type of meter has a very long range and much better accuracy in lower light levels. It's a fully modern type of light meter whose design has not changed much up to this time.
2. The CDS Type using 3.0V used in the Super Electronic Type 1: This type of meter is identical in function to that using the 1.5V button battery. It's only difference is that it uses the same batteries that are used for the shutter (two 1.5V) to run the meter.
Note that up until 1983 mercury batteries were made and sold for photographic use. Now they are banned. The reason mercury batteries were used is that they had a very nice characteristic. Unlike alkaline cells that lose voltage continually as the are used and age, mercury cells kept their rated voltage right up to the minute they died. This made calibration of equipment using these batteries easy. Today we have to use silver or alkaline button batteries and of these two silver is the better for meter use. But you have to be careful and check your battery voltage from time to time. If you've got a 1.5V battery and its Voltage has decreased to 1.3 V it's time to replace it.
The Contarex Bullseye Selenium Light Meter And How To Use It:
The first thing it is necessary to understand about the Bullseye selenium cell light meter is that it cannot possibly be adjusted or repaired to meet modern light meter expectations. It is a selenium light meter that was designed and made for the extremely slow films available in 1957. Since that time films have speeded up tremendously and selenium light meters have been made obsolescent by the CDS type light meter.
Most Contarex Bullseye cameras being sold today are missing the removable "baffle" that fits over the light meter cell. This baffle was intended to be used to increase the sensitivity of the light meter by being removed in low light conditions. It has about a four f stop effect. But the Contarex selenium light meter was never able to live up to the performance specifications published about it. People who bought the Bullseye quickly found that under normal circumstances the meter would work well in daylight provided this baffle was removed. The result of this is that these baffles got put away, were lost, and most Contarex Bullseyes sold today don't have them.
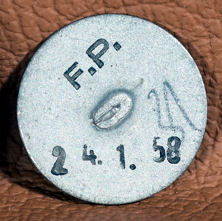
This is a picture of the back of an original Contarex Bullseye Selenium Photocell from a stock of Contarex parts that recently came my way. As you can see it clearly indicates it was manufactured on January 24, 1958. This shows that Zeiss had made its decision about the size of the cell to be used in the Contarex about a year prior to this date and so the light meter in the Contarex Bullseye is a 1957 era light meter.. The diameter of this cell is unusual and it was custom made for the Contarex:
Here is a Contarex advertisement from 1961. This is about the time it was introduced:

This is what I believe to be the first advertisement for the new Contarex cameras. The date on this is April 1961 and this means that the design of the Contarex probably was finalized about two years earlier sometime in 1959. The important thing to understand about the Contarex Bullseye is that it has a 1957 era light meter in it. One of the great beauties of the Contarex is that the camera exterior design is timeless and appears today to be modern. This appearance can provoke the false impression that the camera is fully modern.
Notice that this advertisement makes it perfectly clear the Contarex has been designed for the "Professional and advanced amateur". Many Contarexes today are being purchased by people who do not have anything near to the kind of photographic knowledge a professional or an advanced amateur would have had back in 1961. Much has been lost since then. The fact the Contarex was intended for professional use means it was designed and manufactured to last in professional use about five years which is how long it's price could have been deducted from federal taxes.
Back in 1961 the state of common knowledge in the photographic community was that there were two kinds of camera users: amateurs and professionals. Amateurs used point and click cameras and professionals used real cameras. Real cameras were not perfect in every respect. People who were real "non-amateur" photographers knew then that you had to test a camera, find its defects, and then work around them to get the maximum number of great shots. Today people expect cameras to produce perfect results all of the time under all conditions. The Contarex Bullseye cannot possibly live up to any expectations other than those that existed at the time it was sold. It had problems with its light meter in 1961 and because films have gotten a lot faster since then these problems have only gotten worse with time .
Recently It has become possible to restore the Bullseye light meter so that it is much better than new in performance with a new generation silicon photocell. If this is done the Bullseye light meter will perform very well to modern expect ions with modern high speed film.. But if this is not done, because the Bullseye light meter was designed and made for use with very slow film available in 1957 the modern user will have to make some adjustments and compensations. These adjustments and the reasons for them are explained in the following.
The Bullseye camera has had a pattern of complaints that have surrounded it in modern times and these all circulate around the light meter. I recently overhauled a Bullseye, installed my last new selenium photocell in it, checked the meter to make sure its performance was within factory specifications, and then thoroughly explored and tested the light metering system. The results were fairly surprising. Later I read the Contarex Bullseye Instruction Manual section on the light meter and in the light of the new knowledge observed that Zeiss had very cleverly telegraphed their concerns about the Bullseye light meter back when the camera was being made.
There are eight things that need to be understood about the Bullseye and it's selenium light meter:
1. The Bullseye is a camera of its time. It was designed for the slow film and the need for bright light of the time. It is a camera designed to use slow film in bright day light or in shade in bright day light. This is opposite to the way things are today with people using fast film in low or moderate light, and so there must be some adjustment in camera operating technique to account for these changes. Back in 1959 when the Contarex was designed, the fastest color film had an ASA (ISO) of 16 and Koadchrome had an ASA of 8. The design of the Bullseye meter made good sense back in 1957.
In 1957 it was common for very high quality selenium light meters to come with booster cells. These booster cells allowed the meters to be used in low light situations. This picture is of a Leica Meter shown in its original packaging with its booster cell on the left..
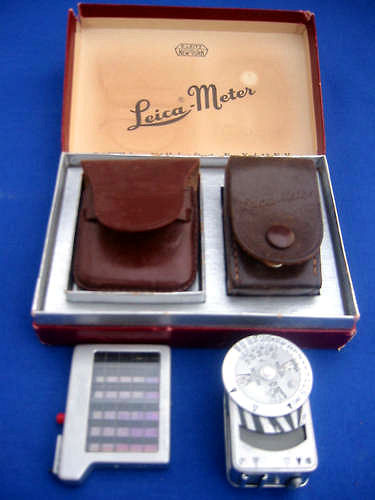
You can see the booster cell is larger than the meter itself. Translating this up to today it's easy to see that if the Contarex Bullseye with its selenium light meter is going to be used in low light levels or with very fast film, a booster cell should be necessary. Unfortunately Zeiss did not provide the Contarex with the provision to use a booster cell and so the photographer of today will have to make some adjustments concerning how the camera light meter is used when modern high speed films are used in the camera.
When the Bullseye was being made it was standard technique to use "fill in" flash using flash bulbs most of the time. In a questionable lighting situation the technique was to just use a flash bulb and use guide numbers and not use the light meter. In 1965 flash bulbs were the predominant method of flash, bulbs were cheap, and everyone used them all the time. It was standard practice then to always sell a pack of flash bulbs with a roll of film. People did not expect their light meters to be totally accurate under any and all lighting conditions and with any film. It was a standard technique to solve any uncertainty about exposure with the use of a flash bulb.
In 1959, Kodachrome had an ISO of 8 and Kodacolor and Ektachrome had and ISO of 16. The most popular black and white film was plus-x-pan and it had an ISO of 125. Tri-x-pan was available then and it had an ISO of 400, but it was extremely grainy then (unlike today's vastly improved version) and at that time was considered to be more of an emergency use ultra fast film. The Bullseye light meter was designed for use with these slow films. Many people may ask then why does the Bullseye light meter setting go as high as 1600? The reason is that the 35mm camera market was a perfect storm of competition then and marketing was important. The light meter film speed setting dial on the Bullseye goes that high because back in 1961 it had a super WOW factor that helped sell the camera in a very big way that is impossible to understand today.
In 1959 Zeiss manufactured the Contax IIIa rangefinder camera meter. It had a larger photocell than the Contarex Bullseye but it had an ISO setting that went only up to 400. It's a great meter and people use it today without any complaint. Taking the fact the Bullseye photocell is about 2/3 the size of the cell in the Contax meter, It is reasonable to assume the Bullseye meter is probably about half as good as the meter in the Contax. This doesn't mean it's a bad meter. It just means it has limitations that must be taken into account when it is used today and with today's vastly faster films. It cannot be used carelessly or without a good knowledge of its workings. These are the things this section is intended to provide to you.
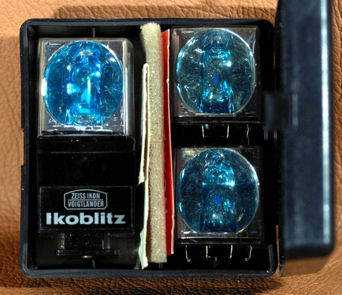
Let me give you a tip. Buy a nice Zeiss Ikotron bulb flash unit. They are cheap and abundant on Ebay. Buy some bulbs to go with it. Use them from time to time. You'll find they are great in an emergency and do a great job when your 're in an exposure pinch. Here's a picture of a handy little Zeiss Ikoblitz flash cube flash. It's tiny and it's plastic case has strap lugs on the back. It weighs about a couple of ounces and is very handy to have. This one cost about $5.00 with shipping included and flash cubes are readily available on the Internet or on Ebay.
2, The Contarex is not a perfect camera. Back in the time when the Contarex was being made Zeiss was in a crisis. The 35mm camera market was in a state of turmoil. The Japanese had just discovered the tremendous power of the process of statistical quality control that everyone uses today. Japanese camera makers were building 35mm cameras and were dumping them below cost on the U.S. market in order to gain market share. The Japanese were cleverly pumping out moderately priced, fully automatic, 35mm rangefinder cameras with large aperture (1.2 or 1.4) lenses, that had the "German" look and these were flooding the market at prices that tremendously undercut equivalent German made cameras.
Zeiss decided to compete by making the ContaRex, "Rex" the King of cameras. But it was too much and it went too far and marketing got involved in design. An example of this is the film speed dial on the Contarex Bullseye. It goes up to 1600. Back when the Bullseye was being made this was an unimaginable speed. The fact is the camera was designed and made for a maximum of ISO 100 and this only in bright daylight (more about this in the following).
Zeiss had to evade patent infringement with the Leitz (Leica) shutter patents. Leica had invented the 35mm focal plane shutter and had it covered with a building full of patents. Leitz sued Zeiss over the shutter in the Contax IIIa and so there was no doubt about Leitz defending its patents. The result of this is that the Contarex is excessively complex and consequently difficult to adjust.
The main thing is that Zeiss made the finest 35mm optics that have ever been made for the Contarex and this is the one and only reason to get one. You can only experience Contarex optics on a Contarex body and it is worth it.
3. The Bullseye light meter has a big problem when used with today's fast films and this is the variable iris over the selenium photocell. Because of this it is best to not use the aperture control, in low light situations, when adjusting the light meter to obtain the correct light reading for a scene. More about this later.
4. All electrical equipment ages. As it ages it becomes slower and less sensitive. The Bullseye light meter is no exception. Because every Bullseye has had a different storage and use history YOU ARE GOING TO HAVE TO PERFORM TESTS AND EXPERIMENT WITH YOUR OWN CAMERA TO FIND OUT HOW IT HAS AGED AND WHAT THE EFFECT OF THIS AGING IS.
5. There is one big thing to understand about the Bullseye light meter and this is that the Bullseye light meter is UNIQUE in its design and IT CANNOT be used like you use a normal hand held light meter. This is explained in much more detail in the following.
6. When a Contarex is overhauled here it is restored to the maximum extent its potential will allow. There can be no guarantee the camera will be restored to like new, absolutely perfect, or a condition that matches the expectations of the owner. Each Contarex has it's own use and storage history and these strongly effect the inherent camera potential when it is presented here.
7. The exterior of the Contarex was made of such high quality materials, and it has stood up to the test of time so well, that even a fully worn out camera will have a good appearance. It is my experience that the actual condition of a Contarex, regardless of the model, cannot be determined from an appraisal of it's external cosmetics. Another thing to consider is that the highest class of camera butchers are well aware of the importance of external cosmetics. They take great care to keep a camera looking good on the outside even while they totally wreck it on the inside.
8. The Contarex has always been an expensive camera. No matter what you do or how you try to gain an advantage a top quality Contarex is an expensive thing. A customer recently sent me a Bullseye he had purchased for $189.00 with the 50mm f2.0 Planar lens. He called it a piece of junk. He was right. It took weeks of careful work and adjustment to undo the effects of bad storage and bad workmanship. In the end the cost was $1300.00 in repair charges and the camera is not perfect because it is incapable of being made perfect. It's the best he can be, and it's certainly worth $1489.00. My advice to you is to be very very careful when buying a Contarex body. There's no way to avoid the fact that the Contarex is an expensive camera and it will always be an expensive camera.
Here Are The Results of My Studies, Experiments and Measurements of the Bullseye Light Meter:
1. The type of plastic Zeiss used to manufacture the selenium photocell cover installed permanently in the camera over the photocell and that is also used in the removable 2X cover selectively absorbs a large fraction of light emitted from an incandescent bulb. The practical effect of this is that the Bullseye light meter cannot be calibrated using a precision light source. The one and only way to properly calibrate a Bullseye light meter is out of doors in sunlight. The camera meter is compared with the result from a precision hand held meter and then set to match.
2. The best method to use when using the Bullseye light meter is as follows:
This advice must be seasoned in accordance with the speed of the film you are using. The higher the speed above an ASA or ISO of 100, the more strongly you must compensate.
a. In direct day light or in the shade of direct day light: Use both the shutter speed dial and the aperture dial to obtain the correct camera settings when using film with an ISO of 100 or below. But test your camera to make sure you understand the limits of this technique. The aperture control may not be accurate at small apertures. You may need to compensate for an inaccuracy that testing has demonstrated is applicable to your particular camera.
b. In low or medium light such as in the shade of high buildings: Set the aperture control at the largest available f stop (preferably 1.4), then rotate the shutter speed dial to center the needle. Once you have an f stop to shutter speed combination If a different aperture is desired decrease the shutter speed by one speed for each f stop the lens is closed from full open. Verify this by testing your particular camera.
c. In the red light of early morning or sundown: The light meter plastic cover absorbs lower light frequencies selectively. This will make the meter indicate more exposure than is actually needed under lighting conditions containing incandescent light or a lot of red light. The meter will not be accurate in these lighting conditions. Apply a correction factor, based upon your testing, or of at least thee to four f stops to the meter reading and close the aperture by three to four f stops or increase the shutter speed by three to four settings. But again, test this recommendation against the performance of your particular camera to obtain the most accurate exposure compensation.
d. If the needle is centered with a speed setting in between speeds set the shutter speed dial to the next highest or lowest marked speed before making the exposure. The factory tolerance of the meter is +/- 1/2 f stop and so this will have no practical effect upon the exposure.
e. Do Your Own Testing. This is the way things were done back in the day when the Contarex was being made. Back then people did not expect absolute shutter or light meter accuracy. It was normal to expect to have to learn the "windage" of a fine camera. People expected that they would test their camera with film and then apply a little adjustment here or there to make things just right based on the results.
I sold fine cameras back in 1965. Back then people would take a roll of film, put it in their new camera, take various shots, have it processed, and then bring the camera back into the store when the film was developed. We would then examine the pictures and negatives and discuss each shot and how it was made and how the camera was used. From this the camera owner would explore the camera and would learn what compensations were needed in particular lighting conditions in order to get the best exposures. This is what you must do with your Bullseye.
f. The meter becomes slower to respond the smaller the aperture setting. This is not a fault of the meter it is a natural characteristic of the selenium coating on the photocell that generates the electricity when light strikes it. As the aperture control is set to a smaller aperture (larger aperture number), the iris over the selenium photocell closes and covers more of the photocell area and the photocell is effectively made smaller and smaller. At f22 the photocell is at least 99% covered and has less than 1% of the area it had when the aperture control was set to f2.0. Selenium has a "memory" that can last several minutes. The smaller the selenium cell the longer the memory. This memory effect makes the Contarex Bullseye meter very very slow to respond to changing light level when the aperture control is set to close the aperture over the photocell.
Here Are The Reasons Why You Want to be Careful and Judicious About Use of the Aperture Control When Using the Bullseye Light Meter.
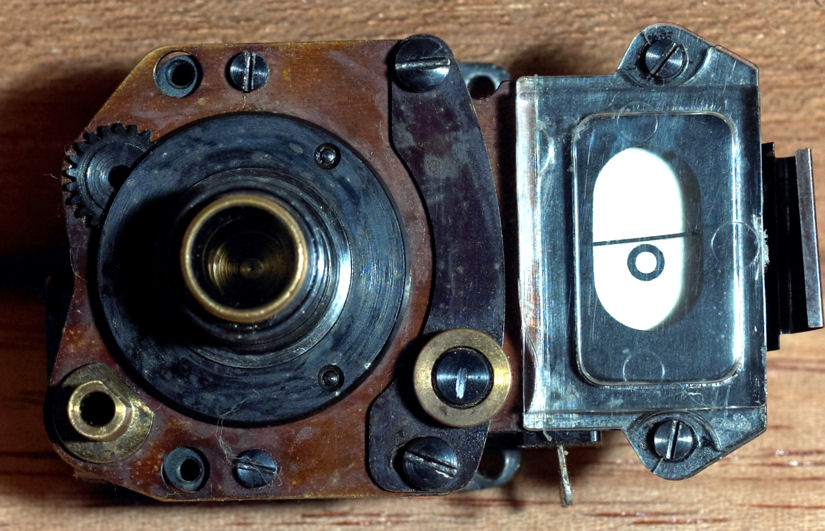
This is a picture of the Bullseye light sensing cell:
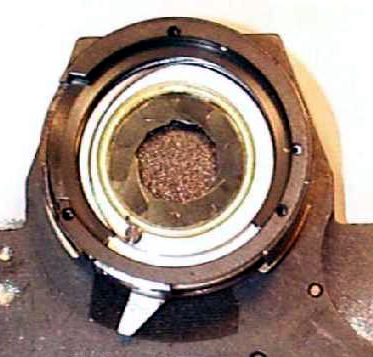
As you can see the selenium cell has a movable iris over it. This iris is connected to the camera body aperture control. The iris over the photocell is fully open when the aperture control is set to the largest aperture and it closes as the lens aperture control is moved to a smaller aperture. Back in 1963 this was no problem because the light meter was designed for use with a color film having an ASA or ISO of 16.
The variable Iris has three effects:
1. When the iris closes the amount of electricity generated by the photocell decreases. It is possible, even in bright shade under noon summer sun to have meter accuracy problems with very small apertures of 11, 16 or 22.
2. There is a more subtle secondary effect that only becomes important when the speed of the film being used in the camera exceeds an ASA of about 200. This effect is based upon the simple fact that with selenium cells the faster the film the camera will use or the less bright the light the camera will be used in, the larger the illuminated area of the selenium photocell must be in order to be able to generate enough electricity to move the needle of the meter accurately. In the Contarex, as the iris closes over the cell (which is small to begin with, more about this later), and the dimmer the light level, the lower the maximum effective film sensitivity of the meter becomes. The problem comes when the iris closes to a point where the effective maximum film setting of the meter becomes lower than the speed of the film that is actually in the camera. Back in the early 1960's, when film were vastly slow compared to today's films, this could not happen. But when a normal film whose speed is fantastically fast compared to1963 films, is put into the camera, it's a guaranteed problem.
For the purposes of this section please forget about the maximum film "setting" of 1600 on the Contarex meter speed setting dial. That is an impossible number will be shown later. For each reduction in size of the illuminated area of the photocell by about 33%, the effective maximum setting of the meter is cut in half. For example. Suppose we assume the maximum actual effective maximum speed of the Contarex light meter is about ISO 200. This means that at an aperture setting of 1.4 where the aperture over the cell is fully open the meter is capable of handling this speed. But if the aperture is closed by one f stop to f2.0, the maximum speed of the meter is going to be about 100. This is when the meter begins to show accuracy problems and this is what we see in actual practice..
Now, lets look at the Contarex light meter from a 1961 viewpoint. If we have ASA 16 film in the camera, then at f1.4 the maximum effective setting of the meter is 200, and at f8.0 it's 100, and 5.6 it's 50, at 8.0 it's 25, and at f 11 it's about 12.5. There's no problem here because you would need a bank of massive floodlights to give you enough light so that with ASA 16 film you'd need an aperture of f11. The meter will have acceptable accuracy in accordance with 1960 standards, all the way down to f22.
There's another problem with the iris over the cell. Each change in aperture setting to close the aperture, say f 2.0 to f2.8, decreases the amount of light available to the cell to produce electricity for the meter by 1/2; but the cell voltage does not decrease or increase by a factor of 2 in response to each change in the aperture setting.
3. The effect of the closing of an iris over the cell can result in a non-linear electrical output in response to the closing of the iris. The iris covers the photocell and blocks light from hitting the cell and generating electricity. The more the iris is closed the less electricity is produced. With the iris shut down to it's smallest setting (f22) it is possible in even bright light for the cell to be producing such a small amount of electricity that the meter does not work properly. This is one reason why the aperture control should not be taken to a very small aperture when metering a scene. My tests show that in the deep shade of a sunny day at noon, f5.6 is the lowest setting that should be used. If the ambient light level is lower than this the aperture over the photocell should be kept wide open.
This non-linear behavior was not a problem back in 1960 because film speeds were not that accurate nor was film processing. Back then you were lucky to get a film with an actual speed that was +/- 25% of the value printed on the box. Then there were also variations introduced by processing. I worked in a processing lab in 1966 and the variation in "as developed" film speed was +/- 50%. Adding these inaccuracies up with the +/- 1/2 camera meter tolerance and the camera body +/- 1/2 aperture control setting tolerance means simply that back in 1961 it was impossible to have a camera light meter that is even in the same accuracy ball park with today's modern meters.
The electrical output of a brand new photocell was measured in response to the change in the opening size of the aperture covering the cell. The result was that from f1.4 to f22 the cell voltage decreased from 0.450 Volts at f1.4 to 0.230 Volts at f22. The cell voltage changed by a factor of 2 over a span of 9 f stops. There is a point where closing the aperture by one stop will result in a halving of the cell voltage. You will need to find out this point by testing your particular camera. My experience has taught me that this point, with a new photocell, in bright day light or the shade of bright day light, is between f 5.6 and f 8.0.
Comparing One Zeiss Selenium Light Meter with Another:
It is useful to compare the size of the Contarex selenium photocell to another selenium cell used by Zeiss in a camera that was made at the same time. This is a picture of the light meter used in the Contax IIIa 35mm Rangefinder camera:
You can see it uses a rectangular light sensing cell whereas the Contarex uses a round one. The Contarex cell and the Contax IIIa light meter cells are shown together in the next picture:
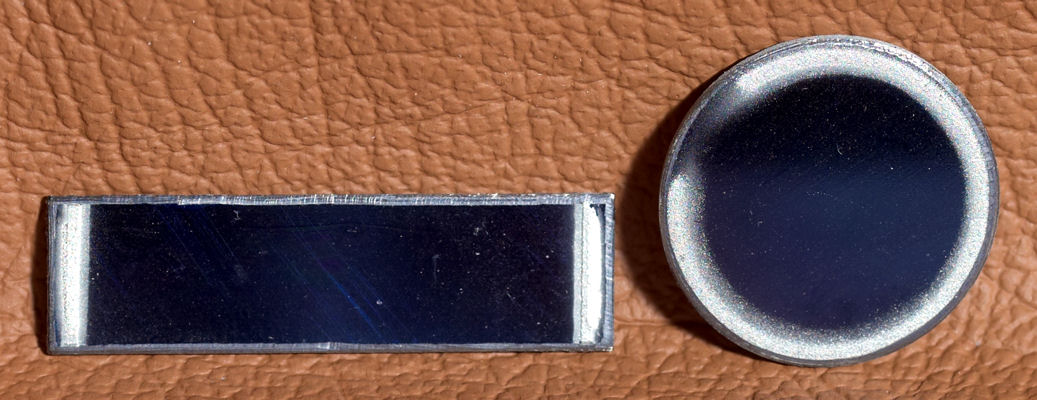
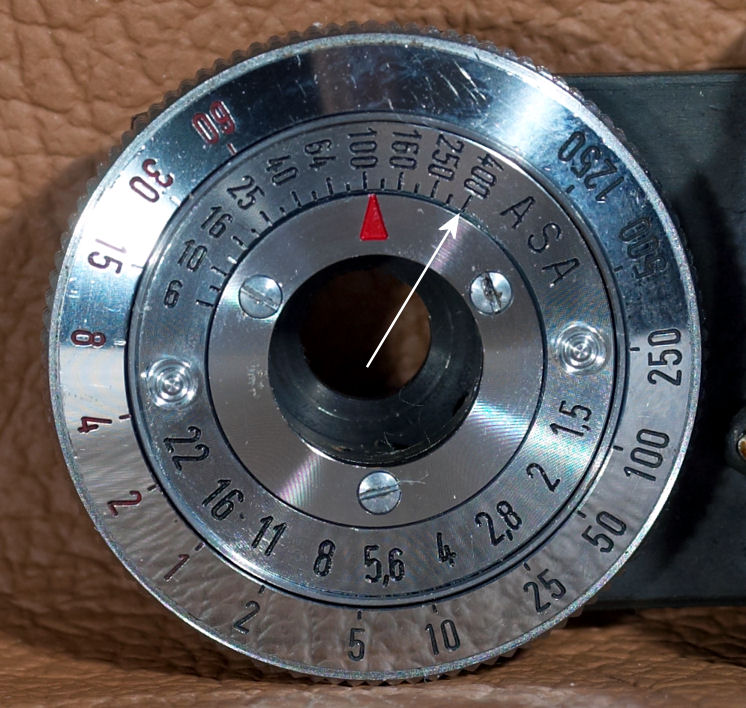
The Contax IIIa photocell has an illuminated surface area of 360 square millimeters and the Contarex cell has 263. The Contax IIIa cell is 96 mm2 larger than the Contarex cell or in percentage is 37% larger. Notice also the maximum ASA or ISO setting on the Contax IIIa light meter is 400 (shown by the white arrow):
There is a big conflict here. The highest Contarex ASA setting is 1600 yet its photocell is smaller than another Zeiss meter with a larger cell whose highest setting is ASA 400.
The only way to resolve this conflict is to understand that at the time the Contarex was designed the camera market was in a turmoil. Competitive pressures were very great and marketing was extremely important. There was no ASA 1600 film available at the time the Contarex was designed and so it was perfectly safe, for marketing purposes, to give the Contarex a highest setting of 1600. But Zeiss could not know back then that as the camera moved through time, and films got faster and faster, that 1600 setting would become a practical problem as it is today.
Because the Contarex photocell is 37% smaller than the Contax IIIa cell it is practical to use this figure to estimate the actual maximum film speed that the Contarex is capable of using with the light meter being used in full accordance with the instructions provided in the Contarex Instruction Manual. In doing this estimation I'm not going to show all of my calculations here because they are too complex. At the time the Contarex was designed the Germans used a film speed scale called DIN and it was based upon the film response curve. Considering the German DIN method of film speed determination a cell 37% smaller should be useful with a meter whose maximum ASA setting is about 1/2 that of the meter using the larger sized cell. This means the Contarex light meter can be safely used, if it is in like new condition, as the instruction manual provides, with a film whose speed is no greater than 200.
If you use a film as fast as ASA (IS0) 200 you're right at the edge of the envelope of Contarex meter design capability. You'd be a lot safer at an ASA of 100 or less. This is why, when you use today's very high speed films, you have to operate the Contarex meter in a way that compensates for the fact this is way out of its design envelope.
Back in 1959, when the Contarex was designed, there was no such thing as a color film as fast as ASA (ISO) 200. an ISO of 32 was the fastest for Professional Ektachrome. With films of this speed the Contarex light meter was being operated very comfortably within its design zone.
The movement of the light meter needle in response to electricity from the selenium photocell IS LINEAR. It can best be understood through the following pictures:
This is a picture of the top of the Bullseye Light Meter:
This is a picture of the same meter with the top removed:

The white arrows are pointing to little blockers that keep the needle from moving too far. The very narrow span of needle movement makes it impossible to make any judgment of how far one is away from perfect exposure in the same way one can with a normal hand held light meter.
This is a picture of a brand new Bullseye Light Meter Movement. This is the little motor in the meter that uses the cell electricity to move the meter needle:
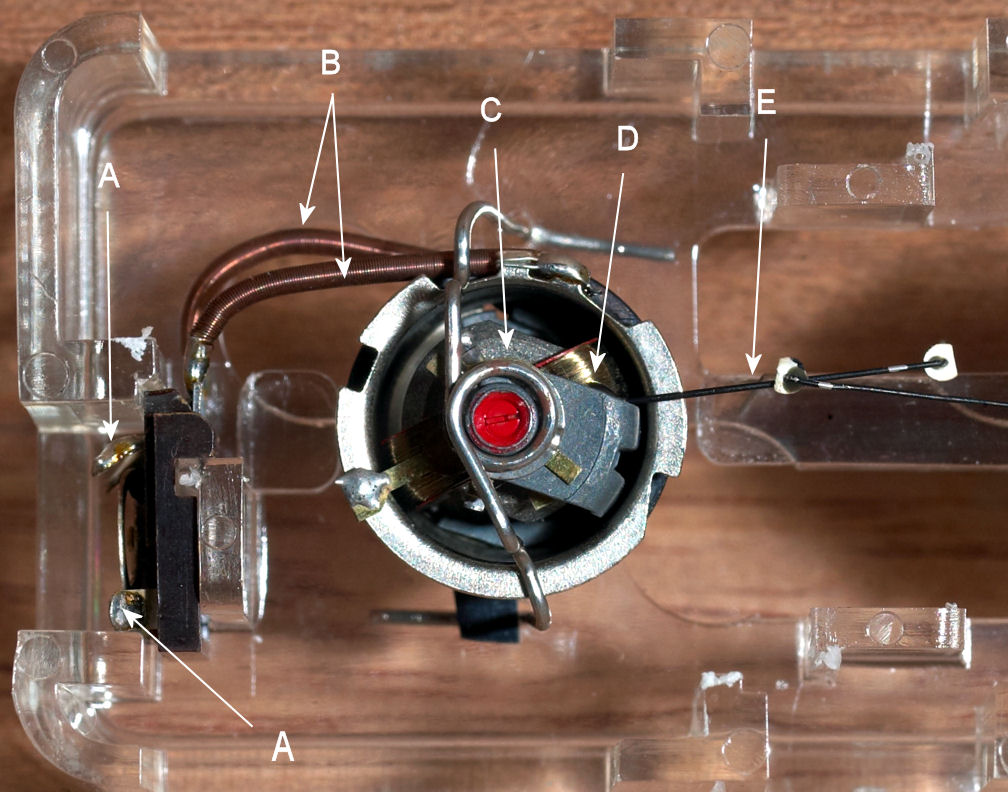
In this picture the parts of the meter movement (motor) are shown as follows:
A are the electrical connections to the photocell.
B. are the wires between the electrical connections (A) and the tiny coil (D)
C. Is a permanent magnet. The magnetic force generated by the coil (D) acts against the magnetic field from the permanent magnet to generate a force that moves the meter needle.
D. This is tiny coil. The electricity generated by the selenium photocell circulates in the coil and this generates a variable magnetic force that acts against the fixed magnetic force of the permanent magnet (C).
E. This is the meter needle.
The key thing to understand about this part of the camera is that it is tiny and is completely un repairable. If the camera has been stored in a humid environment and the parts of the meter become corroded, or if the camera is stored in a shed where it is exposed to summer/winter humidity and drying out, or if it has been badly shocked or bumped or if it was defective to begin with there is nothing that can be done about these factors.
The electricity produced by the photocell is provided to the light meter through wires connecting the cell to the meter. This electricity moves the meter needle. The meter is basically a tiny and weak electrical motor. The meter needle is connected to the shaft of this motor and a precision hairspring that is connected to the shaft acts against the movement of the motor. When the force exerted by the hairspring and the force exerted by the motor by the electricity provided by the photo cell are exactly in balance with each other, the meter needle is centered.
This is a very close up picture of the light meter movement (motor) showing the delicate hairspring (A) that acts against the force being applied to the meter needle in response to light falling on the photocell:

The force the meter provides to move the needle is directly proportional to the amount of electricity provided to it by the photocell. If the cell provides twice the voltage the meter will exert twice the force on the needle. With this being the case it is impossible for the aperture control, that has a non-linear effect upon the electricity produced by the photocell, to have a linear effect upon the light meter needle. This is why the aperture control must often, in medium to low light and/or with film with an ISO greater than 100, be set to the largest opening. This way the cell will produce the most electricity under the existing light conditions.
A good meter hairspring is inherently linear in its behavior. If it is compressed by a factor of 2 it will produce twice the force it did before it was compressed. The spring inside the Contarex Bullseye light meter is directly connected to the shutter speed dial. A higher speed setting produces a more highly compressed spring inside the light meter. This is a linear relationship. With each change to increase shutter speed, say from 1/250 to 1/500, the amount of force exerted by the meter spring is increased by an amount that is exactly equal to the force exerted on the meter spring if twice the amount of light was falling on the photocell.
As a camera ages the meter can become inherently inaccurate due to a numb of factors. These include an increase in the resistance to the flow of electricity in the tiny wire in the moving coil. The hairspring can become damaged or bent due to shocks to the camera. The tiny coil can develop internal electrical shorts due to failure of the very thin enamel paint insulation that covers it.
3. The reason it is sometimes necessary, in medium to low light and/or when using film faster than ISO 100, to meter a scene with the iris over the cell open to its maximum opening is that maximum metering accuracy is produced only when the photocell is producing the maximum possible amount of electricity to the meter. The reason for this is the Bullseye is a camera designed for use with slow film and in bright light. But, today, people want to use it with fast film and in low light. This introduces a problem and the only way to solve this problem is to have the aperture over the photocell open to the maximum possible extent.
Selenium photocells have not been used in cameras for a very long time and so a lot has been forgotten about them. Selenium is a very inefficient producer of electricity. Generally, the lower the light level a camera is designed to be used in, or the faster the film to be used by the camera, the larger the selenium photocell must be in order to be able to produce enough electricity to produce an accurate result. The Bullseye has a very small selenium photocell. It is a cell designed for use in bright light and with slow film. Back in the days when the Bullseye was made an ASA or ISO of 50 was considered to be very fast and 400 was considered to be fantastically fast. The fastest color film had an ASA or ISO of 32. The black and white film used most often had an ISO of 50 (panatomic x). The Bullseye is a camera designed for use with slow films and in bright light.
This is a picture of the Bullseye selenium photocell shown by the arrow. To its left is a nickel. To its right is a disc of a size that the cell should be if the camera was to be used with today's fast film, in low light levels, and using the aperture control when metering. Compared to today's photographic technique the Bullseye photocell is tiny. The result of this is the meter is underpowered and the aperture control action is often non-linear.

Here are the pages from the Contarex Bullseye Instruction Book dealing with Light Meter Operation. Now that you've been fully educated about how this system works you can "read between the lines" of these instructions:

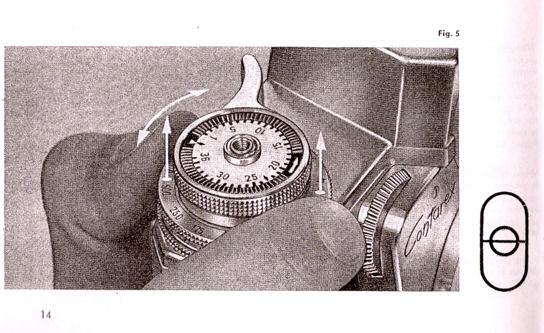
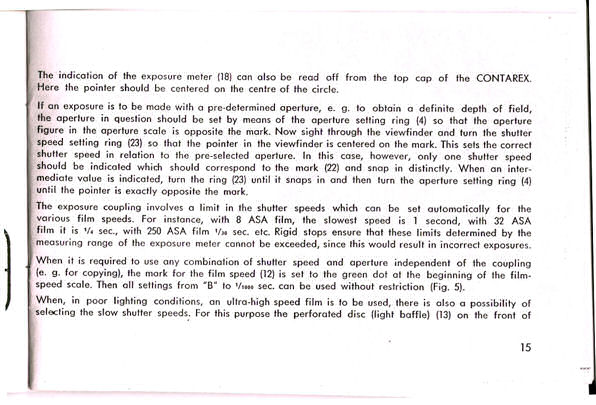
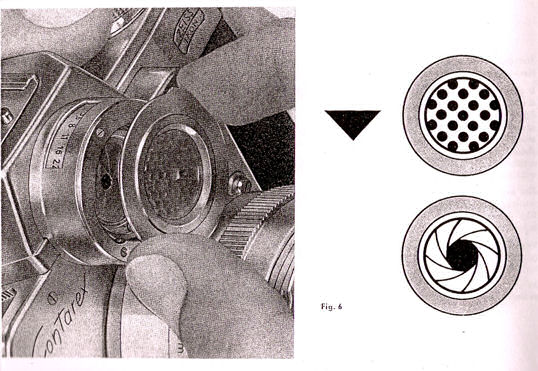

Note the following paragraphs:
1. On page 17: Paragraph 5 from the top: This says the meter response to the aperture control is sometimes not accurate. It goes on to say that that the lens aperture setting itself is accurate. This can be a little bit confusing, but it is an honest admission of the problem with using the aperture control when metering a scene under varying light conditions and with very fast film whose ISO is greater than 100.. What is missing from the instruction book is a method of metering to use that accounts for this problem. This method is provided here.
2. On page 19: Paragraph 2 from the top: This says that the camera must be tested when using low latitude film.
Back in the good old days when the Contarex was being made and me and my friends were selling cameras the Contarex Bullseye was a huge sale. Only the most photographically educated and well funded person would buy one. We would take great care to educate the buyer about the camera and would make absolutely sure he left the store knowing how to use the light meter.
The Fundamental Contarex Bullseye Design Defect:
If you are considering sending your Contarex here for servicing of any kind please read this section very carefully from top to bottom and make sure you understand it. If you have any questions please send me an email and I'll get an answer to you promptly.
There are two kinds of wear that every machine is subject to. The most obvious is use wear and everyone understands this one. Things simply get worn out because the are used. The second, and much less obvious form of wear is assembly/disassembly wear. This is where a machine gets worn excessively by being repetitively disassembled and then reassembled. It's only a big factor in the life of a machine if it's old and has been used a lot, or has been badly designed and requires a lot of maintenance or if a particular part or system has been inadvertently designed to be subject to assembly/disassembly wear. A good example of a machine getting old and getting worn out from maintenance is the first Marine Chronometer "H1". It's no longer being cleaned because it simply cannot withstand being disassembled or reassembled again. What happens is that screws, nuts and bolts that are not properly lubricated will wear out their holes and threads as they are un tightened and then re-tightened over time. Also, metal parts become brittle and are successively flexed and bent as they are manipulated and cracking and metal fatigue begin to become significant factors.
All Contarexes suffer from the fact that the joint between the winding mechanism and the winding lever is very highly subject to disassembly/reassembly wear. The problem is that the shaft was made too small in diameter, the threads were cut too finely, and the connecting nut is too thin and its' threads are also too finely cut. These two pictures show that Zeiss was aware of this problem as the first Contarex, the Bullseye model, was being made:
The picture on the left shows the first version shows four fine threads and the picture on the right shows a wider shaft with three coarser threads cut into the shaft. This improvement was good enough for Zeiss to solve problem caused by this design defect when the camera was new and knowledgeable factory trained technicians using factory made special tools, with a virtually unlimited supply of spare parts worked on the camera; but these are not available today and its about 50 years later.

Zeiss also changed the little nut from being made of steel to being made of brass. This ensured that if there would be any failure it would be the nut that would fail.
Both pictures were taken with a 63mm Zeiss Luminar lens at the same distance and so both have exactly the same magnification. All size differences you see are actual.
The problem with the fine threads is that they strip very easily. The simple reason for this is that over time, as the camera has been maintained after Zeiss got out of the camera manufacturing business, by unqualified technicians, the nut tended to get over tightened and this overstressed the threads on the shaft. In many cases these workers used very strong epoxy cement to hold the nut in place. Epoxy cement does not dissolve in any solvent and so cameras with epoxied winding assemblies are extraordinarily difficult to get apart. I have also found cameras with the type two shaft and brass nut with an epoxied brass nut with stripped threads. When Zeiss stopped making the Contarex they also stopped making replacement brass nuts.
The one and only correct way to repair a camera with a damaged, epoxied, or stripped winding shaft nut or shaft is to machine new threads (coarse ones) on the shaft and to make a new brass nut. Here's a picture of a first version Bullseye winding shaft mounted in a precision metal working lathe having new threads cut onto it:
This is a difficult, time consuming and complex repair because it requires the complete disassembly of the entire winding and shutter speed control module. This module is as complicated and precise as a very expensive Swiss wristwatch:

There is absolutely no way anyone can tell from the outside of the camera what version of shaft is in it or the condition of the shaft or its nut.. I have not been able to correlate camera models or serial numbers to the shaft type. I think Zeiss had a great number of wind-timer modules made initially, used them up, then replaced them with the new and improved model as the cameras were presented to Zeiss for repair. If a camera came to Zeiss for service then the timer was replaced without the customer being told about it. It's a big mix up and the only way to know what kind of wind-timer module your camera has is to have the upper parts of the wind mechanism removed so that it can be seen if the inner attachment nut is brass or steel and/or if it has been epoxied. Brass is good, steel is bad and epoxy is very very bad..
If you want to buy a Contarex Bullseye, Special, Super or Professional consider very very carefully that the chances are about 10% you are going to get a camera with a perfectly good wind shaft and nut.
When you send a Contarex here there is absolutely no way that you can know the condition of the wind-timer shaft threads and nut. But most cameras have been "fixed" so that the wind lever works. This presents me with a real problem when a camera is sent for a simple overhaul and the owner is informed it's going to cost $250.00 to fix a problem that was not evident when the camera was sent here. The only resolution to this is that my policy is that every Contarex sent here with a wind shaft and nut, that in my opinion requires repair in order to restored to original factory specifications, will be repaired and that you accept this is a potential cost that will be in addition to any other costs provided in any estimate concerning the camera.
The sad fact of life with the Contarex is there is no way to know for sure if the wind shaft and or nut must be repaired until camera disassembly has gone beyond the point where the camera can be reassembled without the repair having been performed.
In the 40 years since the discontinuation of the Contarex manufacture each and every Contarex that was made has acquired a history. Very few of these have had a lucky very kind and gentle history. Others have been kept in the worst possible storage conditions. When Contarex cameras get released into the market the first thing that happens is that they get cleaned up on the outside. Then, if they are not working, they get sent for "repairs". The camera repair world is unfortunately populated by a fair proportion of camera butchers. Camera butchers know it is absolutely necessary to do nothing to disturb the outside appearance of the camera and that if possible it is a good thing to improve it. If you would like to read an email I had to send to a customer who sent a Contarex that had been in the hands of a camera butcher to me just click on this link: Contarex Letter. When Zeiss dropped the Contarex shortly thereafter factory qualified service for it disappeared. Since then and now many Contarex cameras were serviced by unqualified and sometimes unscrupulous workers and this is happening right now. There is absolutely no way to be able to tell what a Contarex is like on the inside from the outside except with a precision light source that can test the meter over a span of at least six f stops and a shutter speed tester. My advice is always buy a Contarex with a refund guarantee which is linked to a professional examination of the camera which tests its meter and shutter to verify that both the meter and the shutter are within factory specifications.
The Contax was made so that its "run free" shutter speed is 1/1000. The first step in calibrating a Contarex shutter is to set the 1/1000 speed to produce 1/1000. If you have your candidate camera checked at 1/1000 and it is producing something much less, in the range of 1/300 your camera has been tricked up and it should be purchased at a price that reflects the high cost of restoration. The main mistake Zeiss made in the Contarex design was to make the shutter curtain spring adjustment points too easily accessible. It's only a matter of a few minutes work to twist the shutter springs up good and tight immediately before a sale to make the camera look like its working properly.
If you visit the Zeiss web site you will find that you can buy modern lenses being made by Zeiss for older cameras. Zeiss is busy making and selling Sonnars, Planars and Biogons in Leica and Nikon F mounts. They are not making and selling these lenses in either the Contax RF mount or the Contarex mount. This may seem strange given that during the 1950's Zeiss refused to participate in any Photokina at which Nikon would be present. Zeiss believed that the word Nikon meant "Nippon Ikon", and that this was a usurping of the Zeiss Ikon name. They were also upset about Nikon recruiting Zeiss personnel. It appears their attitude has changed and I've carefully considered the fact Zeiss is not making lenses for its own cameras and have come to the conclusion that if Zeiss thought today that there was enough money to be earned making lenses for their cameras to be worth the trouble that would come out of this they would do it. In not making lenses in mounts for its own cameras Zeiss is making the statement they want absolutely nothing to do with their own cameras.
There is a great resurgence of interest in the Contarex. I can only guess that the recent loss of so many famous 35mm SLR and Rangefinder camera manufacturers making a cowardly (and temporary) abandonment of the film medium has gotten people who want to use film thinking of the super cameras of the past.
My experience is that most people who contact me and who have decided to buy a Contarex are in a hurry. Haste in finding a Contarex always, and I do mean always, leads to deep regret. My advice is very simple and it is PATIENCE, PATIENCE, PATIENCE. Many Contarex bodies look beautiful on the outside, but are used up on the inside and cannot be economically restored. If you want a Contarex that will make you happy approach the whole matter with the greatest stealth and care. Contarex bodies that have "like new" potential are rare and hard to find. This means you absolutely must take your time and be very picky.
A Contarex body that is beautiful on the outside and used up on the inside costs the same as one that is beautiful inside and outside. The Contarex exterior was made of such high quality materials it is IMPOSSIBLE to judge the interior condition of a camera from the outside. I say IMPOSSIBLE and I do mean IMPOSSIBLE, so don't ever do it. You must have any candidate camera professionally tested on a camera tester by a person who knows the Contarex before you commit to a final sale.
There is nothing I like less than to have to tell a new Contarex owner that his camera will require $900.00 worth of work and parts to make it work right. I want to be sent Contarexes with very high potential. This makes things easier, faster, cheaper and happier for everyone involved. So get educated, examine a lot of Contarexes before you buy one, make the sale conditional upon a satisfactory check by an expert, take some shots with it and see what they look like, take your time and never ever be hesitant to walk away from a camera that just doesn't feel right to you. You are getting married to the thing and when it's all over you will know that this is true.
Then, once you have a fully working Contarex have it thoroughly cleaned and lubricated so that it will stay that way for a long time. Have it serviced every five years at a minimum. This is the route to true Contarex happiness.
In the 1970's classic mechanical watch companies were thought to be kaput. Everyone thought that digital time pieces were the future and there was no hope for the old fashioned mechanical watch. Those far thinking Swiss watch makers who wisely did what it took to stay in business cannot fill the market demand for high grade mechanical watches these days. They have absolutely no problem selling out extraordinarily complex hand made $250,000.00 mechanical watches as fast as they can make them. If you think this quarter million price is a fantasy just do a Goggle search on "gyro tourbillon" and you'll see its the real deal.
A Notice
When you send your Contarex camera to me to be examined or overhauled the total substance of the transaction is me, you and the camera. No other thing or person will be allowed to be introduced into the transaction or anything concerning it. This means simply that if you buy a Contarex Bullseye that looks like a beautiful young virginal camera and is described to you by the seller to be just absolutely perfect inside, and then I have to tell you that based upon an internal examination you have been sold a Frankenstein monster in disguise, I will not respond to any communications from the seller or anyone else other than you. To put it simply, its your camera and my work and that's all there is to it.
Contarex Russian Roulette 2:
Every Contarex with a mechanical shutter timer, the Bullseye, Special, Professional and Super, has a 50/50 chance it has a very serious and extremely difficult to repair defect caused by incorrect servicing in the past. This damage happens if the retaining nut for the advance lever is removed or tightened when the camera is partially cocked. Three pictures are provided to illustrate this. The first is of a side view of the shutter speed timer. The uppermost gear mates with the second shutter curtain:

Hanging down at an angle from the bottom of this gear there is a spring strip, riveted to the underside of the top gear, which is shown more clearly in this magnified picture:
The purpose of this spring strip is to ensure that when the camera is fully cocked the first and second shutter curtains are latched together in exactly the precise alignment required to allow all of the shutter mechanisms to operate properly. It also sets the precise end resting position of the first shutter curtain when it opens. These things are necessary to allow the camera to be adjusted so that three things will be possible simultaneously: 1: Self timer to operate; 2: B speed to operate and 3: 1/1000 sec. to be set precisely. If this spring is broken it is possible to set the camera so that only two out of three of these things will operate. If the spring is broken it will be possible to have a self timer and 1/1000, B and a self timer, B and 1/1000 or B and 1/1000 without a self timer only. There are no spare parts and even if parts were available replacement of this gear would be a very expensive job. In all my experience with the Contarex I have found that three out of four cameras sent here for service have a broken spring as shown in the next picture:
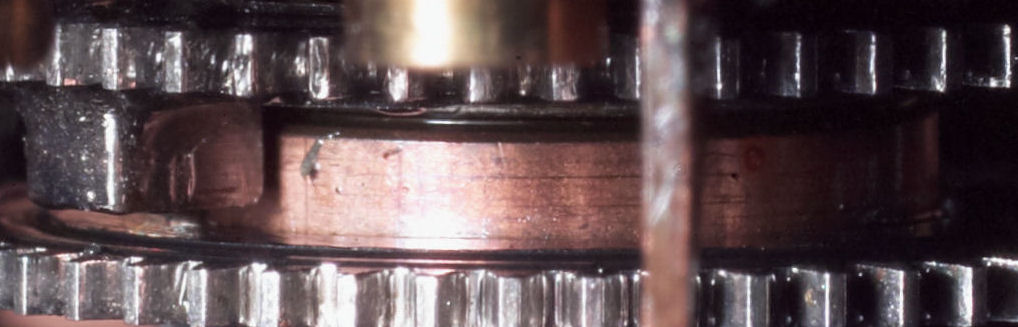
My advice is to have your Contarex checked before you buy it. In most cases I find that people who prepare these broken cameras for sale typically will adjust 1/1000 speed to be about 1/150 sec. If this is done the shutter will appear to the eye to be operating properly and both B speed and the self timer will also operate. But if the shutter is adjusted to provide a 1/1000 accurate speed you will either loose B speed or the self timer.
The Contarex Super Electronic
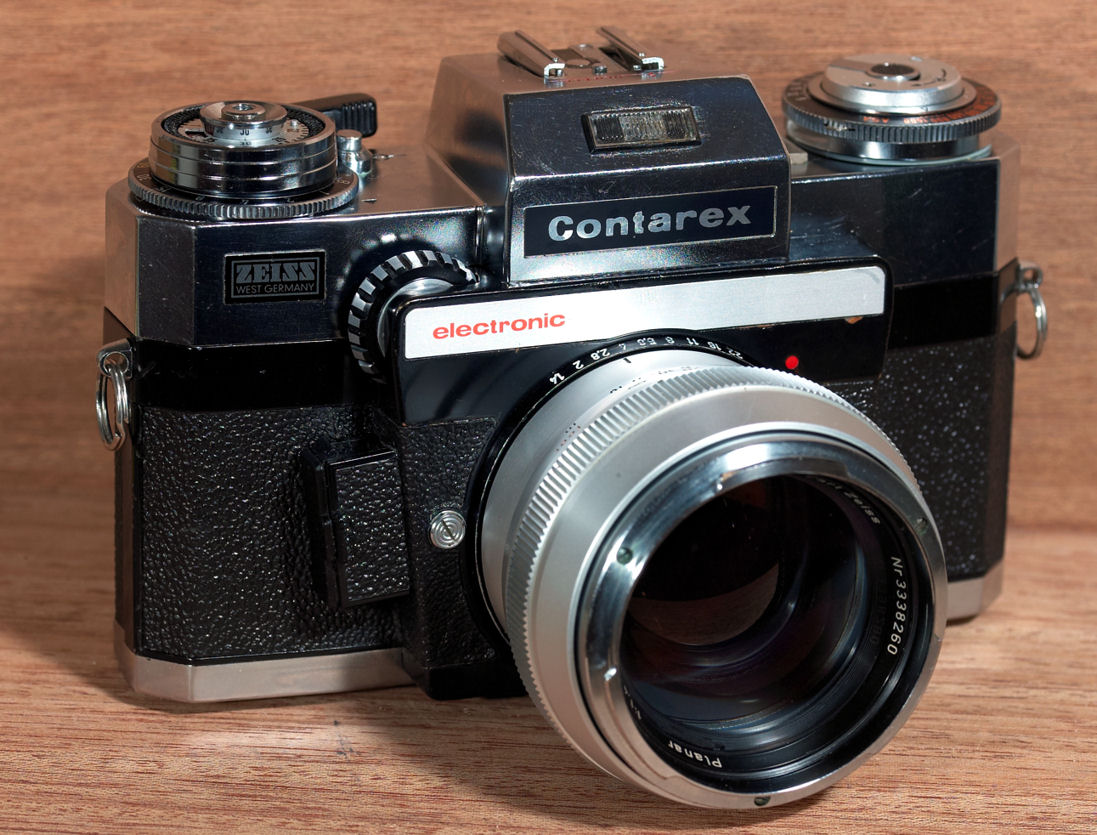
The Contarex Super Electronic camera is the most "ahead of it's time" camera ever made. It is the first electronically controlled shutter camera. It has a fully modern (up to the present time) CDS type light meter. It is a camera system fully populated with a complete set of the most wonderful advanced electronic control components including the famous Tele-Sensor that allows the camera shutter speed to be set automatically:

The Contarex Service Guarantee
- Every Contarex camera sent here for an overhaul will be completely overhauled, properly lubricated and adjusted so that it performs with the maximum accuracy of which it is capable.
- Every Contarex camera sent here will undergo an exhaustive week long adjustment procedure that will completely explore and determine the limits of accuracy possible to obtain with the shutter, aperture control and light metering systems.
- The camera owner will be provided with a final written report of camera performance that demonstrates the overall camera accuracy with the lens provided with the camera.
- There is no guarantee on the failure of original or replacement camera parts, including the shutter curtain and the light metering system.
- Normal adjustments that are required within one month of the overhaul will be performed at no charge for labor. Shipping costs will be the responsibility of the camera owner.
- There is no guarantee of any kind on a camera body that has been used with a motor drive. The reason for this is it is my experience that camera bodies used with a motor drive have been used up and cannot be restored to like new accuracy or reliability.
- For the Super Electronic Only: There is a one month guarantee on all camera body services however thorough. After this one month period there is no guarantee or warranty of any kind on any camera component or operation. This one month guarantee does not apply to cameras used with a motor drive. There are two reasons for the one month guarantee:
- The very small copper wiring in the Contarex Electronic is made of a copper alloy that becomes progressively brittle with time and by now it is all extremely brittle. This is a continuous process of embitterment that does not stop. It is possible for a small copper wire to suddenly break inside of its insulation, where the break is invisible, merely due to residual stresses on the wire generated inside the camera. I cannot be held responsible for this inherent design defect in this camera.
- I regularly find cold or "bad" solder joints inside the Contarex Electronic. These bad solder joints can serve effectively for many years and then suddenly become non-electrically conductive without any warning. These can be very difficult to find and I cannot be held responsible for this inherent manufacturing defect in this camera. The reason for this defect is that the copper alloy used to make the wires is inherently difficult to solder well because it was plated with a nickel alloy having a large phosphorus component that makes it difficult for the solder to "wet" the wire surface. I also cannot be held responsible for this inherent manufacturing defect.
Your Assurance of Quality and Correctness
This is a picture of the one and only original complete copy of the Zeiss Factory English language Contarex service manual. It contains every Service Instruction, Bulletin and Update for every model of the Contarex camera produced from 1960 to the end of production in 1974. This includes the Bullseye, Special, Super and Super Electronic with its Accessories. It is here and it is your assurance that your Contarex will be examined, measured and serviced here only in complete accordance with the approved Zeiss Factory Instructions using tools and instruments that meet or exceed Zeiss Factory specifications.
Notice from the front page that even at as late as the end of production in 1974 the official Zeiss name for the Bullseye was "The Contarex".
The Main Things To Know about A Contarex
There are a few things you need to know about the Contarex before you go out and buy one.
After having been worked on by a number of all of the Contarex models it is possible to make a couple of general statements about the Contarex camera. It is clear to me that Zeiss honestly but mistakenly believed that it had designed the ultimate camera, had developed the final perfect camera design, and had arrived at the perfect manufacturing methods to produce the perfect 35mm SLR camera that would last forever and never need any maintenance. The evidence of this is that each and every screw in the camera is glued into place. Each and every screw was carefully dipped into black lacquer paint before it was put into the camera. This was done in no other camera ever. It constitutes a statement of total commitment to everything the camera consists of and stands for. Being a statement of action it is of the utmost sincerity and there's no way to argue around it. Zeiss was wrong, the camera was not perfect and needed service and I'm absolutely certain that the pure costly nightmare of having to divert highly trained assembly workers away from production to disassemble newly manufactured but defective cameras at the factory was a big part of the reason Zeiss discontinued the camera business.
This screw gluing makes working on a Contarex to be a total nightmare. The black lacquer paint that glues the screw threads into place has had 40 years to harden. Each screw has to be treated with solvent that has to be allowed time to penetrate and loosen the paint, before the screw can be removed. This makes work on a Contax to be very labor intensive and time consuming.
Zeiss mistakenly decided to use single strand high phosphorus copper wire in the Contarex cameras. High phosphorus copper wire hardens and becomes brittle with age. The wires in a Contarex have a very limited tolerance for being bent and tend to break with very little manipulation. This means that when a Contarex is serviced it is necessary to do a fair amount of preventative de-soldering and disconnection so that parts can be handled enough to be serviced without the need to bend wires. This problem was taken to its most extreme extent in the Contarex Super Electronic.
The Contarex was full of new ideas. Some of these were good and some were bad. The bad ideas were identified by the customers who bought the camera with the belief it was perfect. With the camera being so very expensive these experimental owners were not at all reluctant to bring the cameras back for service and this clogged up the entire Zeiss camera works. The Contarex body has a number design problems. You can see these for yourself by comparing a Contarex to a modern SLR film camera. Those things you see in the Contarex that have been continued and improved were good ideas and those things you don't see were bad ideas. The first and foremost of the Contarex bad ideas was the body aperture control. The body aperture control is too complex and introduces too much play and uncertainty into the control of the lens aperture. If you want to use a Contarex and you want perfectly exposed pictures, the aperture control is something you are going to have to learn and adjust to. There's no way to make it anything other than what it is with its built-in +/- 0.5 f stop uncertainty.
The one and only thing that makes a Contarex worth all the trouble and angst is that the lenses made for the Contarex are the best 35 mm lenses that have ever been made. Even today there is nothing like them. They were made to the most impossible German ruthless standards of dimensional perfection. Their coatings are unbelievably fine. Their resolution and contrast are the theoretical maximum and when it comes to "mokeh", they define perfection here also. The irreconcilable conundrum of the Contarex is that the only practical way to see the kind of pictures Contarex lenses can produce is to mount them on a Contarex body.
If you want to use a Contarex successfully you are going to have to test it with film carefully, note its individual peculiarities and take them into account when you use it to take pictures. The Contarex is not a camera that can be used casually as we have become accustomed to doing today with modern cameras. There are two main reasons for this. The first is that it is highly likely the camera body you are going to use is about 40 years old and has not been properly overhauled since it was made. There is no such thing as a piece of such complex precision equipment that keeps its calibration for forty years. The second is that the factory specifications for shutter performance of the bullseye Contarex are +/- 0.5 f stop. Even at its best, the Contarex mechanical shutter can only provide accuracy within one half f stop.
Today we've become used to cameras that have extremely accurate shutters combined with extremely accurate light metering systems. In the "good old" days of the 1960's these kind of cameras did not exist. Photographers then had absolutely no expectation of super accuracy in their cameras. It was considered the mark of a professional to test the camera with film to determine its operating characteristics and then to use this data to work around the camera inaccuracies. The Contarex was a failure in the market place of the 1960's because, even back then, it did not meet the minimum requirements for accuracy and reliability of that time and this is due, in large part, to the body aperture control system. I am certain that without this, we would be buying the Contarex 7 today.
If a camera is inaccurate, but produces reliable inaccurate shutter speeds, the photographer can learn the camera and compensate with the aperture to produce reliably good results. But if a camera is both inaccurate and unreliable there is no way to learn the camera and it will never produce good results except by accident. This is the problem with the Contarex Bullseye (Cyclops) model as it is because of age. With an overhaul it can be made to be reliable.
I've been asked many times to explain how a great company such as Zeiss could make so many mistakes in a single camera. I believe there are three reasons. The first is that big companies occasionally make big mistakes. We see this today. The second is the Leitz patents, and this is explained in detail later. And the third is that after having studied the Contarex for a few years I have come to the conclusion that the root cause of its peculiar personality is that it was the first of the line of modern 35 mm SLR's. The situation with the design of the first of anything is that there is no experience upon which to rely when considering design ideas. It's impossible to prove that any idea is wrong. Anyone who tries to edit the design is quickly attacked and becomes an enemy of the whole. Consequently, just about every designer's pet idea gets incorporated and the product is very quirky. It seems to me the main reason the Contarex is so large and so heavy is that it wasn't possible for anyone on the design team to live without their big idea being incorporated into it, so it had to be very large to hold the fruit of so many very talented people. Once a "first time" product like the Contarex enters the marketplace the whole situation changes; sales numbers and camera return numbers dictate the situation. The product gets changed quickly if it has problems. Most people have not have the advantage of being able to see as many Contarex cameras as I have. So you'll just have to take my word for it that what I have seen inside the Contarex in the way of changes made to the camera from its earliest to its last models indicate to me that Zeiss was panic stricken over the rate of camera returns and customer dissatisfaction. They changed the Contarex as fast as they could but they ran out of time because it was too expensive to produce and the bottom line caught up with them.
A good example of this rapid change is the view through the camera. Today we have become used to clean clear views without any dust specks. A great many people who want to own Contarex cameras today are relatively young and know nothing else. In the first run of Contarex cameras Zeiss used a viewfinder design that incorporates a very thick condenser lens. They did this because such a lens actually makes the view through the camera better. It brings the image very close to the eye and produces a 3-D effect. Zeiss used this large condenser lens in all of its most prized classic cameras. But the problem with the condenser is that the optical glass of that time still had air bubbles in it and these appear like specks of dust when one looks through the camera. I'm sure these bubbles caused Zeiss problems with customer acceptance because they quickly changed the viewfinder design to eliminate the condenser. There's no other reason to remove the condenser than customer complaints about the "dust specks" because the view is truly much better with the condenser present. I know these air bubbles give inexperienced potential Contarex owners problems today. More than once I've heard from someone asking if I can clean the dust specks out of the viewfinder of a Contarex.
The following sections are the result of my detailed study of the Contarex Bullseye. If you don't want to read all of them it would be best for you to consider the following six points only:
- The Contarex was a market failure. It brought down the Zeiss camera manufacturing company. It has design problems with the camera body that cannot be overcome. Even if it is completely overhauled it will be what it was when it was manufactured. The chances are that the Contarex you are thinking of buying was not a great camera when it was made. The simple fact of the matter is that if the Contarex was a reliable and accurate camera system Zeiss would still be making it today. It only took four years for the Contarex to put Zeiss Ikon out of business and this should tell you all you need to know about it.
- There are no new spare parts available anywhere in the world. The only source of spare parts is parts bodies. These are very expensive and consequently repair parts are very expensive.
- The shutter curtains in the Contarex are by now at least 40 years old. They are made of fabric coated with a thin layer of rubber. They are nearing the very end of their lifetime and are starting to fail. Chances are that any Contarex camera contains shutter curtains that will begin to leak light within the next five years. The Contarex shutter curtains are not simply made and it will be very expensive to have them replaced.
- The Contarex Bullseye (Cyclops) model light meter was not accurate when it was made. Age has not improved it. The very best performance that can be expected from even a newly overhauled light meter is +/- 0.5 f stop. Combine this with the shutter inaccuracy of +/- 0.5 f stop and you get a combined exposure uncertainty range of 1.0 f stops at best.
- The Contarex shutter speeds, with the exception of the Super Electronic, are not accurate enough for use with transparency film. This is a design flaw that cannot be overcome. Even a newly overhauled camera will not have shutter speeds that are accurate enough so that all of them can be used with transparency film. The simple fact of the matter is that the Contarex is an old time camera which must be "learned" in order to produce reliable exposures. The photographer must learn the camera to be able to compensate for its inaccuracies.
- The Contarex aperture control system is inherently inaccurate. This is a design flaw that cannot be overcome by an overhaul. The accuracy limits of this peculiar system make it mandatory that if any accuracy at all is to be obtained all of the lenses to be used with a particular body be adjusted individually to mate with that body. The only exception to this is the Contarex Super Electronic with behind the lens light metering.
The "Bullseye" Contarex And Other Models

This is an early Contarex "Bullseye" model. Zeiss just called it the Contarex in the October 1, 1960 Dealer Catalog that announced it. The Bullseye term got added in response to the prominent light meter photocell assembly.
The Contarex Bullseye, Special, Super and Professional all have the same shutter mechanism.
You will quickly note that this is not a perfect camera. It is a camera in that is in the condition most Contarex cameras are in when I receive them. It is my experience that most people do not consider having their precious Contarex camera serviced until it cannot take a picture. This particular camera has a stuck self timer, the shutter will not release, the meter does not respond to light and the film advance lever operates freely. It is important to keep in mind that this camera would not be in this condition if it had been properly serviced on a regular schedule. It is even more important to keep in mind that there is absolutely no source of replacement parts other than parts cameras which are relatively rare and expensive which makes replacement parts to be extremely rare and expensive.
This picture shows the complete extent of camera disassembly required to access and remove the self timer. If you are thinking of purchasing a Contarex with a bad self timer or a stuck shutter release (this problem is typically caused by a bad self timer) be aware the repairs necessary to the self timer, even if they are simple, will be tremendously expensive.
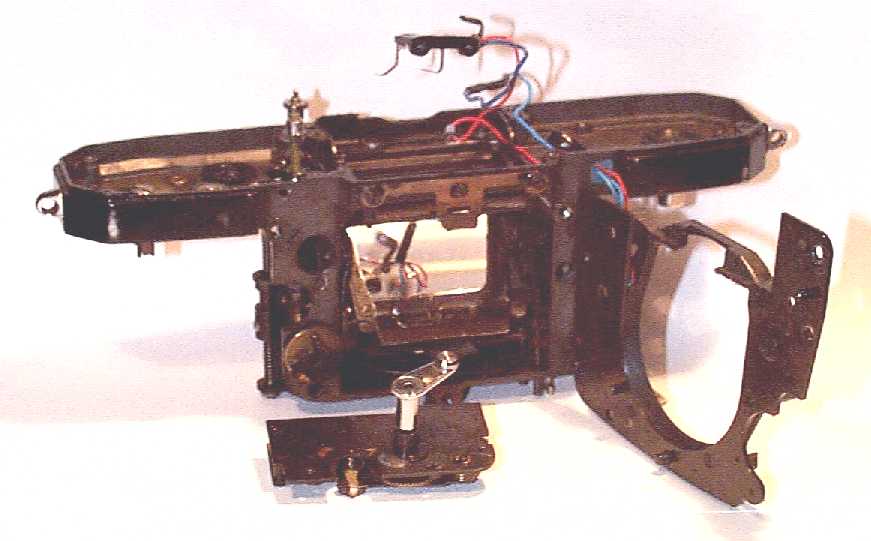
I can't find any fault with the Contarex owners who have delayed having their cameras thoroughly cleaned and properly lubricated. Some of the cameras I have seen contain internal evidence of a great lack of skill on the part of the people who worked on them in the past. This evidence is particularly evident on the fasteners that must be removed in order to remove the camera top plate. It seems that no one has taken the time to manufacture the special tools it takes to do this job correctly so that these fasteners can be removed without being damaged.
Here's a photograph of the special tools I made to remove these fasteners without damage to them:
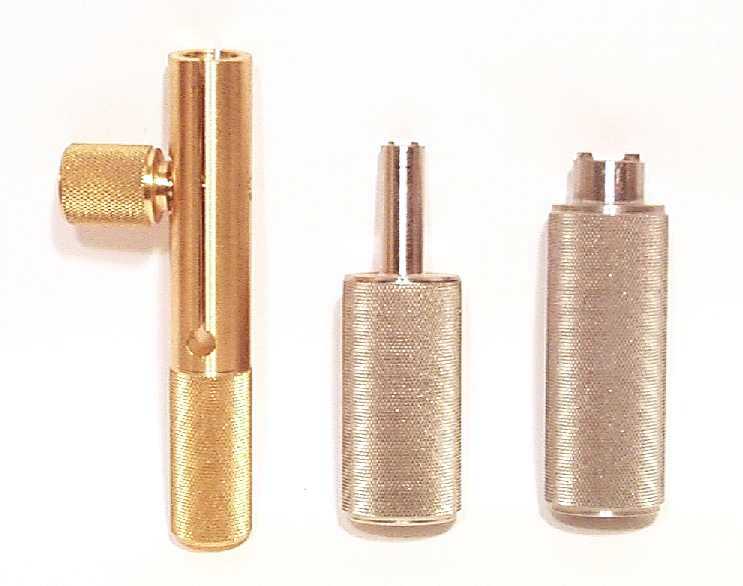
With every camera I service, if a special tool is required to do the job correctly, the work on the camera is stopped, the special tool is designed and manufactured; then the work proceeds.
The Prototype Bullseye:
The Contarex Bullseye began to demonstrate a problem with shutter accuracy due to wear. The situation is that all the shutter speeds are very sensitive to the resting positron of the shutter speed controller main gear when the camera is cocked and only very tiny positional uncertainty is necessary to result in large shutter speed inaccuracy. Four springs inside the camera act upon the main gear when the shutter is cocked. These are the mirror return spring, the aperture control spring and the first and second shutter curtain roller springs. These combine to exert a considerable force on the shutter speed controller main gear. The strongest of these springs is the aperture control spring.
In the Contarex Super and Electronic models Zeiss made two changes to eliminate the force of the aperture control spring being exerted on the main gear. The first change was to modify the spring to be much weaker and the second was to incorporate a latching mechanism so that when a lens is not mounted on the camera the camera body aperture control spring is disconnected from the wind mechanism.
You can see the little switch that was installed on the lens mount which accomplishes the latching of the aperture control mechanism when a lens is installed in the following photograph. The switch is located in about the 11:55 position:
You can also see that this switch is not present in a normal Bullseye camera:
Zeiss constructed a prototype Bullseye camera to see if the latching mechanism alone would be sufficient to correct the problem. This camera was presented here for service and here is a picture of the lens mount of this camera:
This prototype camera was made specifically to be more than normally sensitive to the force of the aperture control system spring. This camera was made so very precisely that the change in shutter performance with the lens on and with it off is clearly perceptible. This camera demonstrated that the latching mechanism alone would not be sufficient to solve the problem and that a reduced strength aperture control spring would be necessary.
The stronger aperture control spring has a big advantage which explains why Zeiss went to the trouble of making a prototype camera specifically to demonstrate if a spring change was necessary. A stronger spring provides good lens aperture performance even if the condition of the aperture control in the lens has a lot of friction. The weaker spring which was used in the Super and Super Electronic mandates that the aperture control in the lens must have the least possible friction if overexposures are not to result. It is this weaker spring that makes the Super and Electronic cameras so finicky about the lenses that are used on them with success. Lenses with sticky apertures will not close down completely before the shutter releases at smaller apertures resulting in overexposures.
Contarex Lenses
This is a picture of the front retaining ring for the ultra rare Contarex 180mm f2.8 lens. Examine it carefully and you will see that it does not have the typical wrench slots cut into it. This is a typical feature of the lenses Zeiss made for the Contarex. It makes the Contarex lenses very difficult to service. The front retaining rings require the most persistent and gentle persuasion to tickle them out. Sometimes it takes days to gently coax the front trim ring out of a very rare and special Contarex lens. Examine this one carefully and you will see that it was removed from the lens without a scratch or a mark. This is how Contarex lenses are serviced here.
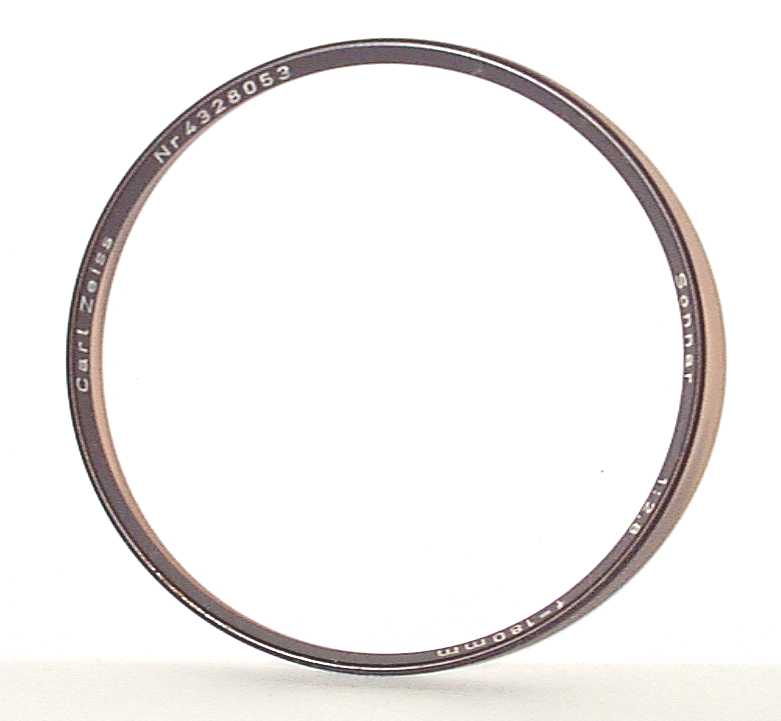
The ability to use the Zeiss lenses which were made for the Contarex is the one and only reason to own a Contarex. These lenses are known to be the optically best ever made for a 35 mm camera and they are unsurpassed even by today's lenses.
The following pictures show the lens barrel of the 50mm Silver and Black Blitz 50mm f2.0 Planar lenses. While both lenses look different, the both use the same Planar lens assembly.
This is a side view of the lens barrel. The extreme craftsmanship and precision of the machining and surface finish of the solid marine brass is clearly evident. The black finish is very special and is obtained by dipping the finished article into a bath of molten cyanide which explains why you don't often see it.
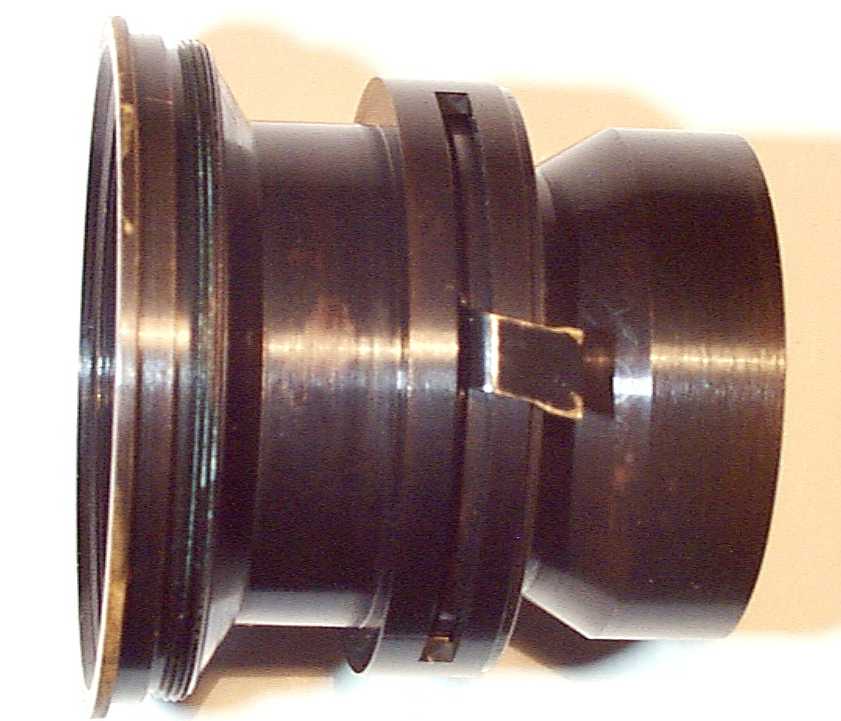
This is a top view of the lens barrel with the lens elements removed. The extraordinary quality and craftsmanship is once again clearly evident. The recesses for the lens elements are so precisely finished and sized that the barrel must be heated in order to be able to extract them out of the barrel.

This is a view down into the rear section of the lens.

This is a view of the aperture control of the lens. The rear section has been removed to expose the aperture blades and control plate. One of the main sources of exposure problems with the Contarex comes out of this location. The aperture control parts are machined and formed just as accurately as the other parts of the lens barrel assembly. Over time wear products accumulate and sticky liquids from deteriorated grease in the focusing helical migrate into this part of the lens. These combine to greatly increase the operating friction of the aperture control. In order to function effectively the Contarex lens aperture control must have almost no friction. If there is some friction from old grease and wear products the result will be a partial operation of the aperture when an exposure is made resulting in bad exposures on film. The aperture blades and control parts must be super clean and properly aligned. The entire lens barrel must be cleaned of the slightest trace of grease residue in order for the lens aperture to perform properly every time the shutter release button is depressed.

One of the features of construction of the Contarex lenses that makes them so good is the extreme precision of the centering of the lens elements. If you could take a Contarex lens apart you would see that it is necessary to gently heat the lens barrel in order to be able to extract the lens elements. The reason for this is that the lens mount is so precisely machined, and the lens edge is so finely and precisely finished that when both are at the same temperature the fit together so closely that the lens cannot be extracted. Even when the lens is gently heated, the other elements in the lens seal the barrel so effectively that the lens must be turned upside down so that the lens element will be gently pulled out of its mount by gravity. It takes a long time for enough air to flow around the lens and into the barrel so that it will come out.
This is a picture of the second front element of the 50 mm f2.0 Planar Contarex lens. The element was rotated in the micrometer while its diameter was measured to find the deviation from true round. As you can see the amount of deviation from true round for this element is less than five hundred thousandths of an inch, which is the limit of accuracy of the micrometer. This means the deviation from true round of this lens is probably somewhere within the millionths of an inch. This is incredible accuracy the equal of that used in spy satellite optics which explains why these lenses are the greatest 35mm lenses every made and why they are never to be exceeded.
The Contarex Lens Focal Length Problem:
I have come to believe that Zeiss believed with the Contarex it was possible to make the perfect lens with the perfect focal length. Every lens varies a small amount from its marked focal length. This is why internal shims and spacing washers are necessary to obtain a very accurate infinity focus. Typically a 50mm lens will vary from 50mm by a millimeter or two. Often times I find the actual focal length marked inside Contax RF 50mm Sonnar lenses and these markings often indicate a true focal length of around 52.3 indicating a difference from the marked focal length of 2.3mm. The Contax RF lenses were designed to accommodate spacing shim washers and they all come with factory installed shims. But the Contarex lenses were not designed for the use of shims. I have also never found a Contarex lens that contained focus adjustment washers or shims in it. But I have also found that most Contarex 50mm Tessars and Sonnar lenses that have come here do not focus properly at infinity. When these lenses are measured the results are always that the true focal length of the Contarex 50mm lenses are far more precise than the 50mm Contax RF Sonnar lenses. The typical Contarex 50mm lens focal length deviation is less than 1mm. The problem is that even with such a small deviation the split image portion of the camera viewfinder will demonstrate a slightly crooked line at infinity when the camera is focused on a straight line infinity target. Many of the cameras that are presented here have deliberately improperly adjusted mirrors. This has been done in an attempt to get a straight line at infinity. Sometimes it works, but the problem with this correction technique is that it is an illusion. The problem is the lens and not the camera. Adjusting the mirror improperly so that straight lines at infinity appear to be straight at infinity doesn't change what the lens projects onto the film. My measurements demonstrate that a 50mm Contarex lens that is 0.2mm out of position in its barrel has a focusing error of about 3 feet when the camera is aimed at an object at a distance of 9 feet. Small differences in the focal length make a big difference in lens sharpness performance, particularly at large apertures.
It is possible to adjust the infinity position of the Contarex 25mm, 35mm, 50mm and 135mm lenses, using the factory provided adjustment capability of the lens, but this can be done only within 1.0mm increments, and the total adjustment capability is 1.0mm. This means that if the actual focal length of the lens differs from the ideal by anything other than 1.0mm only very precisely made spacing shims will allow the lens to be adjusted properly. My experience is that most 50mm Contarex lenses require a shim with a thickness within the range of 0.2 to 0.5mm in order to be adjusted to focus exactly at infinity.
I have also seen camera bodies where the lens mount to film plane distance has been adjusted outside of the specified factory limits in order to correct the viewfinder. This solution will work with the individual lens for which the adjustment is made, but it will not work for lenses having a different focal length defect. Cameras that have been adjusted this way often had the spacing washers underneath the lens mount removed. Bringing these cameras back to proper lens flange alignment requires spacers that come out of parts bodies and this makes them very expensive and hard to get.
There are no factory made shims available for the Contarex lenses. The lens was not designed for them and so I have had to come up with a shim design that does the right job and does not interfere with the other operations of the lens. About nine out of every ten Contarex lenses that get sent here require a custom made shim that is hand scraped to a final perfect dimension to provide the best and most exact infinity focus. This is difficult and time consuming but there is no other way to obtain the full sharpness potential of these spectacular lenses. If you send your lens here for an overhaul you can anticipate there will likely be a charge in addition to the normal overhaul cost to manufacture the custom shim for your lens.
With regard to the rarer Contarex lenses such as the 250mm Sonnar, the Zoom lenses and the 180mm Sonnar most of these lenses that I have seen do not focus exactly at infinity and require some adjustment. With these lenses the focusing mechanism is different from the type used in the 25, 35, 50 and 135mm lenses and so the methods used to adjust the focus are different and more difficult and time consuming.
Old Lenses with Old Grease:
The problem is that the damping grease used to lubricate the Contarex lenses focusing helicals was manufactured in the 1960's. It is petroleum based grease and there is no petroleum based grease that has a lifetime of greater than 20 years. When grease gets old it separates into its solid and liquid components. The solid components stay and the liquid oily components migrate throughout the lens and wind up getting inside the lens assembly and coating the surfaces of the innermost lens elements. This oil film significantly degrades the optical performance of the lens. So in order for you to get the original Zeiss photographs out of a Contarex lens it must be completely disassembled, each optical element must be carefully cleaned, and then the lens must be reassembled and lubricated properly. Then it must be collimated, adjusted for focus and the aperture control must be matched to the camera upon which the lens is going to be used..
In order that they be made to be light Zeiss fabricated the Contarex lens focusing assemblies out of aluminum. Aluminum requires special lubricants in order that very precise assemblies not wear excessively or self weld under use. I have obtained the original grease formula, prepared by the same German company that made it for Zeiss in the 1960's, to use on your Contarex lenses when they are serviced.
There is no such thing as a 40 to 50 year old lens with its original lubricant that does not need a complete servicing. There is no such thing as a 40 to 50 year old lens with its original lubricant in it that is not performing at less than 50% of its true optical capacity due to oil films on the inner elements. The following four pictures illustrate the internal problems of the typical Contarex lens.
This is a picture of the outside of the lens. It presents the appearance of an almost mint quality example of the 50mm f2.0 Silver Planar Contarex lens.
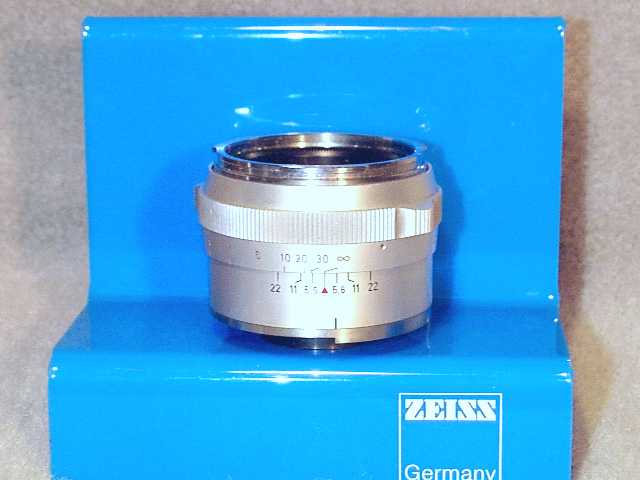
But when it is disassembled its true condition becomes visible. This is the male part of the focusing helical assembly. The original grease became acid from the byproducts of mold growth. This acid has dissolved the black anodized surface of the aluminum and the bleaching is clearly visible. The grease deposits at the top of the threads appear a pasty gray due to the aluminum wear products that have accumulated in the acidic grease. Anodizing is a process that provides a thin but very hard wearing surface on aluminum. Zeiss anodized the Contarex lens helical assemblies after the threads were machined onto them so that they would have an extremely long life along with very smooth operation. The black color of the anodized surface is the result of a black dye that is applied to the anodized surface. Loss of the anodized surface makes the lens more prone to wear.
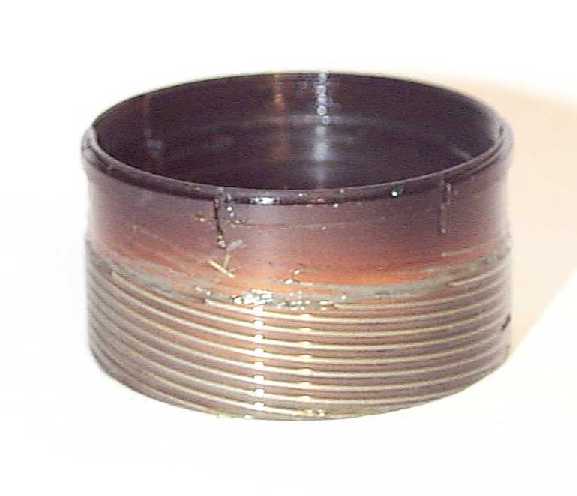
This view shows the removal of the anodized thread surfaces more clearly. You can also see from the interior view that the entire surface was anodized and that where there was no grease there is no anodized surface bleaching. The damping grease in this lens became acidic with time and this acid caused the bleaching.
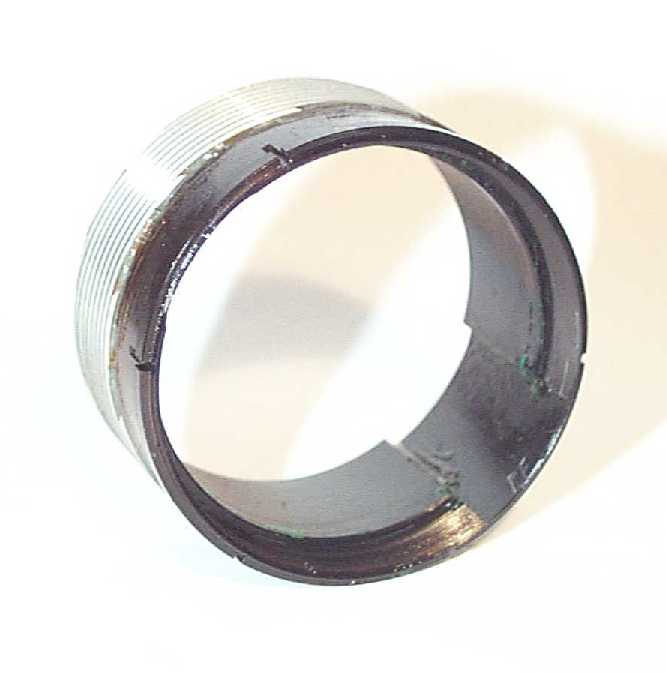
This is the view of the female part of the helical assembly. You can see that the anodizing was removed from the inner part of the threading.
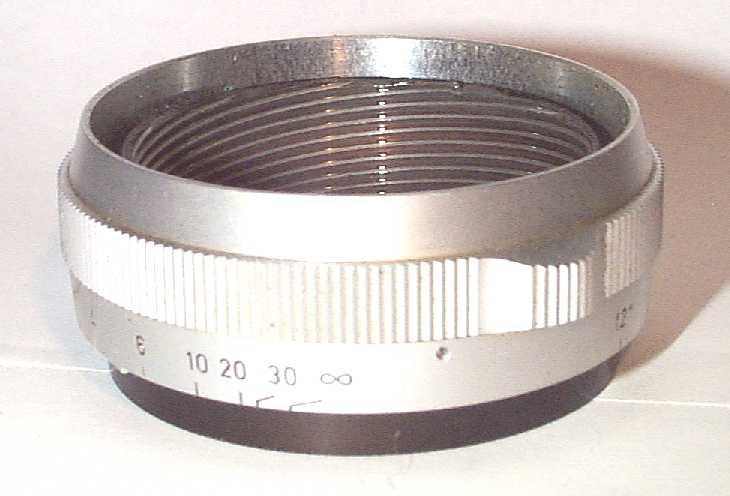
With a thorough cleaning and the use of modern greases it is possible to restore the Contarex lenses so that they can be used without additional damage.
Here's one more tip about Contarex lenses: This is a picture of a Contarex Sonnar with severe separation in the center element. Zeiss used a form of epoxy adhesive to cement its compound Contarex lens elements together. This epoxy becomes harder with time and so the cement layer and the glass layers can separate if the lens is subjected to some form of physical or thermal shock. When this happens the separation is so thin it actually refracts light and so it has this peculiar iridescent appearance. Unfortunately, currently there is absolutely no way to separate these lenses and then re cement them to repair this damage. Lenses with this form of separation are typically not very expensive, but then they are also photographically useless.

Contarex Lens Exposure Uncertainty:
When the shutter release button on the camera is pushed to release the shutter the automatic aperture system is released also. It is necessary for the lens aperture to close to the pre selected value before the shutter curtains are released if the aperture part of the exposure is to be correct. If the aperture does not close completely before the shutter curtains are released the result is some degree of over exposure. One of the design weaknesses in the Contarex Bullseye, Special, Super and Professional is that while it has a very strong spring to activate the lens aperture control, this spring feeds back to the shutter release mechanism. The shutter release mechanism has a full wind interlock. When the shutter release mechanism becomes even slightly worn it is possible for the back pressure of the aperture spring to result in a condition where the full wind interlock will not latch and the camera becomes effectively jammed. Adjustment of this mechanism cannot be described in detail here except to say that it is a pure nightmare because it requires a great number of complete camera disassembles/reassemblies to ensure it is right.
Zeiss compensated for this problem in the Contarex Super Electronic by installing a weaker spring. This solved the camera jamming problem but introduced another problem. It made it necessary for the lens aperture control to be almost frictionless to avoid partial aperture closing. Even the slightest amount of dirt in the bearing race of the lens or on the aperture blades will jam up the works so that the lens aperture will not close completely on a Super Electronic. So if you have a Super Electronic, and it is consistently overexposing, blame the lens and not the meter or the shutter.
Contarex Lens Infinity Focus Uncertainty:
About three quarters of all the Contarex lenses that are sent here for overhaul do not properly focus at infinity. All of the cameras upon which these lenses have been mounted have had their mirrors intentionally misaligned to make the split images line up properly at infinity. The result of this mirror adjustment is fuzzy images and a viewfinder that does not coincide with the actual film plane.
Zeiss used spacers in all of its Contax rangefinder lenses to obtain infinity focus. This is because it is not possible, at a cost people can afford to pay, to manufacture lenses with focal lengths that are perfect. The typical Contax 50mm rangefinder lens will have a real focal length that ranges between 48 and 53mm. This is why there are spacers or space adjustment devices in these lenses.
The Contarex 50mm lenses real focal lengths are much more precise ranging from 49.7 to 50.3 mm. It appears to me that Zeiss believed it could make Contarex lenses so precisely that no spacers would be needed. No Contarex lenses have provision for adjustment of the lens position in the focusing barrel. It is routine for me to have to manufacture and install 0.3mm spacers for 50mm lenses so that the lens can focus precisely at infinity and the camera body and mirror can be collimated so that the mirror is properly aligned.
It is normal for very long Contarex lenses such as the 250mm Sonnar and the 400mm Tessar to not come to precise infinity focus when the lens focusing ring is rotated to the infinity stop. These lenses are made to focus past infinity at this point. The reason for this is that these lenses are so long the length will change with temperature and that the lens could be used in a temperature high enough so that if the lens was set to focus precisely at infinity when at the stop at normal room temperature it would not do so at a high temperature.
The Condition of Your Contarex
All of the Contarex cameras I have examined look good from the outside. Zeiss made the outer parts of the Contarex out of very thick metal and they got the chrome plating right, so that the Contarex, unlike most other cameras, does not generally have a link between external cosmetic and internal mechanical condition. I have not yet seen a Contarex that does not contain hidden damage. My belief is that this internal damage is the result of many attempts being made to adjust the camera shutter to produce speeds with a degree of precision that the camera cannot possibly produce.
This is a picture of the second curtain shutter spring roller. On this roller are machined a very precise set of threads. These threads control a pinion that controls a safety switch for the flash synchronization system. You can clearly see that when a previous worker forced this roller back into place he damaged the thread which effectively destroyed the roller. This repair is very expensive. The lesson here is that when you purchase a Contarex make it a conditional purchase and test everything thoroughly before making the purchase final.
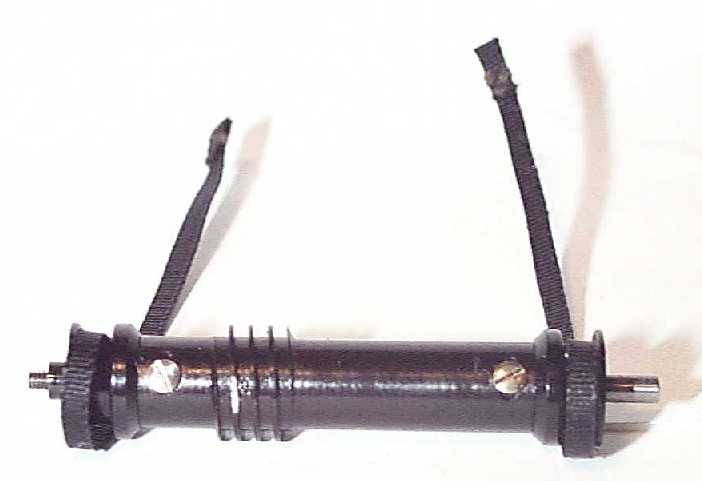
Here's a close-up of the damage. You can see how the section of thread has been broken off.
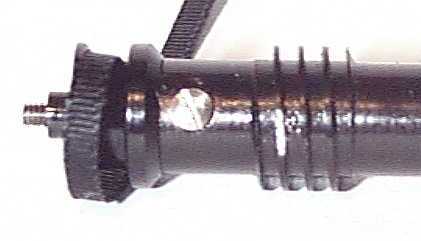
Zeiss abandoned its metal blind vertical travel shutter in the Contarex. This made the shutter much more resistant to age related accuracy deterioration. But then this made it so the cameras were not serviced as often as they should have.
But with regard to the servicing most Contarex cameras did receive, there have been major problems with it. The Contarex cameras I am seeing all have some significant damage to interior components due to mishandling. The two main areas where I see this damage is in the shutter curtain shaft ends and in the light meter. The damage to the curtain shaft ends happens when an attempt is made to reinstall the main control module. When this unit is installed the shutter curtain shafts have to be positioned exactly correctly, and this positioning takes some effort. If an attempt is made to force the control unit in place, the precision pinions at the top of the shafts get bent and can easily break. Repair of these shaft tip pinions is a very difficult and expensive repair.
In the following picture you can see the wind and shutter speed control module installed on the camera. At the very right you can see the two bearings holding the top tips of the shutter curtain shafts.
In this picture you can see a side view of the control module when it is removed from the camera. The side facing you is the right side in the picture above. You can clearly see there are four gears that must be very precisely aligned when the unit is mounted on the camera so that they will mate in the proper synchronization with the gears on the tops of the shutter curtain shafts.
And here is a picture of the shutter curtain shafts with the control module removed from the camera:
So it is evident that if one has not manufactured all the special tools required to hold and line everything up with great precision while the control unit is mounted, installation of the control unit can become an incredibly frustrating experience. The result of this frustration is force and damage. About two of every three Contarex cameras I see have damage either to the shutter curtain shaft tips (pinions) or to the control module.
With regard to the light meter, it is my experience that perhaps one out of every two cameras has a light meter that has been tampered with. The reason this is done is an attempt to compensate for an aged photocell. The result is usually serious and irreparable damage to the light meter.
In all the Bullseye cameras I have seen Zeiss used a very early form of molybdenum disulfide grease to lubricate the winding and shutter cocking mechanisms. This grease looses its oil quickly and in all cases I have seen so far the shutter is completely dry with hard deposits of molybdenum disulfide powder clinging to various locations. These mechanisms are essentially operating without lubrication today if they have not been completely overhauled within the past 10 years.
The good news is that in most cases with the Bullseye the camera has had normal amateur use and is entirely capable of being completely restored to like new internal condition and operation. The bad news is that this can be extremely expensive and require replacement subassemblies from parts cameras. Given that 2/3 of all potential parts cameras have broken subassemblies in it, it's obvious that the expense of obtaining good replacement parts can become very great.
The main problem I have found with the Bullseye is that all the cameras I have seen have been opened many times and have been worked on by unqualified persons in an attempt to correct inaccuracies in the exposure control (light meter) system. The exposure control system is the weak link in the Bullseye system and the following sections have been provided so that you can understand why this is the case, and to provide an understanding of the accuracy limitations of this system.
The Contarex Shutter Speed Controller Problem
There is a big secret in the Contarex and this secret is the original Leitz German patents on the horizontal shutter and its speed control. Leitz invented the 35 mm camera and they carefully patented its operations along with all possible mechanisms associated with it, and defended these patents vigorously. Leitz and Zeiss had been competing microscope makers since the 1700's and so by the time the era of 35 mm photography came along, they were long used to writing very broad and general patents to cover their developments, inventions and improvements. They were also used to watching each other very closely and being quick to file a lawsuit when there was the perception of a patent infringement. Zeiss defended its patented property against infringement by Leitz, and Leitz defended its rights against infringement by Zeiss. This was a well established routine long before the UR Leica came along in 1913. Leitz had intensively and extensively covered every possible 35 mm horizontal shutter mechanism long before Zeiss entered the 35 mm market in 1932 with the Contaflex TLR. I have carefully examined all of the shutters Zeiss produced between 1932 and the end of camera production in 1964 and have come to the conclusion that there was no more powerful effect exerted upon the Zeiss shutter design than the Leitz patents. Simply put, Zeiss was always in a bind and could not freely design a shutter. They always had to design a shutter to evade Leitz patent infringement and Leitz had done everything in its power to make this as difficult a task as is humanly possible. I have personally overhauled a Contax IIIa that was used as evidence in a court case brought by Leitz against Zeiss alleging patent infringement of the Leitz shutter patents in the late 1950's. It is my belief that it was this suit which was responsible for the demise of the Contax rangefinder line. I believe this lawsuit had one other effect and this is the very complex and unusual design of the unsuccessful Contarex Bullseye shutter speed controller. The long and short of it is simply that the only way for Zeiss to get out of the grasp of the Leitz shutter patents and to produce a successful shutter speed controller that was reliable, accurate and consistent was to make the great leap to the Contarex Super Electronic shutter controller. But it was too late. By then the very unreliable, inaccurate and inconsistent Bullseye speed controller had been around too long and had done a complete job of ruining the Zeiss reputation.
There is a very big difference between the operation of the Contarex shutter and the operation of all other horizontal shutters. In all other horizontal focal plane shutters the two curtains form a slit. This is accomplished by the two shutter curtains being released at the same instant with the delay in the closing of the second curtain being directly controlled by the shutter mechanism. But this was covered by German patents held by Leitz and so Zeiss had to invent a shutter speed controller that delayed the release of the second curtain and used an indirect method to accomplish the timing of its release. The result was a mechanism that is simply too complex to be made by mass manufacturing techniques and by people other than experienced and trained watchmakers. My feeling is the Contarex Bullseye would have had a successful shutter if Zeiss had a good watch making company like Hamilton or Rolex manufacture the shutter speed controller. But if they had done this no one could have been able to afford the cost.
In all other cameras both curtains move at the same speed. In the Contarex the first curtain moves much faster than the second. In other cameras both curtains are released at the same time. In the Contarex the second curtain is released only after an independent timer releases it.
This method of operation introduces an operational problem caused by the complexity of the mechanism necessary to sequence things. In the Contarex the path between the shutter release button that is pushed to make the exposure and the first curtain is very short and direct and the path between the button and the release of the second curtain is very long and complex. It is this long, indirect and complex path between the release button and the second shutter curtain release that introduces a shutter speed consistency problem that has always plagued the Contarex. In the following section the operation of the Contarex shutter controller module, with particular detail to the operation of the second shutter curtain release is explained. This is being done so that you can understand that most people make a big mistake when operating the Contarex.
The big mistake people make when operating the Contarex has been to operate the shutter release button as they have been trained to do with every other camera. This is to slowly and carefully press down on the release button until the shutter is released. With the Contarex the correct method to use is to press down on the button as quickly and firmly as one can without shaking the camera and to hold the button down until well after the shutter is done making it's sounds when it makes an exposure. The reason for this is explained in the following section:
The Contarex had two shutter speed controllers. The first is the mechanical controller used in the Contarex Bullseye, Special, and Super. Then there is the electronic controller used in the Super Electronic. I am convinced that the reason Zeiss invented the electronic shutter speed controller used in the Super Electronic is the intense frustration with the many problems inherent in the mechanical controller. The long and short of the matter is that it is not possible to obtain the kind of shutter speed accuracy with the Contarex Bullseye that we have become used to with modern cameras with electronic shutter speed control. Because most of the Contarex cameras in the world are Bullseyes with the mechanical speed control it's important that you understand why this is.
The first thing to keep in mind is that the shutter speed performance of the Contarex is extremely sensitive to a number of factors. One of the most important of these is the "technique" used by the photographer to push down the shutter release button. This is a rather strange thing, and it is contrary to experience with just about every other camera. The root cause of this behavior is not immediately obvious and so I'm going to have to go to some detail into the operation of the mechanical type shutter speed control mechanism in order to be able to explain why the technique used to push down the shutter speed release button really has a major effect on the shutter speed performance of the Contarex.
Operation of the Contarex Shutter Speed Controller
- The shutter speed controller releases the first and second shutter curtains
in two steps. The first curtain is released directly when the release
button is pushed down.
This picture shows a bottom view of the speed controller. On the left you can see the bottom of the shutter release shaft. It is partially covered by the full wind interlock on the left and the second curtain release on the right. When the shutter release button is pushed down this bottom piece is pushed down and a pin is released that causes the first shutter curtain to be released.
The first shutter curtain opens without any restriction, and its speed is controlled only by the tension of the spring in the first shutter curtain roller. The shutter speed controller does not affect the speed of opening of the first shutter curtain.
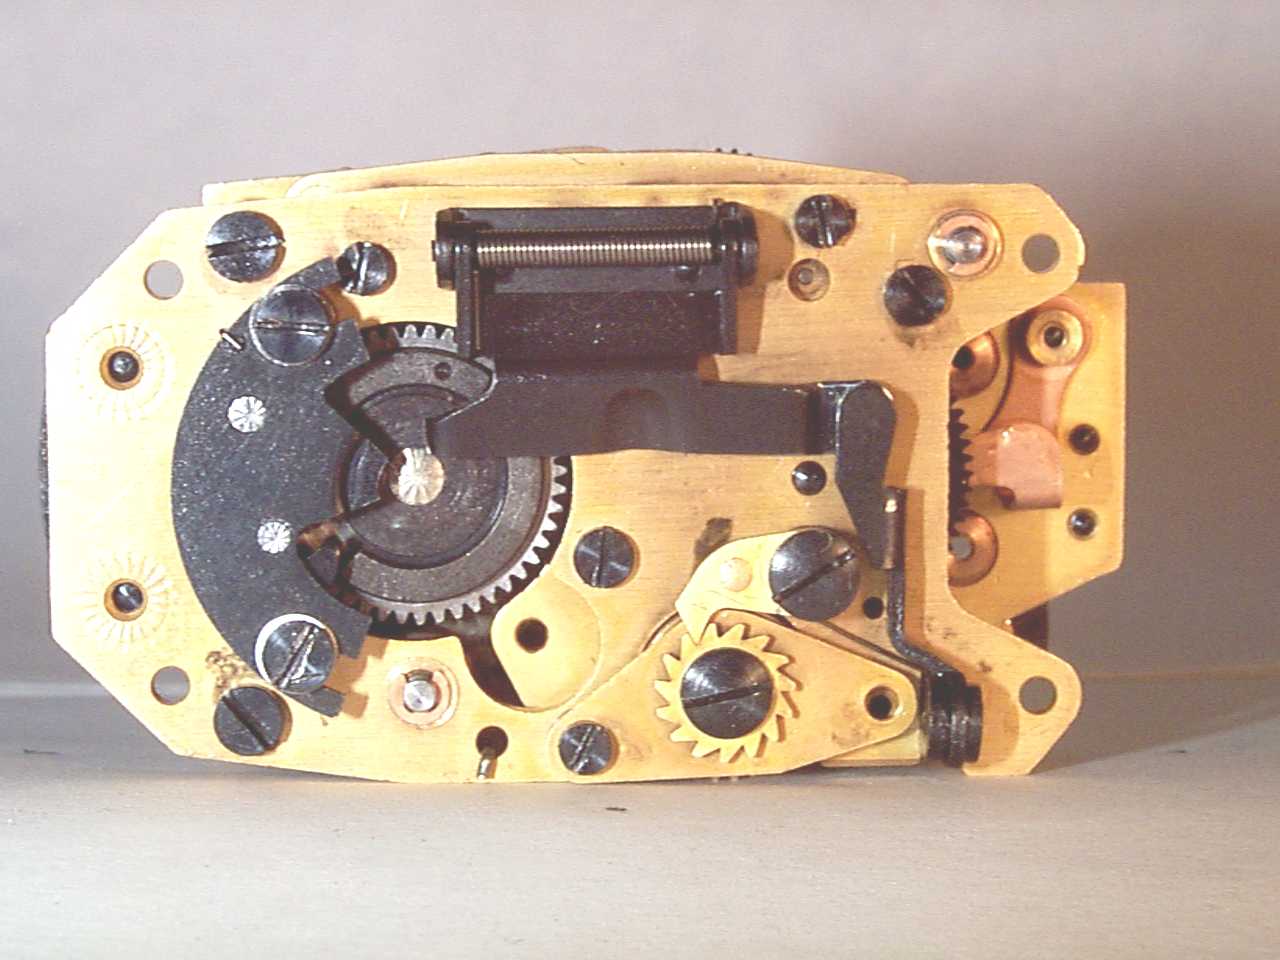
- This picture is of a top view of the Contarex mechanical shutter
speed control:
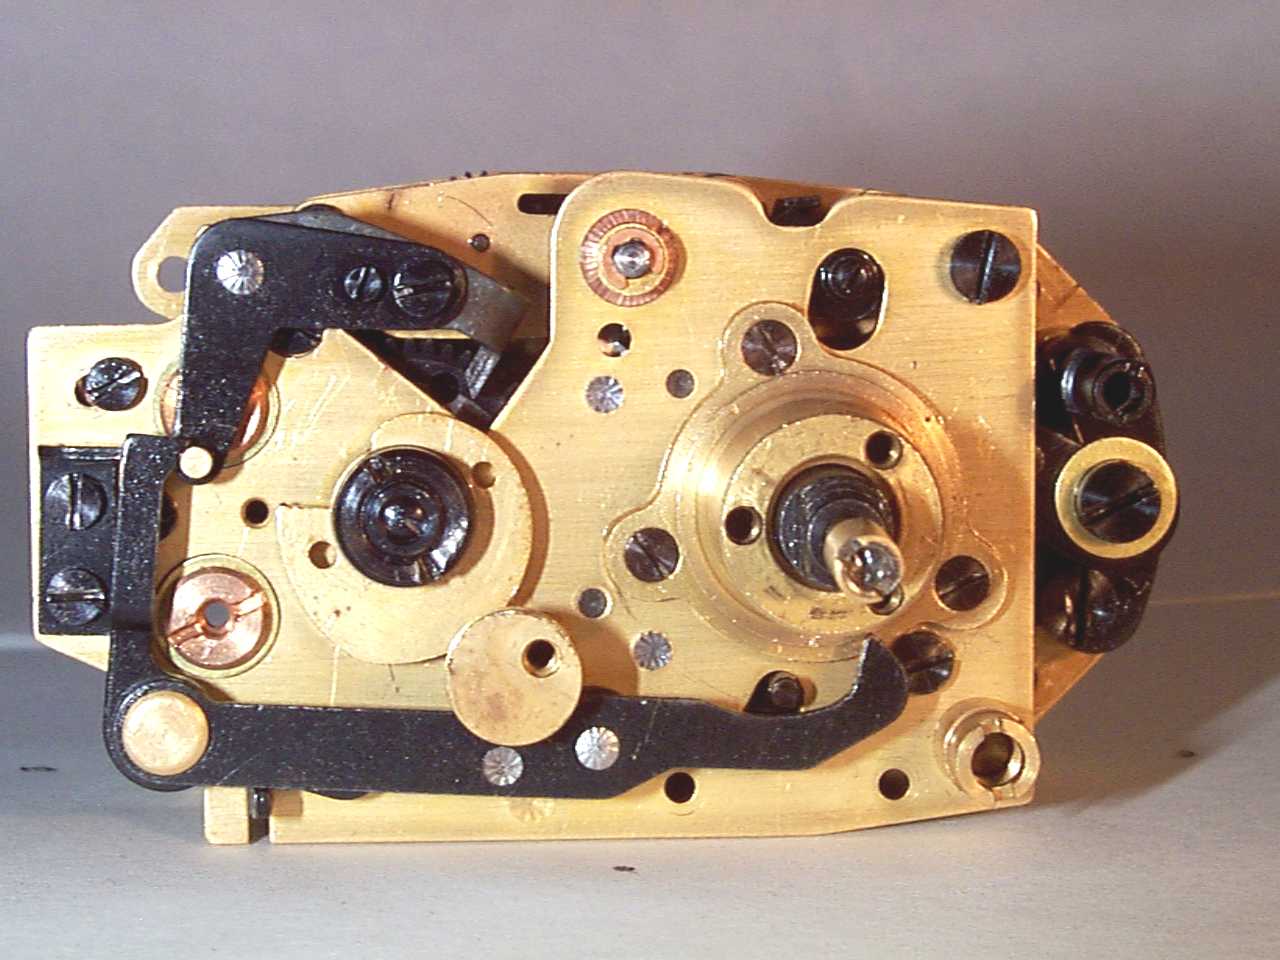
An understanding of this top mechanism is the key to understanding the unreliability of the shutter speeds it produces.
- The next picture is of a cutout of the top left of the mechanism:
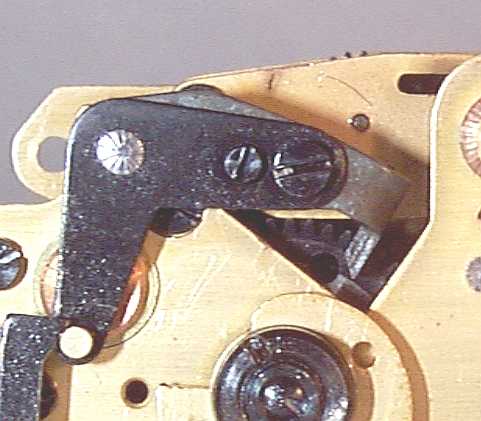
This is a view of the part of the controller that releases the second shutter curtain. You can see this is a lever rotating around a pivot. The pivot is the bright silver rivet spot at the left top of the picture. At the upper right you can see the chisel shaped tip at the end of this lever. This chisel tip is resting on the top of the second shutter curtain gear stop. When the shutter is fully cocked the gear stop is just to the right of the chisel tip and the chisel tip is down and holding the stop in place. When the second curtain is released the chisel tip rises and the stop is released so that the gear can rotate and the second shutter curtain is released to join the first curtain and cover the focal plane.
Part of the mechanism of controlling the speed of the second curtain is that the chisel point descends to a deeper depth for slower speeds than it does for fast speeds.
- In the next picture you can see the part of the mechanism
that controls the depth of the chisel point:

Observe the point at the lower right. This normally rests against a circular cam that is connected to and is rotated when the photographer moves the shutter speed selection control knob on the top of the camera.
The cam raises or lowers the tip which causes the long black lever to rotate around its pivot point which is the silver rivet in its center, changing the position of the long rectangular section at the upper left side of the picture.
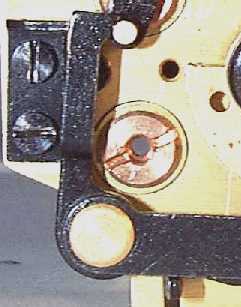
Notice how the lower arm of the chisel point lever rests against this rectangular section of the lever and how the rectangle is braced at an angle by a fixed bracket at its left side. As the cam rotates to a new shutter speed position the long lever moves the lever up or down and this causes the chisel point to move up or down in a very precise manner.
This is a very complex mechanism and it has extremely precise tolerance requirements. It is so precise that it has to be affected by the temperature of the environment of the camera and this is a contributing cause of the irregularity of the Contarex shutter speed performance.
Another complicating factor is that the mechanism by which the chisel tip is raised to release the second shutter curtain is also very long and complex.
- The next picture is of a cutout of the top left of the mechanism:
- This is a picture of the bottom of the shutter speed controller.
At the top you can see a large square part with a spring in it. Notice how at its bottom left it has a point that contacts the bottom of the shutter release shaft. At its right is another contact that connects with a lever that proceeds to the bottom right of the bottom of the controller. This is part of the mechanism that leads to the chisel point lever on the top of the controller.
When the shutter release button is pressed down the bottom of the shaft releases the first curtain. It also transmits motion through the linkage touching it to the bottom right of the controller. This motion is transmitted to the top of the controller where it acts to lift the chisel point and set the top mechanism for release the second shutter curtain.
- This is a side view of the controller. You can see
the linkage that connects the bottom release mechanism to the top mechanism
at the extreme right.
- Here's a view of the top showing where the tip of this side
lever contacts the speed setting lever on the top of the controller.
It is visible at the left bottom of the controller.
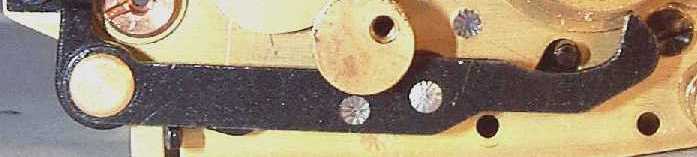
When the shutter release button is pushed this mechanism acts to change the configuration of the series of levers on the top of the controller for release of the second shutter curtain. It does not release the curtain. This is done by the timing mechanism within the controller.
It is very important to notice the little round black piece hanging below the long lever just to the right of the tip of the lever coming up from the bottom of the controller. This is the bottom of another lever that is not so easy to see in the pictures because the mechanism are so very black.
This picture shows the lever just described. I have removed the upper part of the long lever that hides it:
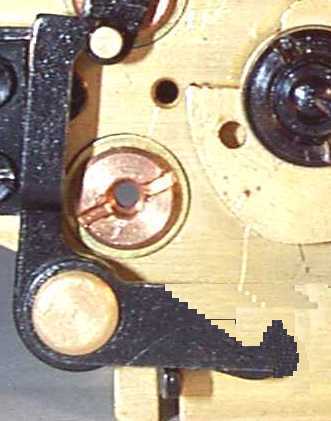
So now you can see that the second shutter speed release mechanism on the top of the controller consists of three levers:
a. The long lever that touches the shutter speed speed selection cam.
b. The short lever with the long wedge at its top.
c. The short lever with the shutter curtain release chisel tip.Notice that levers a and b are connected to each other.
It is important to realize that the actual release of the second shutter curtain is controlled by a timer within the controller. The output of this controller is the rotating cam.
- This is a side view of the controller. You can see
the linkage that connects the bottom release mechanism to the top mechanism
at the extreme right.
- Here's a view of the top of the controller again. In
the left center you can see a brass cam:
- Here's a close-up of the cam:
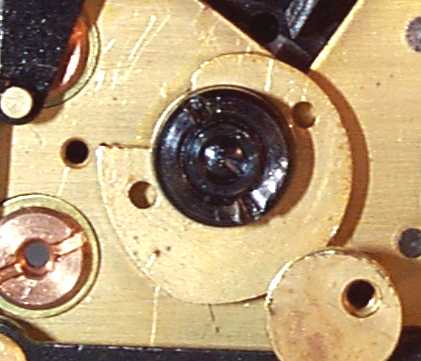
This cam rotates when the shutter release button is pushed. The speed of rotation of this cam is another part of the speed control action of the second shutter curtain. There is a second shutter speed selection cam that is controlled by the shutter speed control selector knob on the top of the camera.
So there are two speed selection cams that rotate and control the speed of the second shutter curtain. One cam controls the depth of the chisel point and the other controls the speed of rotation of the rotating cam.
- Here's a picture showing the point where the rotating cam's
speed of rotation is selected:
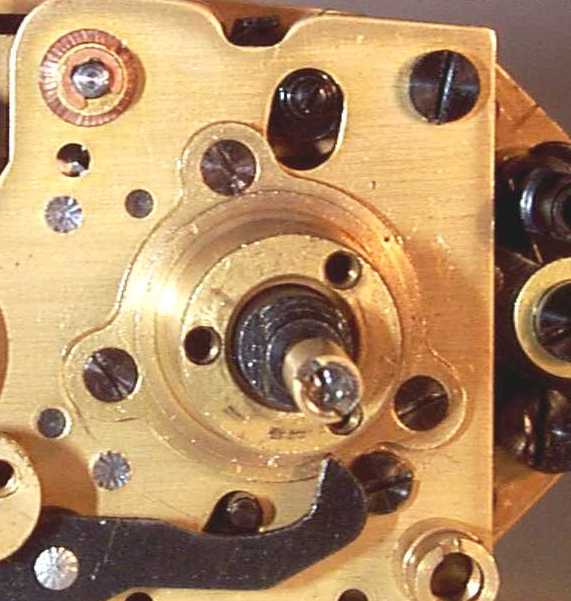
In the top center, in the oval cutout, is a contact that touches the second speed selection cam.
- Here's a close-up of the cam:
- The actual release of the second shutter speed curtain happens
after the necessary wait time to accomplish the overall camera shutter
speed. When the shutter release button is pushed the first shutter
curtain opens quickly without any restriction. At the same time the
complex lever mechanism sets the chisel point at its proper depth and it
holds the second curtain open. At the same time the internal timer
in the controller is released and the rotating cam begins to rotate.
For slower shutter speeds it rotates relatively slowly and at faster speeds
it rotates very quickly.
Here's how the cam causes the second shutter curtain to be released.
When the long lower lever is pushed upward by the actuating point coming up from the lower part of the controller, the lever that is hidden is moved up that the contact point comes up to touch the surface of the rotating cam.
And as the cam rotates to push down on this contact point the lever moves to push towards the right against the lower contact point of the chisel point lever to lift it above the block on the gear.
When the chisel point is above the block the gear is free to rotate and the second shutter curtain moves to meet the first curtain and the focal plane is closed.
- It is very important to realize that unlike every other 35
mm camera, the speed of the second shutter is not controlled during its
travel. It moves freely, just like the first curtain does.
The delay is in its release. This release is controlled by two factors.
The first is the depth of the chisel point and the second is the speed
of rotation of the rotating cam which is also variable.
Now to make the final point, which is to prove my first statement; and this is that the technique of operating the shutter speed release button is very important to shutter speed consistency and accuracy all that is necessary is to point out that the position of all of the levers on the top of the controller is set by the operation of the shutter release button.
If the shutter release button is released too early or if it is not held down firmly enough for long enough the rotating cam will have to rotate further than it should to be able to move the chisel point above the block. This will make the shutter slower than it should be on the slower speeds. If the button is released too quickly on the higher speeds the result can be a blank exposure. The effect of a premature release of the shutter speed button is variable because the mechanism is so very complex.
- In summary there is no way the Contarex shutter speed controller
can be accurate at all speeds. It is just too complex and the parts
are so precise that temperature changes will certainly have an effect on
shutter accuracy. I have taken a Contarex Bullseye, rebuilt it, and
then studied it carefully for over a year. This study has convinced
me that there is no way to make the controller to be accurate enough so
that the camera can be used reliably with narrow exposure latitude film
such as transparency film except at certain shutter speeds which will vary
from camera to camera. The camera just cannot be brought into the
1/10 f stop tolerance required for this film at all shutter speeds.
It can be accurate to within 1/10 stop on some speeds, but it will be out
of tolerance by as much as 1 f stop on others. Just exactly which
speeds will be accurate and which will not varies from camera to camera.
The cause of this variation is the variation in the sizes of the parts
used to make the controller for each camera.
The Contarex shutter is more than accurate enough for highly satisfactory use with modern high latitude color and black and white negative films. These modern films have a very high tolerance for moderate over exposure and the Contarex shutter tends to overexpose. So if you intend to use negative films you will not have any problems with this camera.
In any mechanism as complex as the Contarex shutter speed controller there are going to be instances of position that are non linear. There is no correction for this. In the Contarex speed controller there is an interaction between the rotating cam and the operation of depth setting of the chisel point that make it impossible to obtain an accurate 1/100 and an accurate 1/1000 simultaneously. The best that can be done is to have a 1/125 speed that is actually about 1/80 with a 1/1000 that is accurate or to have a 1/1000 that is actually about 1/1800 with a 1/125 that is actually 1/125.
General Observations about Contarex Lubrication
It seems strange to me that Zeiss would make such a big mistake about the choice of lubrication for use in the Contarex camera. The long and short of it is that of all the lubricants available on the market place at the time the Contarex was made, Zeiss chose made the biggest possible mistake and made the worst possible choice. Their choice of lubricant is clearly specified in the repair instructions for the Contarex Super Electronic. All I can say is that lubrication science is an engineering specialty which came out of the early failures of the space program. At the time of the Contarex lubrication engineering was still literally rocket science and had not yet filtered down into consumer goods as it has today. Much of the reliability with mechanical things that we take for granted today is due to lubrication engineering. It's just too bad the Contarex was just a few years ahead of its time.
Don't let your camera fool you into believing that it's in "okay" condition. The Contarex shutter will open and shut while it is in a condition where its main shutter control module is chewing itself to death. I recently overhauled a very early production Contarex that required a replacement shutter control module. The only source of replacement control units is parts bodies which are currently scarce and expensive.
The shutter speeds are all controlled by a single module which also contains the film advance gearing. This module does a lot of work. It takes the off center force of the advance lever, absorbs the stress of the shutter tension springs, takes the force of the lens aperture positioning spring, and controls the shutter speeds. It takes a tremendous amount of stress and strain. These factors combine to make it liable to accelerated wear when it is used with deteriorated lubrication.
Zeiss used a very early form of molybdenum disulfide (MDS) grease in the Contarex. This is a primitive version of the same grease used in the wheel bearings of modern cars. This grease is a mixture of regular lubricating grease and powdered MDS. MDS acts like graphite. Just like all other natural petroleum based greases the MDS grease Zeiss used in the Contarex began to deteriorate about 10 years after the camera was manufactured. After about 20 years (early 1980's for most Contarexes), all the oil had migrated out of the grease and the lubrication points of the camera were dry with sticky deposits of grease residue with MDS.
Contarex cameras all look good for a very good reason. This is that the oil that migrated out of the internal lubricating grease eventually found its way outside of the camera and covered the camera exterior. This oil film protected the exterior metal and leatherette from oxidation. This process happens so slowly and the oil migrates so slowly it isn't noticed. But it happens and has happened to every Contarex that has ever been made.
Here are some pictures of the shutter speed control module. The first picture shows it as it is mounted in the camera underneath the wind lever. The wind lever assembly attaches to the three equally spaced screws in the center portion of the large brass flange at the left.
You can see the light meter adjustment cords at the top. The shutter speeds are set by rotation of the outermost brass flange with the two unequally spaced larger holes that are off center of the larger brass flange.
This is a picture of the module removed from the camera. It shows the inner gearing that connect to the shutter curtains. You can see four gears stacked on top of each other. The uppermost gear connects to the right shutter curtain. The second gear from the top connects to the left shutter curtain. The third gear down drives the film advance mechanism and the upper two gears; and the fourth gear mates to the tension spring for the slow and medium speed shutter speed control section of the module. To give you an idea of the sized of this component, the largest brass disc on the top of the unit is the same diameter as a quarter.
I'm sure that you can easily see that the main wear point of concern is the central shaft of this unit. It does all of the work. When the central shaft becomes excessively worn the third gear down becomes loose and wobbly. As it wobbles it can disconnect from the second gear and the shutter curtain synchronization can become permanently lost. This is what happened to this control module. It is worn out. It's one that was replaced recently. It cannot be repaired and is good only for the purpose of being used to illustrate this document.
It is not possible to repair your module if it should be worn out. There are no spare parts available. The only Contarex cameras I know of that have properly lubricated ( and protected) shutter speed control modules are the ones I have overhauled.
The Contarex Light Meter Exposure Control System
The main design defect with the Contarex exposure control system can be summed up in one photograph. This is a close up view of the light meter cell on the front of the camera when the camera aperture control is set at f 2.0 which would be the case when the ambient light is normally bright This picture shows how the cell would look in a normal bright light situation.
The aperture over the photocell acts to reduce the effective size of the cell. This is the size of the cell aperture when the light is bright. The actual size of the aperture opening under these conditions is smaller than the size of this "o". It is not possible for a photocell the size of this "o" to produce enough voltage, no matter how bright the ambient light, to move a meter needle with sufficient force to overcome the mechanical friction and electrical resistance inside the meter. The use of the aperture over the photocell was perhaps the largest mistake the Contarex designers made. The long and the short of it is that it is not possible to accurately calibrate the Contarex light meter so that it is both accurate in bright light and accurate in low light because it is physically impossible for it to be accurate in bright light. The Contarex light meter is inherently non-linear. It is only possible to accurately calibrate it in moderately dim light and to know that the meter will become ever more inaccurate as the light level becomes brighter or dimmer than the calibration point.
But it gets worse. Here is a picture of the cell cover that was provided with the camera.
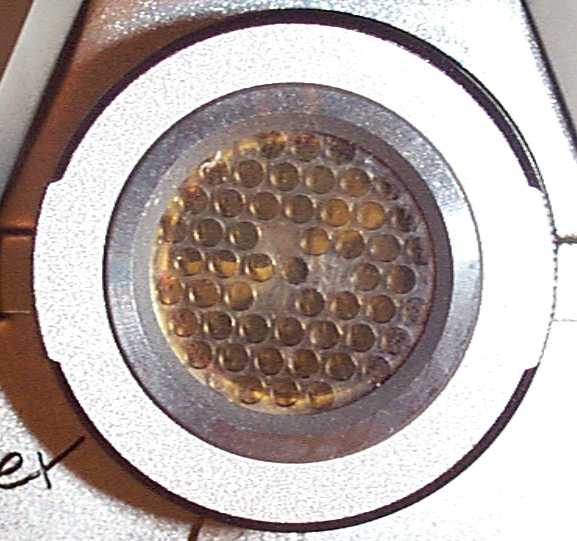
It is colored to absorb light. The concept for it, as explained in the Contarex instruction booklet, is that the Contarex light meter was so sensitive that it needed this absorption filter over it in normal circumstances; and that in dim light the sensitivity of the meter could be increased 16 times by removing this cap.
These two mistakes were supposedly corrected by the choice of the meter used in the Contarex. It is extremely sensitive, and its indicating span is only about 1/50 (one fiftieth) of an f stop which is an extraordinarily narrow indicating range.
This is a picture of the top of the Bullseye light meter. At the right you can see the rotating cam that translates shutter speed and film speed control settings into meter input. The way the meter works is much like the meter on the Contax IIa and IIIa cameras. An internal spring acts against the action of the meter needle so that when all the inputs of cell voltage, film speed setting and shutter speed are balance the needle will be precisely between the two red arrows.
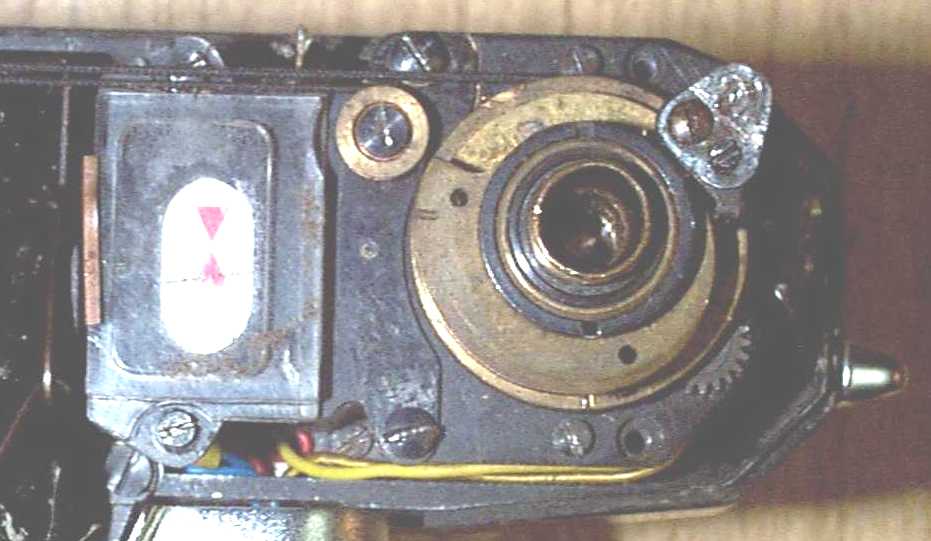
But there is a problem with this. The meter is not compensated for the non-linear decrease in cell voltage caused by the covering of the cell by the cell iris. In order for the meter to be accurate the spring inside the meter would also need to become weaker as the size of the aperture hole over the photocell becomes smaller. The situation is that there is no such thing as a "perfect" meter. The Contarex meter is not a perfect instrument. It has bearings and internal friction and electrical resistance. While these are small, as the cell voltage becomes less and less as the aperture opening over the cell becomes smaller, these forces become proportionately greater. When the cell is almost completely covered, as is the case in moderately bright light, the internal mechanical and electrical resistance become so great as to become predominant and the metering system looses all of its accuracy.
You will note that I have not refereed to the Contarex exposure control system as a light meter. It is not a light meter. It is an exposure control system because the indicating span of the meter is so incredibly narrow, being about 1/50 of an f stop, that it can only do one thing and this is to provide you with its idea of the correct exposure and nothing else. The Contarex light metering exposure control system can tell you nothing about the ambient light situation as a regular light meter can.
All of the Contarex owners I have spoken to about the Contarex, all of the Camera Dealers, and the Zeiss Literature concerning the Contarex refer to the "Contarex Light Meter". The Contarex system is that it is not merely a light meter. It is actually the first single lens reflex camera exposure control system.
If you look at a classic hand held or camera light meter such as the Zeiss Ikophot or the Contax IIIa light meter you see that these meters really provide exposure recommendations. The photographer can use, ignore or change the reading indicated on the meter. There is no direct connection between the aperture control on the camera and that on the meter and there is no direct connection between the meter and the shutter speed control
The Contarex light meter component of its exposure control system uses actual shutter speed and aperture settings as inputs. Also, the output of the meter has no calibrations so that the photographer can judge the output in the same manner as he would with a normal light meter. It is very inconvenient to determine the meter recommendations because the span of the meter needle is extremely narrow and its sensitivity is very great.
Here is an illustration of the Contarex exposure control system and its various parts. You can plainly see that it is distributed throughout the camera and is not merely a light meter as the term is commonly understood:
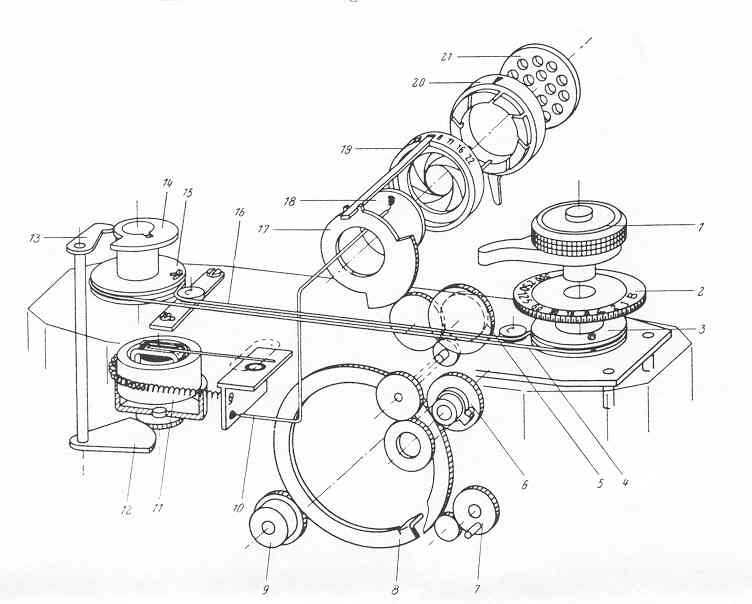
The Longevity problem with the Contarex Light Metering System:
The following picture shows a cutaway diagram of the side of the camera with Contarex light meter:
You can see that the rewind shaft is split by the light meter. There is a gear system that transmit the rotation of the rewind knob to a shaft that is behind the meter. The shaft that connects to the rewind knob is held in a brass housing that is bolted to the top of the light meter. This shaft and the gear at the end of it are well lubricated with grease.
As the camera is used the grease becomes acidic and dissolves tiny amounts of copper and tin out of the brass housing. Wear products in the form of tiny particles of brass also become introduced into the grease as the camera is used.
Originally the grease is an electrical insulator. But as it ages and becomes contaminated with metals it becomes less of an insulator until finally it becomes a good electrical conductor. As the grease ages it begins to disassociate into its solid and liquid components of grease base and oil. This oil begins to leave the locations where it was deposited with the grease and move into other areas of the camera. When it enters areas, such as the light meter, where electrical components are located, it will cause electrical shorts which can severely diminish and finally destroy the accuracy and reliability of the components.
The problem with a Contarex light meter that has become contaminated with electrically conductive oil is that it is not possible to completely remove this oil. The Contarex light meter is a solid unit that has been riveted together and it cannot be completely disassembled as the meters in other cameras can. The only possible solution is to clean the meter in a solvent that will dissolve and remove the oil. The problem with this approach is that I have not yet been able to find a solvent which will remove the oil and at the same time not attack the insulating paint that was used to coat the fine wires inside the meter. So as it stands a Contarex light meter that is ruined by oil from deteriorated grease is not repairable and the only possible repair is a replacement meter from a parts camera that has not yet lost enough oil from its grease to ruin the meter.
The Shutter Speed Setting problem:
When Zeiss designed the Contarex exposure system meter it designed it with the assumption that the shutter speeds produce by the camera would be accurate. We know this is not true. The result is that even if all other parts of the metering system could be made to be accurate, the inaccuracy of the shutter would cause major problems with camera performance.
When the meter speed setting dial is rotated to set a film speed, or when it is rotated to set a shutter speed the effect upon the meter part of the light sensing system is the same. There is only one shaft that enters the light meter and it is rotated by the movement of the film speed control knob and the shutter speed control knob. Hence, an inaccuracy in actual camera shutter speed performance has the same effect as incorrectly setting the film speed setting.
The meter system light sensing cell:
The Contarex Bullseye uses a selenium type light sensing cell. This type of material is no longer used in photographic use today. The selenium type of cell directly generates electricity when it is struck by light and does not need a battery. The brighter the light, the more electricity it produces. But selenium has three properties that the Zeiss designers did not take properly into account when designing the Bullseye light meter system because the effect of these bad properties were negligible in routine photographic practice. Normally, these three properties did not have any effect because the physical size of the photocells was large enough so that the good property of light generation would overwhelm the bad.. It was the use of the variable iris over the cell that caused these bad properties to become important in the Contarex. They became more important as the cell iris closed. The reason for this is that the physical size of the cell determines if the bad properties of selenium are large enough to be important. In most meters and cameras the size of the cell was large enough so that these bad properties could safely be ignored. The Contarex cell, even when its iris is fully open, is on the borderline. It is just large enough to be small enough so that even if it is made a little bit smaller by the iris closing the bad properties of selenium begin to become important to the accuracy and linearity of the Contarex exposure control system.
- The first important property is that the selenium cell has a maximum voltage of 0.40 Volts. This is called its "saturation point". This means that there is a value of light brightness at which if the light brightness is increased the cell will not produce an increased voltage.
- The second important property that acts against the accuracy and linearity of the Contarex meter is that selenium is an electrical resistor. This means that when electricity has to travel through selenium, the selenium resists the flow of electricity through it. This resistance property is also light dependent. The less bright the light, the greater the resistance.
- The third important property that acts against the accuracy and linearity of the Contarex meter is that selenium is relatively slow to respond to changing light levels and to produce more voltage with brighter light or less voltage with dimmer light. The speed of response can be increased by increasing the size of the cell. The smaller the cell area the slower the cell is to respond by increasing its output voltage in response to an increase in the light brightness.
The single aspect of the bullseye light meter design that insured the light meter would not function as it was advertised to do is the variable iris that was placed over the light sensing cell. This iris is connected to the lens aperture control and opens and closes in synchronization as the lens aperture opens and closes. The idea behind this is very simple. As the lens aperture is closed the light sensing cell is made to produce less electrical current by the aperture in front of it becoming smaller. The smaller voltage makes the meter require the input of a reduced shutter speed or faster film speed setting to bias its internal spring so that the needle will be placed between the red arrows.
So here's where Zeiss went wrong with the variable iris over the cell:
- 1. As the iris closes the cell becomes effectively smaller. The area in the center of the cell is illuminated and is producing electricity, but this area is tiny in proportion to the area of the cell that is in darkness. The electricity produced by the lit part of the cell must travel through the part of the cell that is a resistor to get to the cell output terminals. The overall effect is that the cell output voltage decreases in a non-linear way. As the aperture closes to its smallest point the cell voltage becomes so small the internal mechanical friction and electrical resistance of the meter itself become proportionately larger until they predominate the system and all accuracy is lost.
- As the iris closes the cell becomes effectively smaller and the cell response becomes longer and longer due to the covered part of the cell becoming an electrical resistor. At the smallest iris size the effective cell response time is about 30 seconds. The result of this is that there were many incorrect exposures due to the photographer not noticing that the needle was still slowly moving.
The Contarex Aperture Control
When one looks at a Contarex lens you see there is no aperture control on it. It has an aperture, but there is no control. In the Contarex system the aperture control is on the camera body and so also is the aperture setting indicator.
There is a problem with this system that must be taken into account by Contarex users. This problem is that it is not possible to obtain the same f stop setting accuracy with a system that uses a camera body control to set the aperture of the lens that is obtained when the aperture is set by a control that is part of the lens itself. The accuracy requirements of modern color negative film is 2.5 f stops for film that is processed into prints by a commercial processor. The inaccuracy of the Contarex aperture setting system is well within these limits and so there will be no evident problem if the camera is used with color negative film. But the accuracy requirement for modern color reversal film is about 0.2 f stops. With a worn camera and a lens with a sticky aperture control it is highly possible that the accuracy of the lens/camera system will be well outside this limit. The result will be fairly wide inconsistency in exposure quality.
It is also important to consider that as a practical matter it is extremely difficult to obtain manufacturing accuracy in separate camera bodies and separate lenses such that when any lens is mounted on any body the setting accuracy of the lens f stop will be the same from camera to camera and lens to lens. There is an inherent aperture setting inaccuracy contained within the Contarex system design. I have not yet been able to test enough cameras and lenses to get a good idea of the size of this inaccuracy.
Unlike all the other Contax cameras that preceded it the Contarex camera is a total integrated system that combines the body, shutter, light meter and lens together. When one looks at the Contax range finder cameras it is obvious that the light meter and the lenses are separate from the body, and can be thought of individually. But with the Contarex they are all one thing together. This means that when one is dealing with a Contarex that needs servicing all of it, including the lens, needs servicing and calibration in order for the part that appears to be causing the problem to be corrected.
This picture illustrates the aperture control system on the Contarex:
The gear train that leads from the control knob (No. 5) to the lens (big ring No. 8) contains 5 gears. Each introduces a small amount of play which is additive. In a well worn camera this play amounts to about 1/2 f. stop which means it is impossible to actually set the lens to an accuracy less than this 1/2 f stop. But the aperture indicator (No. 17) and the meter iris (No.19) have only two gears separating them from the the control knob and so they do not show this inaccuracy.
On the Bullseye body the aperture indicator is located on the top of the light meter light sensor cover. It does not display in the viewfinder, and so in order to see what aperture has been set on the lens one needs to remove the camera from the eye and move it so that you can look down on it. This is a great inconvenience. It makes it very difficult to use the camera if one intends to use it in the traditional method where one thinks of both shutter speed and aperture setting.
It seems obvious to me that the intention of the camera designers was that the user wouldn't need to do this and would rely entirely upon the exposure control system. And so the light meter system needle indictor was provided to display in the viewfinder. In this way one can adjust exposure to a correct value without the need to remove the camera from the eye. So the camera designers clearly intended that the photographer would not need to consider aperture settings and would instead rely upon the exposure control system display in the viewfinder. This fact elevates the Bullseye light meter from being a built in accessory to being a vital camera control component whose reliability and accuracy are key to overall camera performance. We take this for granted now, but it was a revolutionary development when the Bullseye was new.
The same control knob that actuates and controls the lens aperture also controls the light meter system. And the shutter speed control is also connected to the light meter system. So it is clear that all camera controls are interconnected. This means that when you have a problem with any one part of this combined system you have a problem with all of it.
The following two pictures illustrate the aperture system. The first picture is of the back surface of the camera internal front plate. On it you can see the gearing that leads from the control knob to the light meter sensor cell aperture control on the left. There is another gear set the goes downward from the chrome plated control knob to the brass gear on the bottom. These gears are not shown because they are mounted on pinions and are not attached to the plate. It is the brass gear at the bottom that mates with the lens mount rotating tab that couples with the lens aperture control.

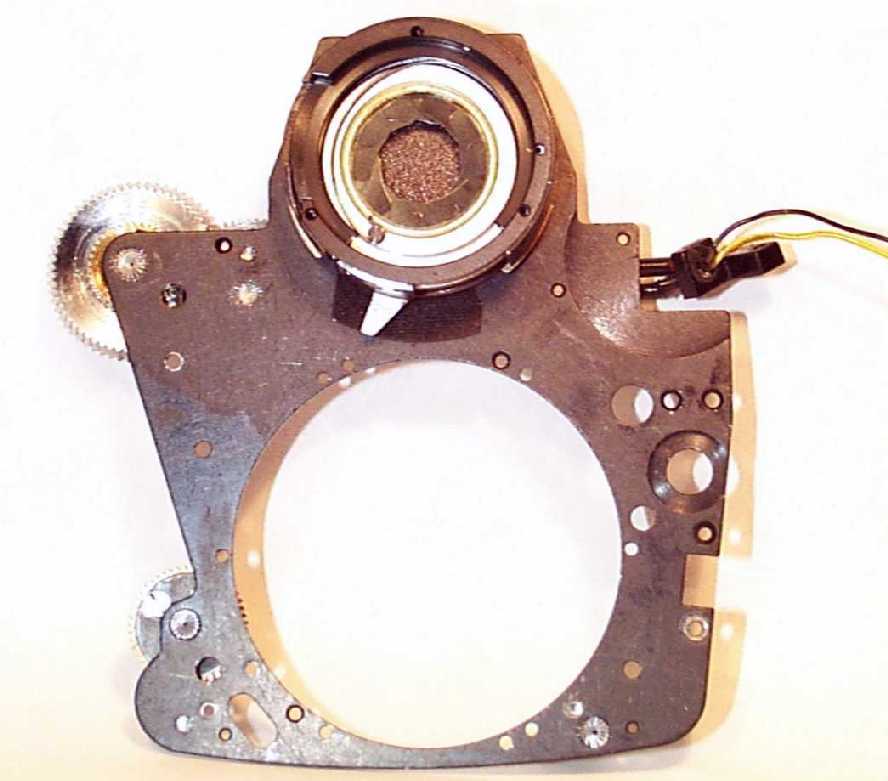
Please note that the surface of the front plate is not smooth and polished, but appears to be somewhat granular. This granular appearance is actually how digital photography resolves the very fine scratches that are the indication of a precision lapped surface. Lapping of the plates is indicative of extreme precision equivalent to that found in the finest watches. But when it is considered that the front plate of this camera is gigantic when compared to the equivalent plate of a watch, the cost of this precision in the Contarex becomes evident. It was the cost of this extraordinarily precision, and the use of molyplate grease that contributed to the doom of the Contarex camera line.
The Contarex Patent:
The following pages are scans of the original Contarex United States Patent. Just click on the miniature page to pull up the full size version:
Page 1:

Page 2:

Page 3:

Page 4:

Page 5:

Page 6:

Page 7:

The Contarex Electronic
The Contarex Super Electronic sold for about $9,300.00 in today's dollars when it was new. Just like the $30,000.00 professional digital cameras of today, very few of them were purchased by amateurs. This Contarex model was intended by Zeiss to be used by professional photographers and for the most part professionals purchased this camera. Professionals buy cameras to make money and so their cameras generally get used hard and get used up by the end of their tax life which is about 5 years. Most Super Electronic cameras were sold with a motor drive. Motor drives chew cameras up internally without mercy and without leaving a trace on the camera exterior. My guess, based upon my experience, is that out of the entire production of Contarex Super Electronic cameras perhaps no more than 100 of them were purchased by amateurs meaning they had a chance of surviving to this day without being used up within five years of being manufactured. The Contarex Super Electronic camera is rare and expensive today. This makes it a prime target for the artistic touches of the very talented fix up cheats who repaint cameras to make them more valuable on the market. The best advice I can give anyone about buying a Contarex SE is to never buy one for serious money without first running a roll of film through it.
A. The Contarex Electronic Shutter
Zeiss described the Contarex shutter in its literature to be completely electronic. Speeds are controlled by the use of circuits using resistor/capacitor combinations. Today modern electronic shutters used quartz crystal based timing devices. Because the Contarex Electronic was the first of its kind several new problems that were photographically/mechanically new had to be overcome. The first of these is synchronization between the operation of the mirror and the shutter.
In a purely mechanical shutter SLR camera getting the mirror and the shutter to be synchronized so that the mirror is fully "up" while the shutter opens and closes is relatively straightforward and had been fully worked out by the time the Contarex Bullseye came along. But with the Electronic there had to be an interface between the mechanical operation of the mirror and the electronic operation of the shutter to ensure proper synchronization. The way Zeiss solved this problem was to install an electrical switch that is actuated by a cam which is installed on the shaft that operates the mirror mechanism. This cam does not rotate. It is a very precise double eccentric assembly that is buried deep inside the camera. If an Electronic camera becomes excessively worn, the first place this wear is going to show is in this cam assembly. The result of this wear is uncertainty in the higher shutter speeds of 1/250 and 1/500.
The Contarex Electronic body sold for $500.00 in 1972. This is equivalent to $9300.00 in today's money. Typically these cameras were purchased by professionals who use them to produce income and who could then amortize the camera off of their taxes as a five year property. Professionals typically use motor drives on their cameras. Motor drives typically use up a camera in about five years. If you are in the market for a Contarex Electronic keep these fact is mind and be prepared to have reasonable expectations about its shutter.
Shutter Batteries:
The Contarex Electronic was designed to use two mercury cell 1.5 V cells to power the shutter. In combination these were wired in series to provide 3.0 V to the shutter electronics. Mercury cells have a property of holding maximum voltage accurately until they are used up then the voltage quickly drops to zero. Mercury cells are no longer sold in the U.S.A. and the only substitute available today is the "N" Alkaline 1.5 V cell. These work well, but the battery condition indicator light is not accurate when the camera is used with these batteries. The reason for this is that the Shutter will perform well at a voltage as low as 2.6 V. But the battery condition indicator light will be nice and bright at voltages as low as 2.0 V. The light was designed with mercury batteries in mind where if the cells could light the bulb they were probably providing 3.0 V. But alkaline cells have a long life where they slowly loose voltage as they are used. Alkaline cells become useless due to low voltage vs. no voltage as is the case with mercury cells.
The lowering voltage of alkaline cells will have a tremendous effect upon light meter accuracy on the Type 1 model Electronic Body. It is important for your camera's light meter to be calibrated at a specific voltage and then to test the batteries regularly to ensure that the battery voltage is consistent with meter accuracy. Modern batteries should be changed out based upon meter accuracy considerations and not whether they can light the battery check bulb or provide good exposure accuracy as measured on a shutter tester.
C. The Contarex Electronic Meter
The Contarex Super and the Super Electronic share the same meter with one exception. In the Super the shutter is mechanical and so the meter had to be powered by a separate battery. Zeiss elected to use the typical PX-625 mercury "button" cell in the Super. In the first version of the Electronic body Zeiss decided to simplify things by using the shutter batteries to also power the meter. This turned out to be a bad idea for a number of reasons one of which was the shutter used the batteries up far more quickly than they had calculated with the result being a meter that acted badly. A design change was made to install the Super type meter assembly in the Electronic so that the meter was powered by a button cell which resulted in the Type 2 Electronic Body. The result is there are two versions of the Electronic camera body. My guess, based upon experience, is that there were probably no more than 1,000 type 2 bodies manufactured.
When Zeiss designed the Contarex Electronic they believed that this was the perfect camera. Unfortunately, the meter sensing cell has a peculiar flaw which has only recently been discovered. This is that the light sensing cell used in the Contarex Electronic has a 4.0 f stop insensitivity to the light emitted by the camera tester tungsten precision light source. This means that it is not possible to calibrate the Contarex Electronic light meter on the test stand. The only way to do it is to take the camera out of doors with a camera tester and to perform the calibration in natural sunlight.
The meter also has a bias in favor of green light. The amount of the bias is 2.0 f stops which is present both in dark shade and bright light. The shade of green to which the cell is specifically over sensitive is the color of dark foliage such as well watered and kept grass, cypress, pine and shrubbery. The cell is also under sensitive to red light, but this red lack of sensitivity is only about 0.7 f stops. The meter cell is neutral to blue. Given that much of photography is in the outdoors, and that much of the outdoors contains dark green foliage in it, and considering that the placement of the metering cell in the Contarex Electronic is such that it aims above the center of the frame, it shouldn't surprise anyone that the Contarex Electronic tended to underexpose by about 1.5 f stops. The Contarex Electronic was intended to be a camera used by professional photographers. Professionals tend to use color transparency film. Transparency film needs to have an exposure accuracy of +/- 0.2 f stops. Overexposing transparency film by 1.0 to 2.0 f stops provides useless results and so the Contarex Electronic was a failure as a professional camera.
This fault in the light meter system has gone undiscovered until a happy accident disclosed it to me a short while ago.
It is possible to set the Contarex Electronic so that in normal use exposures +/- 0.5 f stop of the correct value are routinely obtained when the camera is set by the camera meter. But this requires a difficult and complex procedure that uses a camera tester used in the outdoors to calibrate the meter to normal scenes. The extreme color sensitivity of the CDS Cell used in the camera ensures that if the meter system is calibrated on an electrically lit precision light source the results will be bad.
Zeiss understood about color sensitivity of light sensing cells for its light meters. It invested a lot of time and money to develop a selenium cell for its rangefinder cameras which were color balanced. My feeling is that when their designers specified the parts for the Contarex Electronic light meter they specified that a color neutral CDS cell would be necessary. But there is always the conflict between the design and the reality of what can be obtained. Clearly a color biased cell was used and I'm sure that if Zeiss had known it was color biased they would have recalled the cameras.
Every Contarex Electronic camera I have seen has many tool marks on the slot in the light meter adjusting variable resistor. These demonstrate that over the years many attempts have been made to get the camera to indicate properly. I'm sure most, if not all of these attempts were made with the camera mounted in front of a precision light source.
Contarex Electronic Light meter Interlocks:
The Contarex Electronic body has a reliability problem with the meter that is caused by all the electrical interlock switches that are between the batteries and the meter CDS type sensing cell. In the Type 1 Electronic body there are three switches in series.
1. Switch 1 is located underneath the wind lever. When the wind lever is put into the storage position this switch must be depressed so that the lever keeps it from rising. When the camera is wound the button rises sets the switch on allowing battery current to flow to the meter circuit.
2. Switch 2 is located behind the lens mount. It is actuated to on when a lens is put onto the body. It is also operated by the flash control ring that is present on a Blitz type flash lens (black body). If the lens flash ring is taken from locked automatic to set a guide number the meter is turned off by the lens mount switch.
3. Switch 3 is located in the bottom of the camera. It is activated by a lever that is connected to the wind mechanism and turns the meter on when the camera is fully wound and turns it off when the shutter is released.
All three of these switches are made of lengths of small diameter gold
plated brass spring wire. In the switch design the two contacting
pieces of wire are located crosswise to each other, with one piece of wire
being moved into or out of physical contact with the other by the
operation of the associated camera mechanism. There is a big reliability
problem inherent in this design and it is very simple, but subtle.
When two small diameter pieces of round wire are brought into crosswise
contact with each other, the area of physical contact is almost infinitely
small. This means that for the switch to be reliable, the contact
must be absolutely perfect. This is always a difficult thing to achieve.
With three light meter power switches of this design being in series the
possibility for unreliability is very great. This is probably the
main reason why Zeiss abandoned the shared battery concept in the Type
1 Electronic Body and went to a simple button type battery in the Type
2 and abandoned two of these interlock switches.
Contarex Electronic Booby Traps:
Zeiss did not design the Contarex Electronic with its fate some 40 years in the future in consideration. The shutter control electronic circuit boards are dispersed through the camera. In most cases it is necessary to remove a circuit board or two to gain access to mechanical components. The circuit boards are connected to each other with short lengths of small diameter solid copper wire. This copper wire is made of an alloy having a large enough percentage of phosphorus so that it is age hardening and by now it's about as hard as it can be. When the circuit boards are manipulated, however carefully, bending stress is applied to the connecting copper wires. These copper wires have a very small, very limited and unknowable, number of bends they can withstand before they begin to break. When you buy a Contarex Electronic there is no way of knowing what its maintenance history may be. There is no way to know how many, if any, of the many small brittle copper connecting wires are one bend away from breaking. It is this uncertainty that can make working on an Electronic to be a true nightmare. It is for this reason I am unable to accurately specify an overhaul cost for a Contarex SE in advance. All I can say is that the owner and I will know the cost for sure when the work is done.
