Zeiss Ikon Contax Camera Repair
A home for your Zeiss Ikon Contax, Contarex or Super Ikonta camera!
Body:
- What Condition is Your Camera In Now?
- What is the Contax?
- Contax Shutter Accuracy in a Camera Today?
- What is Shutter Bounce or Blanking?
- What is the Difference Between a Black Dial and a Color Dial Camera?
- Can a Black Dial Camera be Converted to a Color Dial Camera?
- Can Anything be Done for a Gouged Eyepiece Bezel?
- Why is Zeiss Chrome so Bad?
- Can Anthing be Done for Bad Paint?
- Can I have a Camera Custom Built?
- How Should I Care for My Contax?
- The Illustrated Camera
- Why is Zeiss Chrome so Bad?
Rangefinder:
- The Rangefinder Wheel is Hard to Operate, What is the Cause of This?
- The Focusing Helical Seems to Have a Lot of Clearance, is This Normal?
- Why don't the images in my viewfinder and rangefinder line up right?
- The rangefinder image is badly faded, can it be restored?
- My Pictures are Fuzzy. Is it the Lens or the Rangefinder?
- There is a Defect in the Rangefinder Image, Can this be Corrected?
Shutter:
- Pictures of a Shutter Disassembly
- Pictures of a Shutter Assembly
- Why Does the Color Dial Model Shutter Not Release Sometimes?
- What are Shutter Tapes?
- What is Shutter Capping?
- What is Shutter Bounce?
- My shutter appears bent, what causes this?
- Shutter Cocking and Film Advance
- How do you clear a Jammed Camera?
- Why Does the Self Timer Interfere with 1/1250 Speed?
- How are Shutter speeds set on a IIa or IIIa camera?
Lightmeter:
- The IIIa Lightmeter Explained
- My IIIa LIghtmeter Doesn't Respond to Light At All, Can This be Repaired?
- The Needle on My IIIa LIgtmeter Sticks, Can this be Repaired?
- The Response of My Lightmeter to Light is Intermittent, Can this be Repaired?
- Can the IIIa Lightmeter Photocell be Rejuvinated?
Lenses In General:
- How Should a Lens be Cleaned?
- What Can be Done for a Filter Ring Dent?
- What is an Opton Lens?
- What is a Red "T" Coating?
- What is the difference between a Zeiss Opton and a Carl Zeiss Lens?
- Why are there Bubbles in the lens elements in my lens?
- What is Lens Fungus and What Can be Done About it?
- There is Oil on the Aperture Blades, is this Important?
- Can a Badly Scratched Front Element Surface be Repolished?
- What is Lens Element Separation or Cement Failure and What Can be Done about it?
- Can Nikon Lenses for the Nikon Rangefinder Cameras be Used on Contax Cameras?
- Can Jupiter Lenses for the Russian Rangefinder Cameras be Used on Contax Cameras?
- The 85mm f4.0 Sonnar
Leather:
- Where Can A New Camera Case Be Found?
- What are Zeiss Bumps?
- Can Zeiss Bumps Be Removed?
- Can Damaged Original Leather Be Replaced?
- "Zeiss Bump" Removal from Leather
Emergency:
Overhauling A Contax IIA/IIIA Body
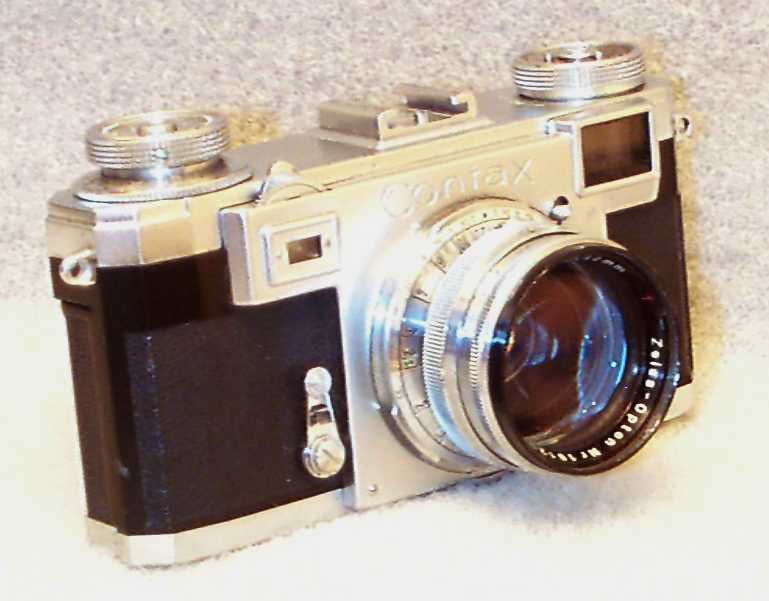
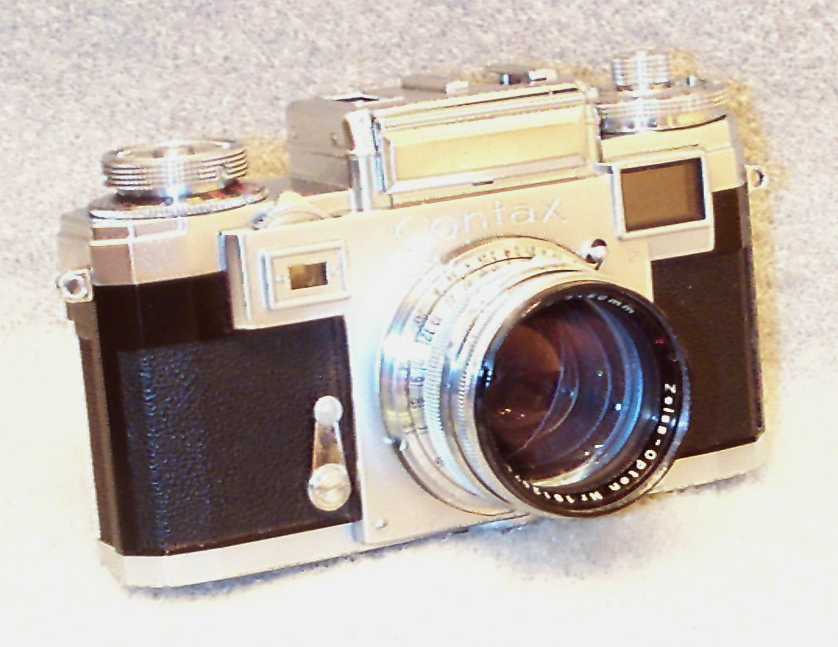 It doesn't matter how bad the condition of your Contax IIa or IIIa
is. Chances are
it can be economically repaired to its full inherent performance
potential. The camera overhaul pictures on this page are of the winterization
rebuild of a Contax IIa that had been stored for a very long time in damp
conditions, had originally been defective from the factory and never worked
properly. It had been worked on many times by unskilled technicians
and at some time the winding knob had been forced backwards doing severe
damage to many delicate parts. It was restored to completely reliable
smooth and accurate operation.
What Condition is Your Camera in Now?
The First Assumption:
When a person buys a Contax the first assumption is based upon the assurance of the seller. In most cases the seller will describe the camera to be "working". This can mean anything. The problem is that the Contax was manufactued back before modern methods of quality control. This means it can have a great variety of problems resulting from improper part selection during the camera assembly process. It can also suffer from bad maintenance practices and the desperate attempts by others, over the years, to correct a serious factory defect. This is ilustrated by this picture of the lower shutter curtain of a Contax IIa received here for overhaul:
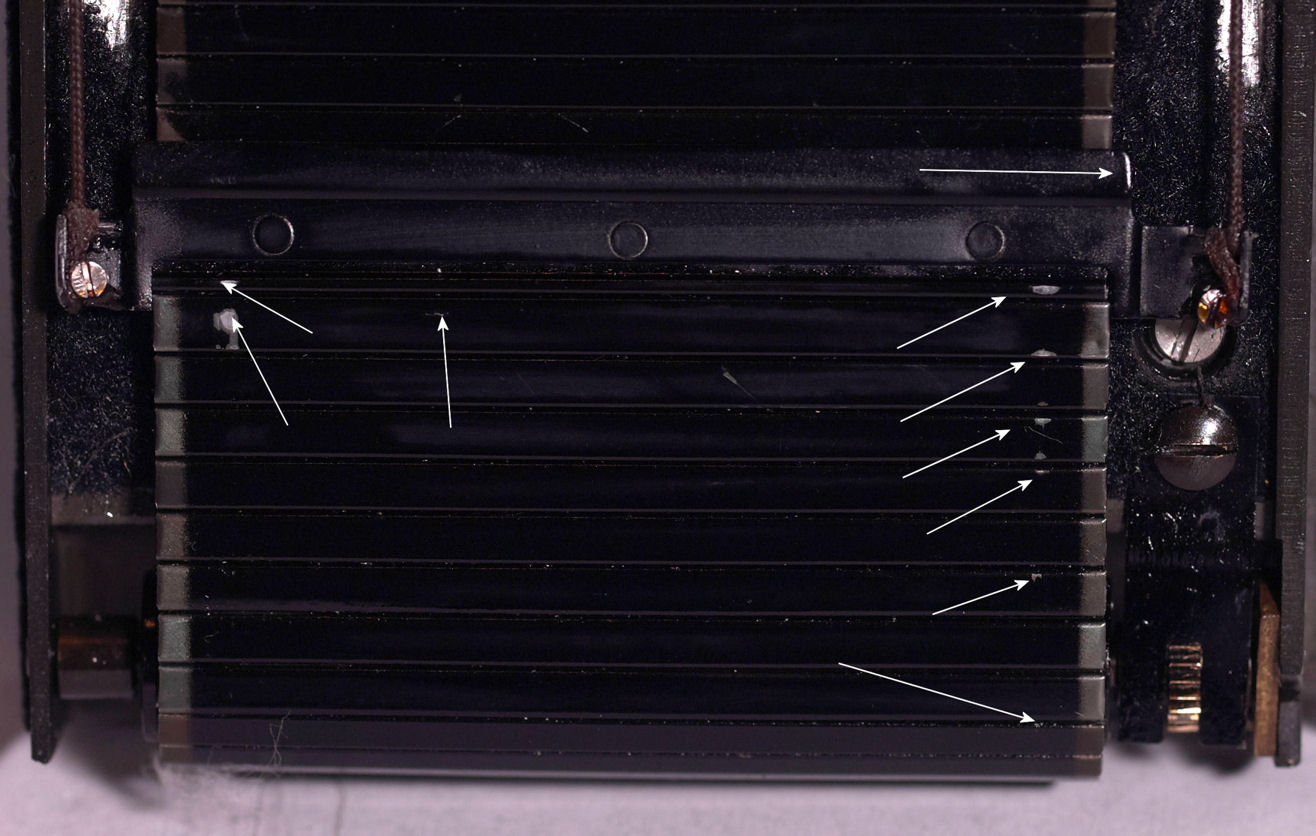
The white arrows show where the shutter curtain has rubbed against the inside of the camera body over the years. This particular shutter is an extreme case of this factory defect. Over the years workers over tightened the shutter springs and saturated the camera with cheap machine oil in their attempts to correct this shutter speed problems this rubbing causes. The over tightening of the shutter springs ruined them and the cheap machine oil ruined the camera leather. It was also necessary to lavish eight hours of filing work inside the camera body to remove enough metal so that the curtain would not rub when it descended. This was an expensive and labor intensive camera to repair. When you buy a Contax there is no way to know what is going on inside it or what has been done to it over its past fifty or more years of history.
External Condition:
There is a very serious reason why we go the extra mile to thoroughly clean, sanitize and polish the exterior of every camera that comes here for service. It is called basic sanitation. The exterior of your newly purchased, but used for about 50 years, Contax is filthy dirty beyond description. Bacteria, viruses, skin oil, just plain filth, and who knows what else has been layered on it year after year. Look at the milling of the speed control dial and you'll see a thick brown buildup. This covers the entire camera. It's just a uniform coating and so it's not as evident as it should be. My attitude is simply that it would be the absolute height of carelessness verging on a crime, to allow you to take such a thing, put it in your hands, and then raise it to your face or to allow you to handle it and then go have a nice sandwich.
Every camera that comes here is cleaned thoroughly inside and out to ensure that it is as clean as it was when it was new. I can tell you that I wash my hands thoroughly before starting the assembly of a Camera out of freshly cleaned parts. This is why all the exterior parts are ultrasonically cleaned. It is why all the leather is carefully dry cleaned and given a fresh outer surface.
A dirty camera is just loaded with allergens. It is more than likely that many people have suffered needless allergy and asthma attacks from a dirty camera. This can't happen with a camera that's been overhauled here.
Your continued good health is part of the reason it takes longer here. We don't do anything that is not necessary but we do things which are not obvious. Your fingers can tell the difference. They know what's clean and what's not.
Internal Condition:
The condition that counts the most is the internal condition. There are no spare parts available for the Contax IIa or IIIa other than replacement meter cells for the IIIa, and parts taken from other camera bodies. Each and every part in your camera is virtually irreplaceable. If your camera has not recently been completely disassembled, cleaned and lubricated it is very dirty with many parts grinding against each other dry. There are particles of old film and metal meshing with the gears, and accelerating the wear. Think of what your car engine would be like today if it was a 1956 model and you had driven it continuously since it was new, without adding any oil or having the original old oil changed. This is what the inside of your camera is like now. The following pictures demonstrate what the inside of a Contax IIa looks like even though the camera body appears cosmetically mint from the outside:
The first picture on the left is of the inside of the camera underneath the shutter speed control knob. The original grease became acid and has removed the nickel plating from the components inside the camera body. The middle picture is of the underside of the film speed reminder disk that is located on top of the rewind knob. You can see the grease became acid and has removed the chrome and nickel plating from the underside of the disk. The rightmost picture is of the front of the same disk showing that you cannot tell what the inside of the camera is like from looking at the outside.
The simple fact is that Zeiss designed its cameras to have periodic maintenance that included lubrication of the moving parts. The following two pictures illustrate this.
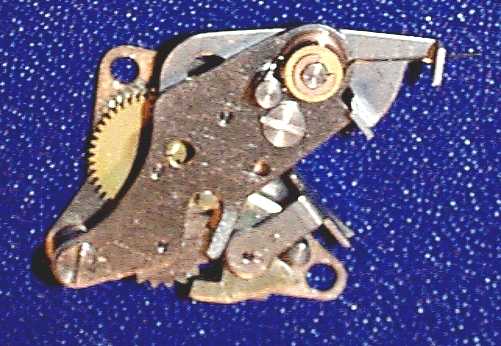
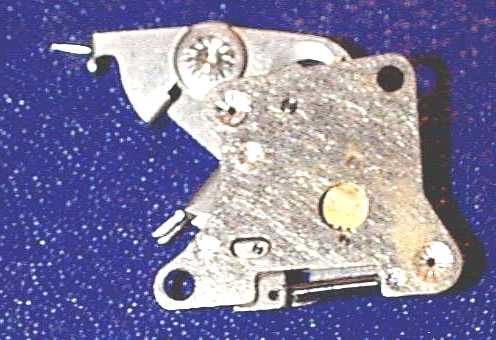
These pictures are of the middle speed escapement. This is the fourth and final version. Zeiss went through four changes to this very important part of the camera during the span of IIa/IIIa production. This is the timer that controls the shutter speeds between the speeds of 1 second through 1/100 second. It is shown in the left picture to be right side up and aligned as it normally is positioned when in the camera. On the right it is upside down. In the right picture at the bottom left you can see a small oval cutout that exposes a small bearing pivot. The only reason Zeiss would have made that cutout to expose that pivot is to allow that pivot to be lubricated with a very small drop of oil. So Zeiss designed the camera to be periodically lubricated. The question is, just how often? The answer is no longer than five years. The reason for this is that with the finest quality watch lubricating oil being applied to a freshly cleaned bearing, the oil will only stay in place for an absolute maximum of five years.
The question then arises, just how was the camera originally lubricated at the Zeiss factory when it was originally assembled. I have been able to examine enough Contax IIa and IIIa cameras that have been presented to me in unopened factory original condition to be able to answer this question conclusively. Zeiss lubricated its cameras very badly if at all. I have seen cameras that have had absolutely no oil or any signs of grease in them and appear to have never been lubricated ever. I have also seen cameras that were originally over lubricated, and I have seen cameras that were improperly lubricated. These problems are complicated by the fact that Zeiss seemingly did not think much about the kind of lubricants that would be used in the post war Contax cameras. I say this because I have observed that Zeiss used three types of grease in the Contax IIa and IIIa cameras.
Type 1 grease is a red colored grease that dries to a sticky hard transparent deposit. About 1 out of five cameras appear to have been lubricated with this grease. This grease appeared to have been useful for a fairly long time and was obviously appropriate to use in the camera.
Type 2 grease is a pale yellow colored grease that appears to be the same optical damping grease that was used in its lenses. It is usually virtually completely consumed by bacteria. About three out of five cameras appear to have been lubricated with this grease. It wouldn't last long in regular service.
Type 3 grease is molybdenum disulfide grease equivalent to that used in modern automobile wheel bearings and constant velocity joints. About one in five cameras appear to have been lubricated with this grease. It quickly decomposed to release its oil leaving a thick sticky semi hard deposit composed mostly of molybdenum disulfide powder and grease base. The use of this lubricant in a camera is so adverse to its proper operation I can only conclude from the fact it was used in a significant number of cameras that Zeiss did not think much about what lubricants it used in its cameras.
I have noticed a correspondence between the cosmetic condition and the type of grease found to have been used in it. Those cameras which were lubricated with type 3 grease are the best looking and those lubricated with type one grease are the ones that look most used. This makes sense because even when it was fresh a camera lubricated with type three grease was incapable of taking a good picture. The rare camera with no lubrication in it is always the best looking. All of these I have seen are true classic mint rating as museum quality.
The good news is that your old camera can still be restored to better than new operating condition at a very reasonable cost. It is possible to restore your camera to like new condition so that you can use it regularly without fear of damaging it further. The way to do this is to have it rebuilt by me. The following series of pictures are of a Contax IIIa during a complete overhaul. These are provided to help you understand just how precise and delicate the internal mechanisms of this very special camera are, and why regular maintenance is necessary to keep it operating at its best.
What is the Contax?:
The Contax camera is something you almost cannot find anywhere today. It is a hand made camera fabricated of hand made parts. Don't let the outside fool you. The outside chrome, glass and black paint look very modern and machine made. But inside it is all hand made and hand assembled. This means that each and every Contax is different. Each individual camera body is the work of the original assembler. This explains why there are many very beautiful Contax bodies available for sale today. They just pass from hand to hand with each owner having to find out for his or herself that the camera can't take a good picture.
I think the following picture demonstrates better than anything else just how "hand made" each Contax camera truly is.
The brass part on the right is the foundation of the wind knob and shutter speed control. On the far right of it you can clearly see that two holes have been drilled into it, but only one has a threaded screw hole underneath it. The extra hole was a mistake. The person whose responsibility it was to drill the mounting holes made a mistake and drilled the holes evenly spaced at 120 degrees from each other. This was incorrect so an additional hole was drilled in the right place. This was an appropriate decision. This part is very complex and was exceedingly difficult to make. Note also that the parts in this picture have been ultrasonically cleaned and look just like new. This is what the inside of your camera will look like when you get it back from me.
Each and every part of the Contax camera was made by hand. And this part is not an exception, it is an exemplar. Zeiss designed its cameras with parts that are subtly exceedingly complex and filled with subtle curves and high tolerance cutouts. I am a machinist and have tried to count just how many machining operations would be required to make this part and the number is very large. I know that if I needed to make one it would be much easier and cheaper just to buy a parts camera. Only the most highly skilled machinists had the skills to make Contax parts.
I think it is a good general rule about cameras that cameras that take good pictures get used. The get used, bumped, knocked, scraped and scratched. The chrome wears off the edges of the control knobs, the lens mounts get worn, and the paint gets knocked off the edges. On the other hand, a camera that is highly sought after, is expensive, and doesn't take good pictures sits on a shelf and looks nice. This explains why there are so many beautiful Contax cameras available today. They were not assembled properly.
I have opened and restored enough Contax cameras to know the assemblers were not given much training or instruction. I have seen Contaxes that were assembled with virtually no lubricant, and those which were saturated with grease. The problem is that assemblers were paid on a piece work basis. With piles of new parts, each with varying size tolerances, assembling a new camera so that all the parts mesh right is a back and forth affair. The camera goes together, then it comes apart over and over again until finally it is all together. I guess a good assembler could have put a good camera together in one day. But at the piece work rates Zeiss was paying in the 1950's, one camera a day would not pay the rent. So, it is my experience that two out of every three Contax cameras ever made didn't work right from the day they were made.
It can take a lot of work to make that beautiful Contax right. This is what I do.
The main fascination about the Contax IIa and IIIa cameras is the 1/1250 shutter speed. This is still a very fast speed today. The IIa and IIIa cameras were capable of providing this speed when new if they were put together properly and most were not. But even if the camera never worked right from the day it was made the potential for this kind of performance is still there. All that is needed is the proper cleaning, the proper honing, matching and adjustment of parts, the proper lubrication and the proper adjustments.
It has been my experience that it is usually possible to restore a camera so that all the speeds are accurate to well within 1/10 stop or better. In perhaps two out of three cameras, when I test the camera after assembly the speeds on the shutter speed control dial and the speeds indicated on the shutter speed tester match exactly; die. 1/1240 = 1/1250 all the way down to 1 second. This is astounding performance that is equal to that available from modern electronically controlled shutters. It is a remarkable testament to the excellence of the quality of the shutter design.
Contax Shutter Accuracy Today:
The Contax shutters we have today have traveled through at least 50 or so years of time. In this period, all of the lubricants used in the shutter have degraded and oxidized; becoming hard and sticky. It is this stickiness that degrades the ability of the shutter to perform at the higher speeds. In most cameras, this problem is called "shading". When the camera is held up to the light and the shutter is observed, one can clearly see that both shutter curtains meet before the bottom of the frame. This is caused by the lower shutter curtain descending more slowly than it should. It is the sticky old lubricant that retards it's speed.
Another problem is that the parts have formed a layer of oxidation. This oxidation prevents the parts from attracting and holding the vital film of new oil that is necessary to restore proper operation. This is illustrated by the shutter curtain springs. This is a picture of the shutter springs in a Contax IIa/IIIa shutter. They were lubricated with grease when the camera was manufactured and by now this old grease has become hard and sticky. The old grease interferes with the movement of the springs lessening their speed and this affects the accuracy and long term reliability of the 1/1250 shutter speed. It also reduces shutter spring life because it forces the springs to be made much tighter to produce the same shutter speeds. It also affects shutter cord life because stronger spring tension means shorter cord life. During an overhaul these springs are hand cleaned with solvent to remove the old grease residue, then ultrasonically cleaned to remove oxidation so the springs will hold onto new lubricant. Then the assembly is lubricated with watch oil and finally the spring coils are painted with Swiss watchmakers spring grease. This is a lot of work but it is necessary because these springs are the heart of the shutter. In this picture the center spring coil is for the lower shutter curtain and the two side springs are for the two shutter tapes that pull down the upper curtain. These are very fine springs and are easily damaged by being over tightened. They can also loose strength by the camera being stored for a long time with the shutter cocked.

It is part of the normal camera aging process for the focusing wheel to become progressively harder to operate until finally it becomes painful to the finger. it is also possible that when the camera was originally assembled it was put together with a very stiff and rough focusing action.
There are six possible causes for hard, rough and noisy focusing action:
1. The first is dirt and environmental grime build up in the focusing helical threads in the lens mount.
2. The second is oxidation of the surface of the brass focusing helical threads in the lens mount assembly.
3. The third is the build up of fine dust in the helical threads.
4. The fourth is the drying of lubrication in the range finder assembly. A more infrequent cause is the drying out of lubricating grease improperly applied to the focusing helical threads by the original camera assembler or by a subsequent worker.
5. The fifth is that it is also possible for a very slight misalignment of the lens mount assembly when it is attached to the camera body to cause binding. This can also happen if the camera has been dropped. Frequently when a Contax has been dropped on the lens there will be no obvious damage to the lens mount assembly, but it will be distorted by the impact.
6. The Sixth is that it is possible for the surface finish and inner diameter of the stationary part of the focusing assembly to so match with the surface finish and inner diameter of the moving part of the focusing assembly so that they tend to catch against each other when rotation occurs. This possibility is the consequence of the use of an Acme type thread profile in the focusing assembly helical threads. Most, if not all, cameras ever made use the Acme type thread design in focusing assembly helical threads. The reason for this is that the Acme thread type design is very resistant to fouling by dirt and wear products. But it does require great precision in surface finish and component manufacture to avoid a thing called "juddering", which is what happens when moving parts catch and then move as they are rotated against each other. In some cameras the focusing assembly components were unfortunately mismatched with they were assembled.
The proper alignment of the focusing assembly to the camera body is highly critical to smooth and precise focusing action and feel. It can sometimes be extremely difficult to get this alignment just right because some cameras require a precision of one ten thousandth (0.0001"). The skirt of the focusing assembly mounts to the camera with five evenly spaced screws. Extremely thin spacing washers are placed beneath the skirt between it and the camera body at each screw. I have overhauled cameras that required no less than five sold hours of work to obtain a proper alignment of the focusing assembly to the body.
Fortunately is is possible in all cases to restore the focusing mechanism operating friction to better than when it was new. This is accomplished by careful ultrasonic cleaning of all the components, followed by the proper lubrication, and extreme care in the alignment of all the components when the camera is assembled. A distorted lens mount assembly can usually be restored to free rotation through the use of a great amount of elbow grease, fine diamond lapping compound and very thin spacing washers.
Zeiss was aware of the friction problem with the Contax focusing mechanism. I recently came across a Contax IIa with an experimental lens mount assembly in it. The focusing assembly had been made so the threads at the rear of the mount could be made to have a tighter fit than the threads at the front. This was done by the making of four equally spaced slits down the length of the helical. A groove was then cut around the rear circumference of the lens mount with a fine steel wire wrapped tightly in the groove to pull in the rear of the threaded section of the focusing assembly somewhat like a collet. The reason for this experiment was to obtain a looser fit at the front of the mechanism that would lower the friction combined with a tighter fit at a smaller portion at the back to increase the focusing precision lost by the looser thread fit. It didn't work from the factory. but I made it work through the use of much elbow grease and diamond lapping compound to lap the threads together to precisely the proper tolerance. It took about a day of very hard work to get it just right which explains why it was only experimental and was never implemented in regular production.
I can duplicate this in your camera if you would like to have absolutely spot on precision focusing action, but it will definitely not be cheap.
There is a very close connection between the tightness of fit of the focusing helical threads, the friction it takes to rotate the lens mount, and the degree of focusing precision that is possible. The looser the thread fit, the easier it is to operate the focusing wheel, the less precise the focusing. The average precision of focusing with a typical Contax is about four inches due to focusing helical thread tolerance.
It is part of the normal camera servicing procedure to use very fine diamond compound to polish the helical threads. The result is better than new focusing action. The extreme fineness of the compound I use does not increase the degree of focusing imprecision that is inherent in the mechanism.
No camera leaves here until its focusing action has the same feel as every other camera that leaves here and this is what I expect would be the standard of perfection at the Zeiss factory when the camera was originally manufactured.
What is the Cause of Focusing Helical Clearance or Looseness?
I frequently am asked why the focusing action on a pre-war Contax II or III is much smoother than that of a post war IIa or IIIa camera. The reason this is so is both simple and complex.
It is a fundamental law of camera design that long camera life comes from mating brass moving parts against steel parts wherever possible. Brass against steel wears better than brass against brass or steel against steel.
In the prewar Contax II and III cameras the focus system gear train from the range finder wheel to the rotating focusing helical is brass, steel, brass. And this works very well because the gears are all mounted to the camera body and can be mounted with great precision and firmness. This means that everything can be made so that wear to the moving part of the focusing helical is held to an absolute minimum. So the focusing action is very precise, tight and smooth.
In the postwar Contax IIa and IIIa cameras the focus system gear train is all contained in the range finder module. The range finder module is movable and must be adjusted when the camera is assembled. It is necessary to remove the range finder module to disassemble the camera for maintenance. The result is that it cannot be adjusted to the same degree of precision as the mechanism in the pre war cameras could. This inability to precisely adjust the gearing resulted in the possibility of accelerated wear to the gear teeth that are cut on the moving part of the focusing helical. Zeiss solved this problem by applying a "hard" chrome plate to the gear cuts in the rotating part of the focusing helical. The thick layer of chrome protects the underlying brass from accelerated wear caused by misalignment of the range finder module and its steel gear that rotates the focusing helical..
"Hard" is a technical term applied to chrome plating. It refers to chrome that is plated to a thickness where it is not transparent as it is in normal "decorative" chrome plating. Hard chrome plating is very expensive and very difficult to apply with precision to a complex surface like a focusing helical. It would not have been specified by Zeiss unless it was absolutely necessary. But hard chrome plating introduces a big friction problem.
When chrome is plated thickly (hard) it cracks and develops a microscopically rough surface. So hard chrome is not smooth like decorative chrome. This surface roughness increased the friction of the mating parts of the focusing helical and the only way to decrease the friction and keep the chrome plating was to increase the tolerance of the fit. Rather than do away with the chrome Zeiss decided to increase the clearance between the moving and stationary parts of the focusing helical which made them looser. But even though the clearance was increased the roughness of the chrome plated surface remains.
The good thing about hard chrome is that the microscopic cracks allow it to hold lubricant very well. So parts in valuable machines that must have a long service life, such as locomotives and nuclear submarine parts, are hard chrome plated. The problem with using most grease type lubricants on the Zeiss Contax focusing helical is that they do not decrease the operating friction because the surface area is so large. Most, if not all, lubricants provided by suppliers for photographic use actually make focusing harder when they are used in the Contax II and and IIIa focusing helicals. Oil cannot be used because it will not stay on the helicals and will quickly migrate into the rangefinder system and fog the viewfinder.
Fortunately, there is a solution to this problem. I have recently found a French watch grease that is so finely made and so light it will actually decrease the operating friction of the focusing helical. This grease provides a focusing action that is very smooth and fine, without excessive looseness, and very close to the feel of the pre war Contaxes.
It is a very common defect for a Contax IIa or IIIa camera to have a problem with the rangefinder where the viewfinder and rangefinder images have a vertical misalignment. In some cases this misalignment is so great it is impossible to focus the camera. This problem has been another reason for there being so many beautiful unused Contaxes for sale.
Zeiss used two different cements to hold the rangefinder module lenses in their frames. The first cement they used is a water soluble glue. This glue appears to me to be hide glue. It deteriorates over time and becomes very brittle. It cracks and crumbles into small pieces. This process leaves the lenses loose in their frames and the shifting of the lenses causes the image vertical offset. I see many cameras where modern plastic cement has been applied to this glue in an attempt to hold it together. This technique works for only a limited time.
The second cement is a black epoxy paste. This was used in later production cameras. This cement is very hard and permanent and holds the lenses tightly in place. Rangefinders in which Zeiss used this cement typically do not have image offset problems and will never develop them.
When a camera is sent here that has the water soluble glue I change it out with modern epoxy. This guarantees the rangefinder image alignment will be permanently correct.
There can be other causes for this problem. Sometimes when the lens cement problem is corrected one of these other ones becomes evident. You can see in the following picture a back view of the rangefinder module that shows the moving lens on the right. The misalignment of the viewfinder image to the rangefinder image can have three possible causes. The lenses can have been improperly ground, one or both lenses can have been cemented into their frame(s) upside down, or one or both lenses can be vertically and/or horizontally misplaced in their frames. It can sometimes be very difficult to diagnose the actual problem and then repair it. The alignment must be extremely precise and final adjustment of the lenses can sometimes take a week of cementing, moving a lens slightly, then recementing it. Compounding this is the small size and fragility of the rangefinder module parts.
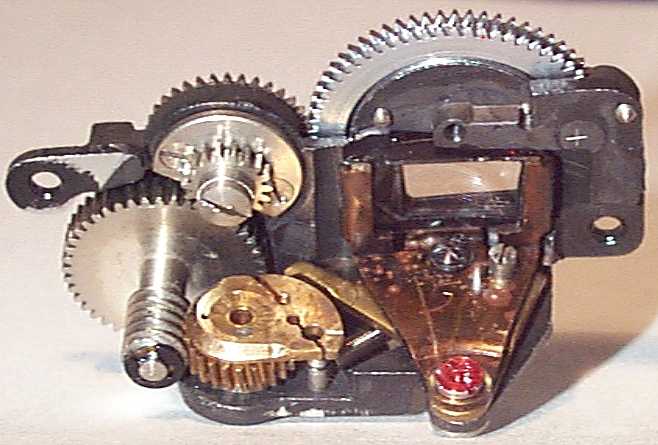
The range finder prism is a cemented optical assembly. The cemented prism is split at an angle midway between the viewfinder lens and the viewfinder window. One side of the prism was coated with a very thin layer of gold or platinum before the two halves were cemented together with balsam optical cement. It is this reflecting layer of precious metal that half reflects and allows light to transmit through it. If you camera has a gold mirror in its prism, the viewfinder view appears slightly greenish, and the range finder window appears gold. Light transmitted through gold appears green. If the prism in your camera was coated with platinum both the range finder and the viewfinder images have the same normal color.
The following picture shows two prisms for a Contax IIa/IIIa camera. One is complete, and the other has been separated to show the way the prism is put together.
The gold or platinum was deposited onto the surface of the glass through a process called "sputtering". This process deposits a very thin film of metal on a surface that is in a vacuum using high voltage electricity. It is virtually impossible to form the same quality of metal film by methods other than sputtering. Commercial sources are available for this service, but the price is prohibitive. The last quotation I was able to obtain was $450.00 per piece. Clearly, it is cheaper to purchase a parts body merely to obtain the prism from it.
If you have a platinum mirror in your prism, and you have compared the image in your camera to a camera that has a gold mirror in it you may be under the impression there is something wrong with your prism. The key measure of your prism is can you focus easily with it? If you can, and the viewfinder image is not light green, you have a platinum prism and there is nothing wrong with it. The contrast between the range finder and viewfinder images in a platinum prism is much less than exists in a gold coated mirror prism.
The best way to check a prism is to look into it with a magnifier from the front. A good prism will be clean and clear. One that is not good will likely show clearly evident mold growth, mottling and discoloration.
At the time of the writing of this I am experimenting with less expensive methods of restoring the Contax prism. If you have a bad prism and do not want to purchase a parts camera to get a good one, keep checking back. The day I have success this section will be updated.
There are a number of defects that can exist in the little rectangular rangefinder image in the viewfinder. They usually show up as black or blocked out portions of the rectangle. These defects can have a great number of causes, all of which will have the same optical result. Among these are chipping or damage to the prism end behind the rangefinder window, damage or chipping to the lenses in the rangefinder assembly, a broken and re cemented prism, paint defects, dirt, or a sticky film chip stuck on the prism end. It isn't possible to know the cause for sure without disassembling the camera.
Zeiss glued the eyepiece bezel into the top plate using a powerful thread locking adhesive. This makes it extremely difficult to remove under the best of conditions. Most workers don't know this and when they try to remove the eyepiece the attempt is made using a pair of pliers. The result is that the jewel like quality of the bezel knurling usually gets gouged and ruined, the chrome gets scraped off in places, and the finely finished annular section around the eyepiece lens picks up a number of very deep and ugly scratches. It's usually a big mess and nothing makes the value of an otherwise beautiful Contax go into free fall harder than a ruined eyepiece bezel.
Luckily a lot can be done to correct the situation. It is possible, using the proper special custom manufactured tools to remove the eyepiece assembly without damaging it further or damaging the top plate paint. Once it is out it is possible to skim cut and then apply new beaded knurling to the outer rim. The inner annulus can also be skim cut to remove scratches and gouges and then refinished to glistening perfection. All this can be followed by Rhodium plating followed by deep coat of diamond hard clear gunsmiths baking lacquer. The result will be like new with only a slight metal tone difference between the original chrome and the new Rhodium plating.
If your problem is a camera that is truly mint otherwise, and nothing but original perfection will do, bright chrome plating is also available at additional cost.
It is possible for the rangefinder to be the cause of fuzzy pictures, but not usually. My experience has been that the main cause for out of focus pictures is a misalignment of the lens element assembly within its body. The lens is made so that an adjustment for proper focus is relatively easy and straightforward if one has the proper tools and instruments to do it.
It is very easy to check the rangefinder. Check the split image against the engraving on the lens mount on the camera body. If the split image lines up properly on a far object when the lens mount is set at infinity; and then then also at one very nearby the rangefinder is operating properly and the lens is the problem.
The Contax IIa and IIIa cameras must be completely disassembled in order for the shutter to be completely serviced. This is the way Zeiss designed the camera. It is exacting and precise work. In the rest of this document you will see many pictures of the camera and shutter being disassembled for a servicing. What is in these pictures is not special. Each and every camera serviced by me is given the complete treatment it needs so that it will work right each and every time for many years.
The Contax IIa and IIIa shutter has several mechanisms that require adjustment. Unlike all previous designs, the more modern IIa and IIIa shutter design incorporates the ability to adjust the high, medium and low speeds separately. This provides for the greatest possible linear range. However, wear and abuse may limit the ability of a shutter to be adjusted to the original factory specifications.
The original shutter tapes were made to explicit design criteria for
Zeiss. The tapes used during a modern rebuild are the silk
tapes. They have a specific weave and dimensions. These
are not available today. Substitute material is used by many people.
Many people use rayon ribbon obtained from craft supply houses. There
are three problems with this tape. The size is usually incorrect,
the material stretches under tension, and it is not durable. Only
silk provides the required durability and resistance to stretching under
tension. Only the required dimensions result in the proper friction
when the tape slides through its slots in the upper shutter curtain.
I use new silk shutter tapes made to the same specifications as the original.
I am sorry to have to say I cannot sell any. The supply is sufficient
only for my needs.
The following picture is of a special tool used
to set the shutter tape length:
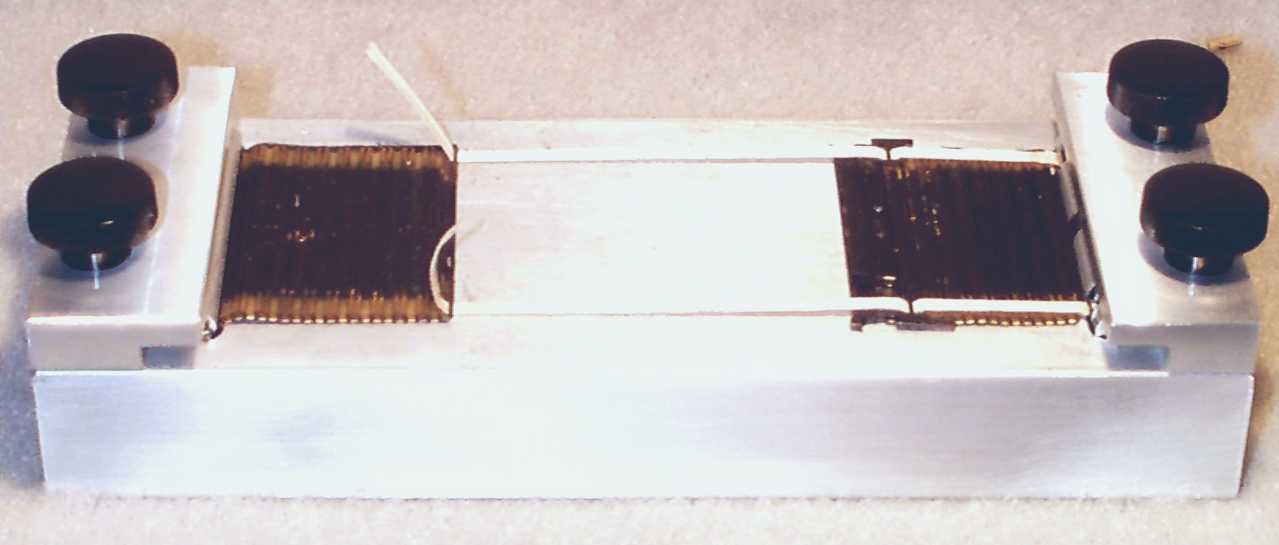
This fixture ensures that the shutter curtain edges will be absolutely parallel during exposure. It also demonstrates that to repair Contax cameras, one must be able to afford, or to make all of the special tools required to ensure the job is done right the first time. Tool design is a separate specialty and requires some time since none are available to copy.
Color Dial Model Shutter Reluctance to Release:
The shutter release mechanism of the Color Dial Model IIa and IIIa cameras is much more complex than the one in the Black Dial model cameras. The Color Dial shutter release mechanism contains two electrical interlock switches that are part of the flash synchronization system. It also contains an additional shutter release interlock. All this additional complexity makes the mechanism more sensitive to the build up of wear products, roughness caused by surface oxidation, and gumming caused by the hardening of old grease. A Contax IIa or IIIa Color Dial model with a shutter that will not release reliably is one that needs a complete overhaul. This is the cure.
I recently overhauled a Contax IIIa color dial camera that had previously been sent to a very large and reputable camera repair shop. The owner had paid $200.00 for his camera to be serviced there. He sent his camera for servicing because the shutter was not releasing reliably. When he got his camera back after a three month wait nothing had changed. The camera shutter was still not releasing reliably. So he returned it under the guarantee (three months) and waited another three months and got it back in the same condition. The shutter would still not release reliably. Finally he sent it to me. When I disassembled the camera I found that the only thing that had been done to the camera for his $200.00 was that a single 0.005" thick washer had been placed underneath the shutter release button. This is about a ten minute job max. When the owner got his camera back from me two weeks later he took it on his lifetime trip to Paris and reported perfect operation and wonderful results.
When you get your camera back from me it will have
been completely restored to it's highest possible potential and it will
be reliable. It will have been completely overhauled. You will
get more than $205.00 worth of work for your money.
Shutter capping is a phenomena of the older Contax II and III cameras. The shutter curtains on the IIa and IIIa cameras do not latch together or cap. A built-in bias between the upper and lower shutter springs holds the curtains together as they are raised when the camera is wound.
In the very first production models of the Contax IIa and IIIa model cameras there was a problem observed with some cameras that the lower part of the film frame would not be exposed. It was discovered that the problem was caused by the lower shutter curtain hitting the inside of the camera body and bouncing back up a short distance. The solution to this problem was to cut a recess in the bottom of the camera case so that the parts of the lower shutter curtain that hit the case would have some clearance.
I have seen only one Contax IIa that had a hand modified case to account for shutter bounce. It didn't take Zeiss long to make a change to the camera body casting so that the necessary recesses were built in. I'm also sure that as cameras with shutter bounce problems came into the repair system their old bodies were replaced with newer once so that by today there are probably no cameras having this problem.
In more modern times the phenomena where the upper part of the film frame is unexposed has also been attributed to shutter bounce, but the correct name for this is "blanking". The cause of this problem is simply that the upper shutter curtain is traveling faster than the lower curtain and they meet before the lower curtain reaches the bottom. The cause of this speed mismatch is usually twofold. The first is general camera fouling caused by deterioration of the original lubricating grease and the second is excessive wear to the very complex, delicate and subtle shutter action control mechanisms. The only real remedy is a camera overhaul.
I have seen a great number of cameras that have this problem. Among these are a great number of cameras that were sent to other "experts" to have the problem corrected. In every case where the camera is sent to me after being repaired by another an entirely incorrect and highly damaging method has been used in an attempt to correct the problem. This method involves bending the moving arm that whose position is set by rotation of the film speed dial. The effect of bending this arm is actually to set the speeds lower than the dial indicates. For example: Suppose a camera is blanking at 1/500 and 1/1250, but it is not blanking at 1/250. The appearance that the problem is solved can be achieved by bending the speed control arm so that when the speed control dial is set at 1/1250 the camera internals are actually set at 1/250.
The problem with this approach is that it does nothing to correct the actual cause of the problem, it is deceptive, and the control arm has an extremely precise and subtle shape. It is extraordinarily difficult to get it back into the correct shape so that when the real cause of the problem has been corrected the arm will perform properly. This is a damaging technique that should never be used.
My shutter looks bent, what causes this?:
The shutter curtains do not cap and lock together as the shutter curtains in older Contax camera designs did. The position of the upper shutter curtain lip is held precisely in alignment with the lower shutter curtain lip by two cords on either side. The following picture shows the cord on the left side of the shutter.
The position of the shutter as shown in the picture is as it would be in the camera if you were looking at it through the lens mount.
The cords must be very precisely adjusted. If the cords are even a fraction of an inch longer than they should be, the upper shutter curtain lip will hang down too far into the camera body where the body cavity becomes smaller. This forces the shutter lip to bow outward making it look like it is bent. The shutter curtain stays bowed when it is cocked. So the shutter curtain appears to be bent. Correction of this problem is very tricky and difficult. The cord material cannot be replaced since there are no spare parts, and there is no satisfactory substitute. Removing it from where it has been glued into place, and then resetting it on both sides takes extreme care.
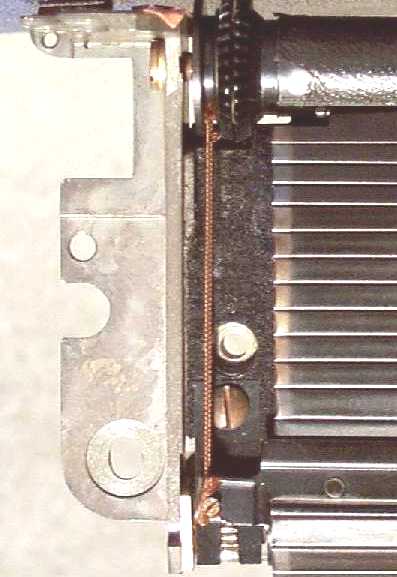
Right above the cord you can see two bevel gears. These gears operate to pull both shutter curtains up simultaneously, and allow the descent of each curtain to be controlled independently. This simultaneous lifting is what keeps the lips from separating and exposing the film while the shutter is being cocked. The shutter tape is not visible as it is covered by the edge of the shutter curtain.
Shutter Cocking and Film Advance:
The winding knob simultaneously winds the film advance and cocks the shutter. The design of the IIa and IIIa shutter is very different from that of previous cameras.
The shutter release mechanism for the Black Dial model is much simpler than is the one in the Color Dial model so the Color Dial model is more susceptible to jamming. Jamming is caused because the shutter is cocked, but cannot be released, so the wind mechanism is locked. There is no way to clear a jam from outside the camera. A jammed camera is a camera that needs a complete service.
Never ever force the winding knob. Don't even think about it. All this will do is to break a great many expensive parts.
Never shock the camera. Don't even think about it. Many rangefinder prisms have been split by cameras being hit hard in frustration. A broken prism can only be replaced by purchasing a parts camera with a good prism.
Most people use their cameras at 1/1250 very seldom if at all. And most people use the self timer very seldom if at all. So most people never come to experience a blank frame when the camera is set at 1/1250 and the self timer is used. When the self timer is set and the shutter release is depressed the shutter is released and moves a minute distance. The lower shutter curtain moves a slight amount and is then held by the self timer catch. When the timer runs to its completion the self timer catch is retracted and the lower shutter curtain is released. So, the self timer catch takes the place of the normal shutter release mechanism and the shutter components are slightly out of full cock alignment when the shutter is released by the self timer. The balance and alignment of the shutter components must be in very delicate and precise alignment at the point of release for the shutter to perform properly at 1/1250 speed. So it is normal for the frame to be blank if the camera is used with the self timer when the speed dial is set at 1/1250 if the camera has not been serviced in a long time or if was last give a typical "CLA" type service.
It is possible that you may take your camera and test it to find out if this behavior is happening with your camera. It is also possible that when you get your film back you will find the frame is exposed. If this is the case you have not proven your camera will work properly when the self timer is used to release the shutter at 1/1250. What you have demonstrated is that your shutter is considerably slower than 1/1250 when it is set at 1/1250. The reason for this is that it is a very common practice by most workers to deliberately reset the camera shutter speeds low to avoid shutter bounce. This is done to avoid the hard and complex work of completely disassembling the camera and cleaning and lubricating it and then properly adjusting it so that when the shutter speed dial is set at 1/1250 it actually exposes film at this speed. My experience with most cameras that I receive that have been "CLA' d" by others is that when the speed dial is set at 1/1250 the shutter is actually exposing at about 1/300.
Another thing to consider is that you cannot evaluate the behavior of a shutter using color negative film. The reason for this is that modern color negative film contains two separate layers having different speeds. An ISO 800 film will have an ISO 800 layer and also an ISO 200 layer. The reason manufacturers are doing this is to increase the yield of satisfactory pictures from film exposed by amateurs in simple cameras. Keep in mind that film makers make most of their profit from the film processing and not from the sale of film and cameras. With film having two layers with widely differing speeds it is more likely that the simple amateur camera will capture a printable image. This greatly increases the profit for the film manufacturer and also reinforces customer loyalty to a particular film brand. So if color negative film is used to test a Contax whose shutter is widely off its true speeds, it isn't possible to determine this from prints. They will all look good because the film is made to make a printable negative regardless of the shutter speed, and the processor is very expert in making good prints from bad negatives. If you want to know what your shutter is really doing you must use a narrow exposure latitude single layer film whose results cannot be manipulated during the print making process to evaluate your shutter. Kodachrome 25 is a good film for this purpose.
Setting a Contax IIa and IIIa shutter is much different procedure than is used for other focal plane shutter cameras. Leica type cameras have individual adjustments for the first and second shutter curtain springs. In the Contax both springs are attached to the same shaft and so there's one adjustment for both springs. The Contax IIa and IIIa shutter has six separate separate adjustment points. Four of these affect the speeds of 1/250 to 1/1250 and they interact with each other. The other two affect speeds of 1sec. to 1/100 sec. and B.
The proper procedure after a camera rebuild is to adjust 1/1250. Due to the fact this speed is adjusted by the manipulation of four interacting adjustment points it can be a complex procedure. It's time consuming because it's also necessary to wait some hours after each adjustment to ensure the adjustment has settled in before measuring the resulting shutter speed and moving on if necessary. In some cameras it can take as long as a week to get the fastest and most reliable high speed adjustment settings set properly. Each camera is different and requires its own special treatment to find out the exact settings necessary.
A big complicating factor in setting shutter speeds is that it is necessary to obtain the settings that result in the least necessary shutter spring tension. A lower tension results in increased shutter tape life, less inclination for the shutter springs to take a set, and it greatly increases the life of the shutter cords.
The Contax IIa/IIIa shutter has a set of two very small diameter cords that set the bottom stop for the lower shutter curtain. When the shutter is released the lower curtain drops and is stopped by these cords which unroll from spools. There is no modern replacement cord that works properly and so it is extremely important to set the shutter so that the tension on the shutter springs is as low as possible. In some cameras it takes a lot of time and adjusting to find out the optimum set of adjustments that result in the most accurate speed with the lowest possible spring tension settings.
The Contax IIa/IIIa shutter tape tends to fray if the shutter spring tension is set too high. Fraying causes it to develop fuzzy surface due to broken threads. When the upper curtain descends, the upper lip slides down on top of the shutter tape. If the tape is frayed the high shutter speeds cannot be set properly due to the increased friction between the tape and the curtain lip. This is another important reason to take great patience and care in the setting of the shutter to obtain the lowest possible shutter spring tension.
The Contax IIa/IIIa shutter has a problem in that it is very easy to mask underlying inner shutter mechanism friction problems by simply cranking up the shutter curtain tension. Many of the cameras I see that come here are suffering from shutter problems that have been caused by being used for too long with shutter springs that have been set at a tremendously excessive shutter spring tension.
It is possible to access the shutter spring tension adjustment without disassembling the camera. I have seen enough previously "serviced" cameras here to know that most servicing's or "CLA's" consist merely of ratcheting up the shutter spring tension to the point where the shutter appears to work properly to the eye, and the application of windex and shoe polish to the camera exterior.
What About a $119.99 CLA?
This is the picture of the inside of a Contax IIa camera body shell before it was cleaned. It is in the condition it was in when it was first opened. The white deposit visible coating the inside surfaces and which forms a small ball in the upper right hand corner is mold. It is normal for a Contax body shell to be coated with mold or bacteria.
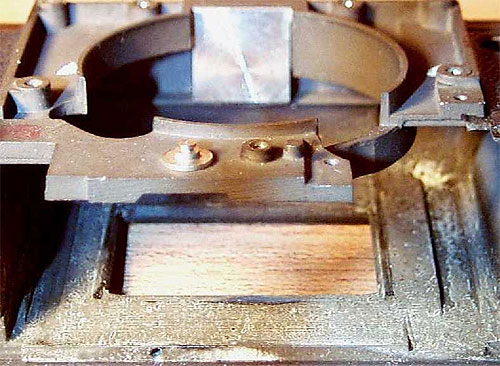
A regular CLA does not include a thorough cleaning of the inside of the Contax body shell. This body shell is dangerous to your health and it will also infect any lenses that are mounted on it. If you are allergic to mold a camera such as this could wind up costing you a trip to the hospital. This is why every camera that comes here is thoroughly and completely cleaned inside and out.
When people write to me about a recently purchased Contax IIa the main problems of concern are focusing adjustment difficulty, viewfinder/rangefinder haziness, and high speed shutter curtain shading. Unfortunately, it is relatively easy, in a quick, temporary and superficial way to address these items and do nothing else about the camera with relative ease and cheapness. This is what you get for $119.95. The result is a camera which for the most part is still grinding itself to pieces. It is also possible to permanently damage the camera severely with the normally applied cheap and quick solution to shutter shading.
- Focusing stiffness can be temporarily cured by the application of a couple of drops of oil to the focusing helical by access through the focal plane when the shutter is opened on Time Exposure.
- The rangefinder haziness can easily be "cured" by the use of a couple of cotton swabs and removal of the top of the camera.
- Shutter shading can be "cured" temporarily by increasing
the shutter spring tension. While this has the effect of curing shading,
it also decreases the high speeds of 1/1250 to actually be 1/300..
It also, in many cases, results in shutter springs that are permanently
damaged beyond repair. If a Contax shutter spring is tightened too
much it will fold in on itself and will become permanently bent.
It is only possible to know if the shutter springs have been so damaged
when the camera has been properly disassembled. This kind of damage
is very easy to accomplish.
I have put this page together to demonstrate the various steps in the complete winterization overhaul service of a Contax IIa range finder 35 mm camera. This is a work in progress and so as my overhaul of the current camera progresses I hope to add more pictures to fill out the entire story. The following pictures illustrate parts of the assembly process and pictures of critical cleaning and polishing steps. I am hopeful this first offering will help you understand the workings of this very unusual, complex and high precision mechanical marvel.
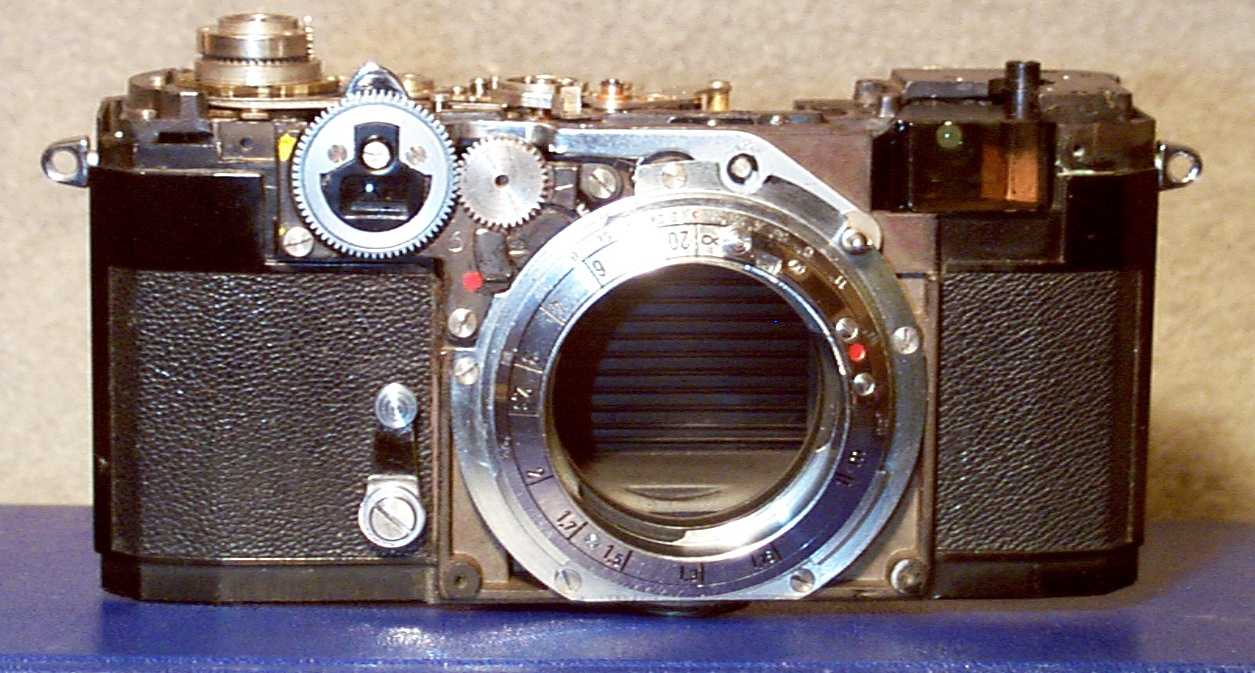
The first picture is of the camera when the top and bottom trim plates have been removed:
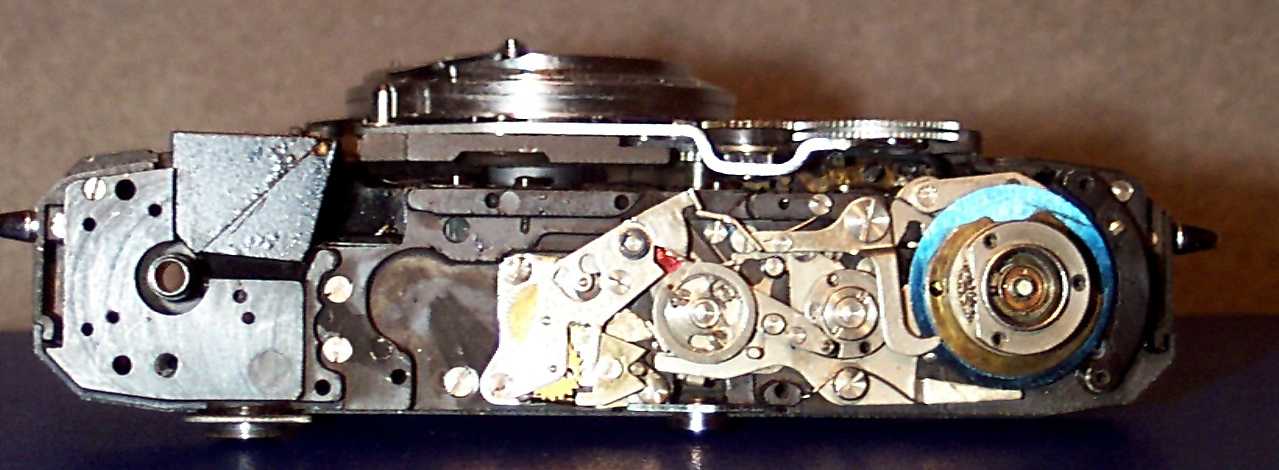
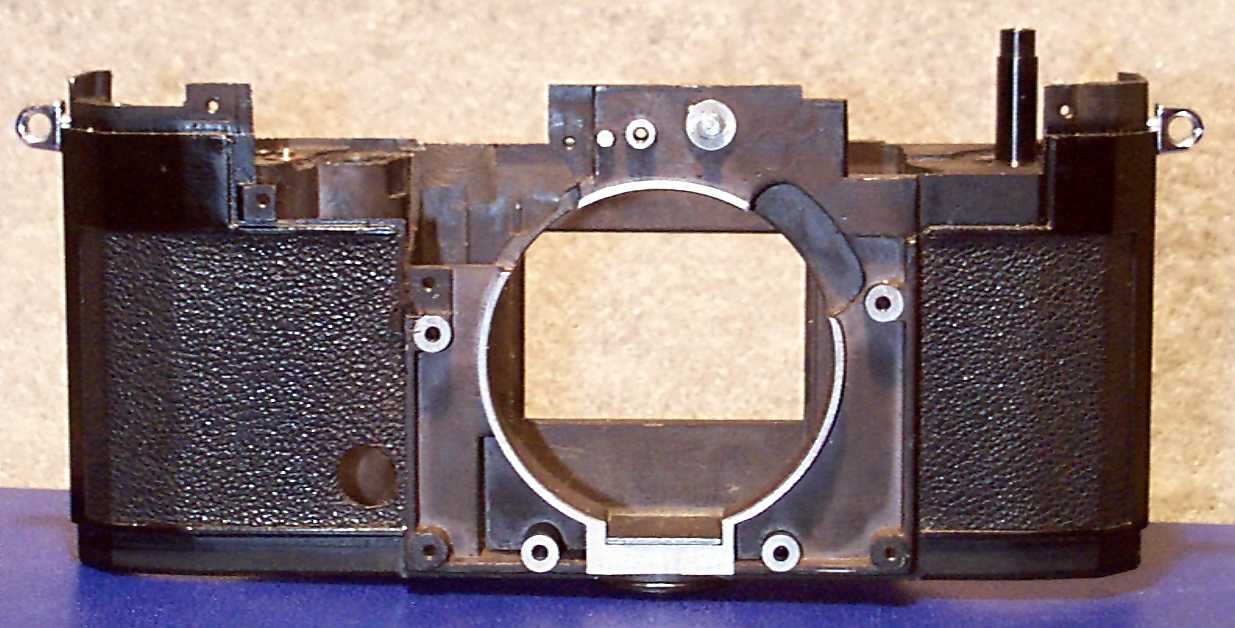
The next picture is of the body shell with the shutter mechanism module removed:
.

Notice that all components have been removed from the empty shell. This is part of a complete overhaul. All parts must be carefully examined, cleaned and lubricated. This is the only way to take the camera back to the day it was made and get that original factory performance and reliability.
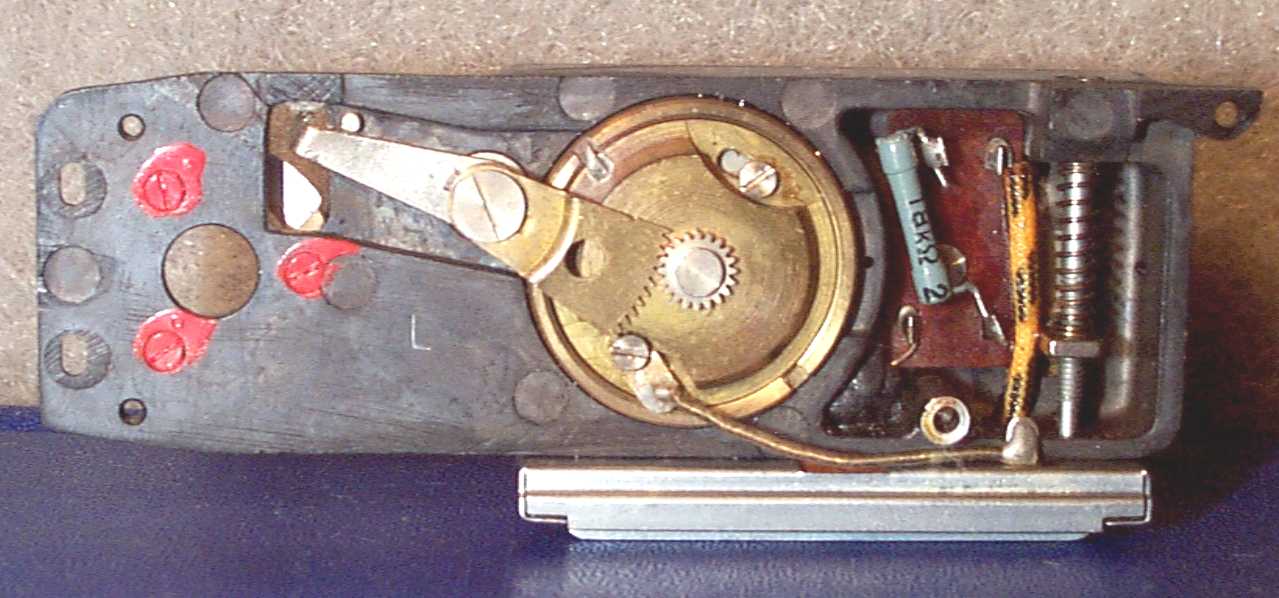
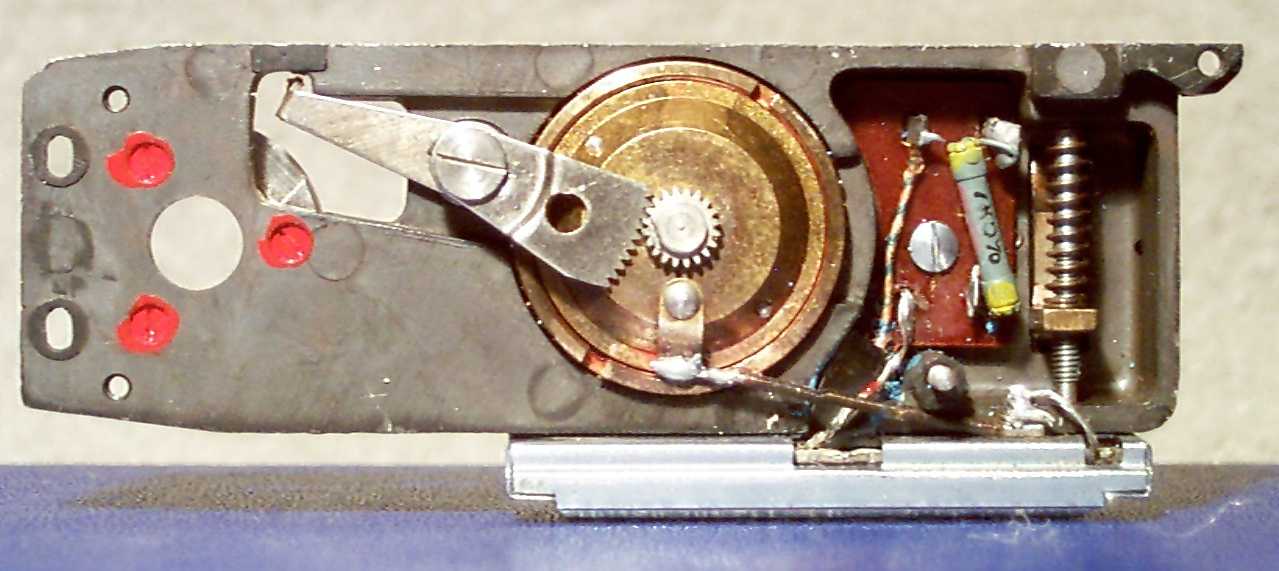
The next picture shows the underside of the shutter module with all the components removed. This view shows clearly the switches and wiring for the flash synchronization system. The blue insulating paint indicates the position of the various switches. One contact is shown loose. This contact is installed when the module is completely assembled. The black cylinder at the bottom center is the PC socket housing.
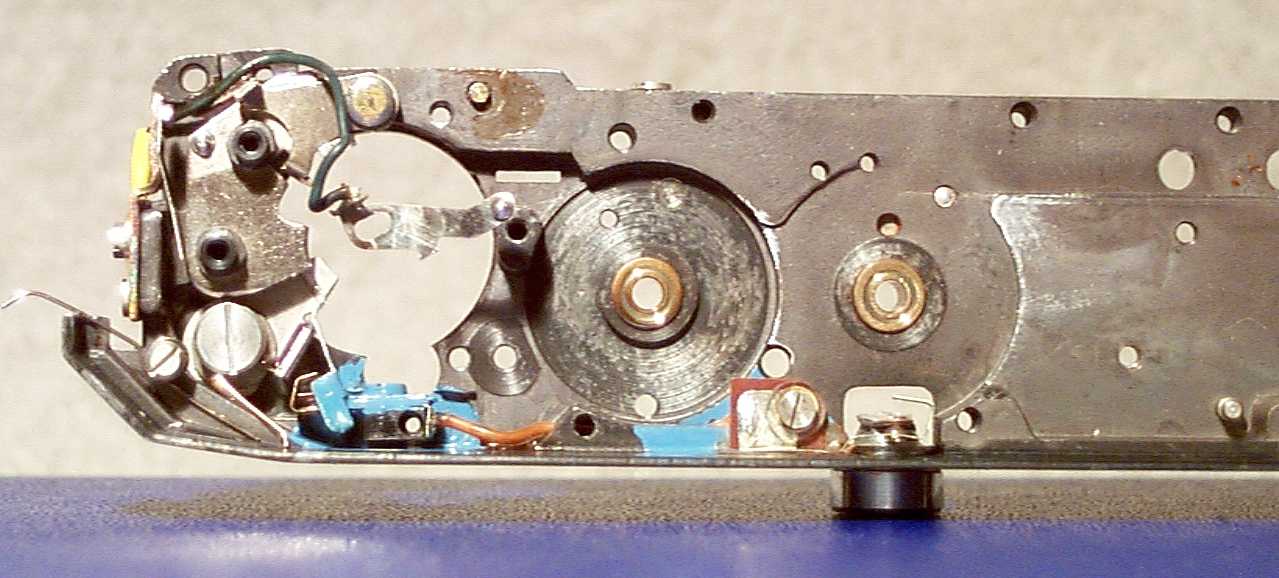
This next picture is the same view of the same assembly, but with all the component parts installed. Note the blue spots of grease. The special low temperature grease has a blue color. When a camera is winterized, grease must be installed in some locations which are not normally lubricated. This is done to prohibit the introduction of condensation during normal operation which can freeze and block mechanism operation in freezing temperatures. The original factory problem with this camera was that the sliding plate that is located at the left in this picture was slightly warped. This warpage kept it from sliding in its curved slot. This plate must move for the shutter to release. Lapping this plate solved the problem.
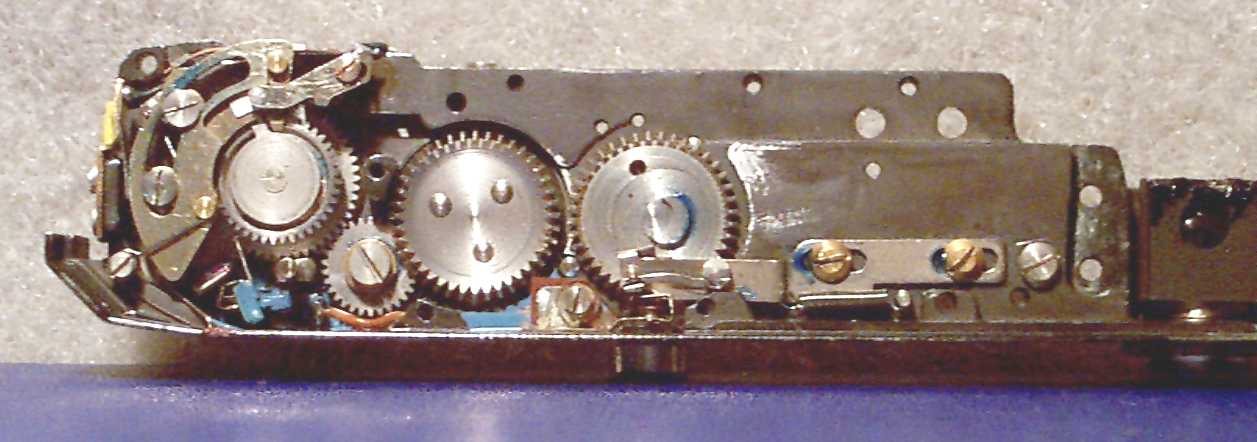
Here is the top side of the same mechanism with all the components removed. Please note the adjustment screw at upper left. This releases the plate directly beneath it to be adjusted. Note the little pin bent up from the plate to the right of the leftmost bearing opening. It is this pin that controls the shutter operation in "B" speed. Wear to the edges of this pin is responsible for a failure of the shutter to hold open when the shutter release is depressed. You can also see the M/X synchronization selector switch at the far right (blue paint). This switch is operated by the shutter speed selector cams automatically.
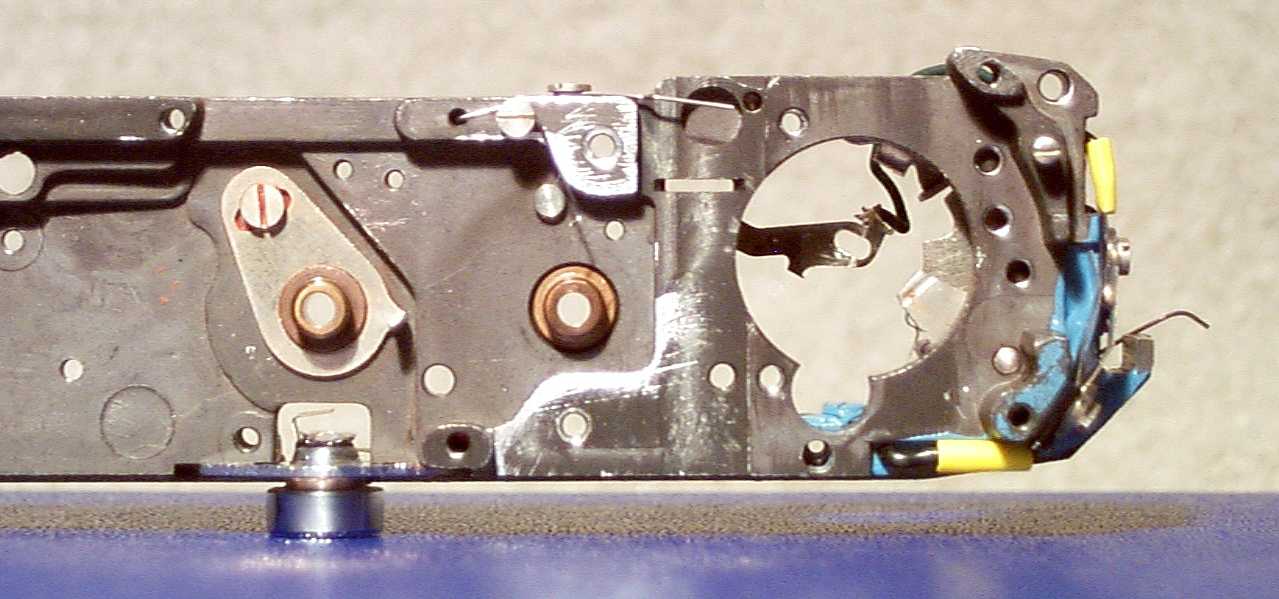
This is a picture of the same assembly, but with most of the parts assembled. The slow speed escapement is not installed. Shutter speed is controlled through a set of two rotating cams. These are located around the film winding shaft. The two cam followers are the shiny steel arms located at the top and bottom of the picture. The shutter release shaft is at the very center of the film wind flange. The film wind flange has three screw holes and is located at the left of the picture.

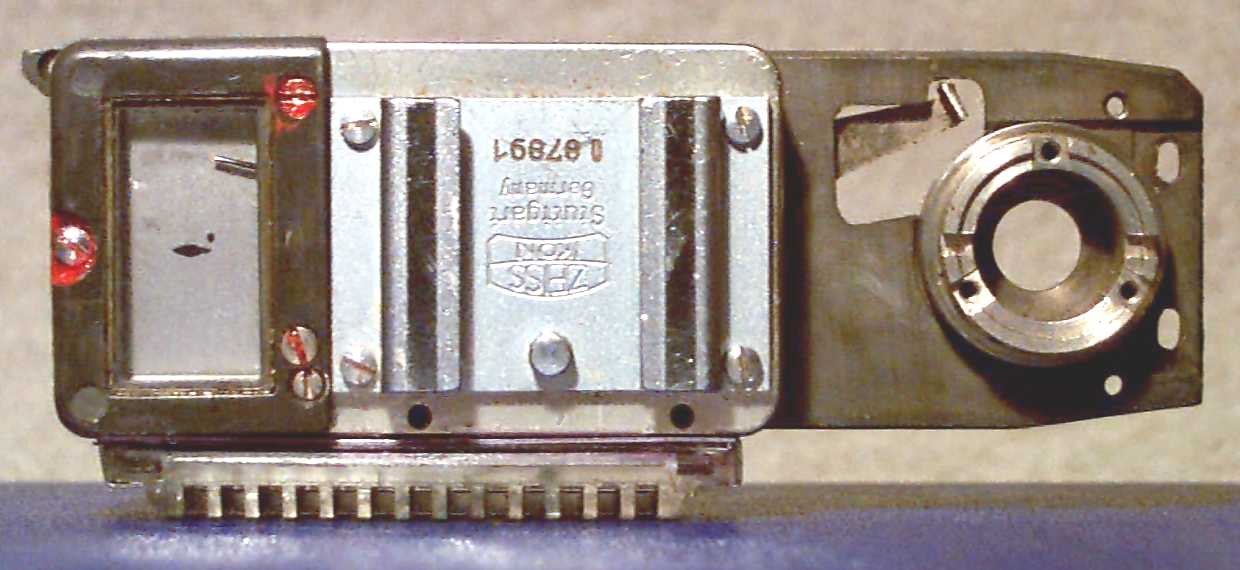
This is a picture of the shutter module shown as it faces the lens, but upside down from its normal position. The self timer mount is on the right.
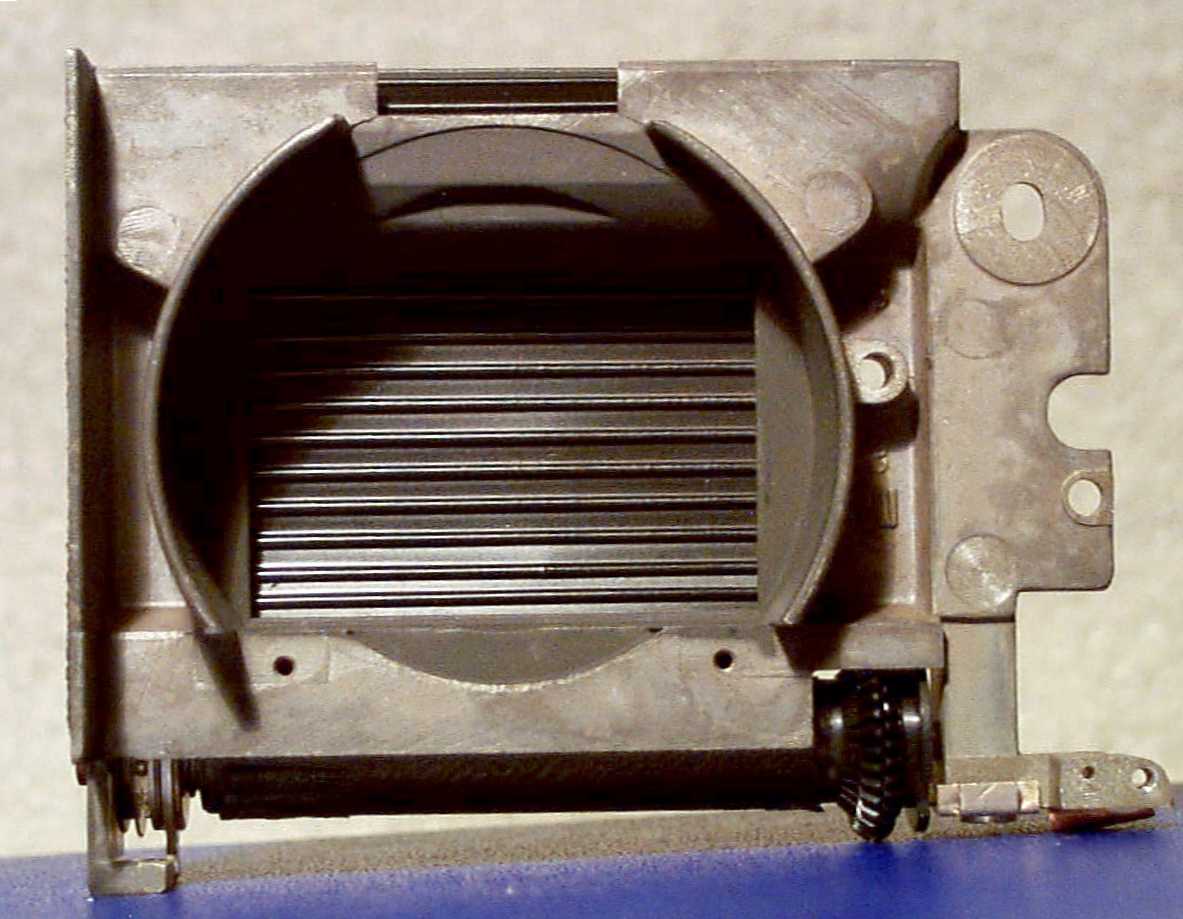
This is a view from the rear. The fine cords at the right and left control the lower shutter curtain. In the IIa and IIIa cameras, the upper and lower shutter curtains are separately controlled. This is different from the II and III cameras, where the shutter curtains are controlled together.

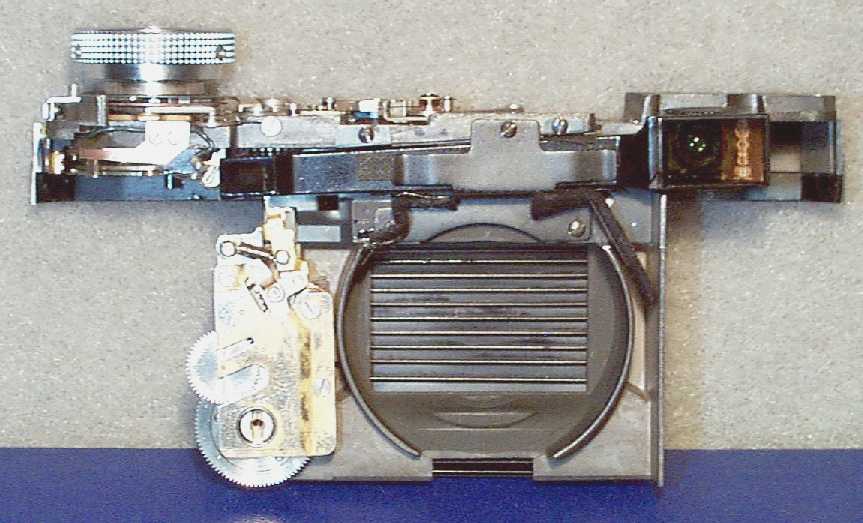
This is the completed shutter module. The self timer and viewfinder prism are installed. You can see the viewfinder prism from right to left in the center top of the module. Note that the prism on the IIa and IIIa cameras is not straight, but angles down from right to left. The viewfinder prism is made of two pieces that have been cemented together. Many prisms were slightly misaligned when they were cemented and the result of this is that the secondary image is either slightly higher or lower than the viewfinder image. This is an uncorrectable defect at the present time.
This set of two pictures is of the front and rear view of the range finder module:
In the front view you can see the range finder adjustment ring to the far left and surrounding the range finder front lens. The transfer gear assembly that leads from this ring to the point of mating with the lens mount helical is also shown.
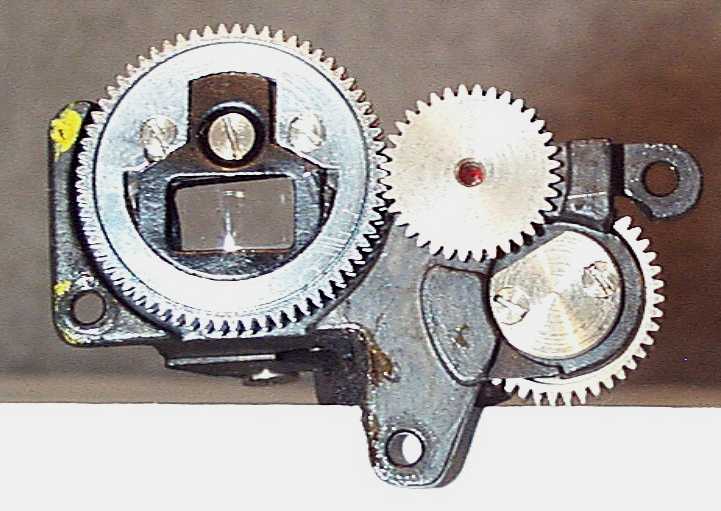
The rear view shows the gear assembly that leads from the adjustment ring to the moving prism lens. You can see the brass gear operated cam and the cam follower from the moving lens assembly. This assembly has been ultrasonically cleaned and so all the metal parts are bright and new.

The next picture is of the range finder assembly mounted on the camera over the prism.

The Contax IIIa light meter is a deceptively complex and extremely delicate mechanism. While all other mechanisms in the camera can take an occasional shock, the IIIa light meter can easily be damaged by an incautious tossing of the camera onto a car seat.
The main problem with the Contax IIIa light meter is the advanced old age of its selenium photocell. The photocell generates a small electrical current when it is exposed to light. It is this electrical current that causes the meter needle to deflect and provide a light reading. The cells in most Contax IIIa cameras are at least 45 years old and have aged to the point of uselessness. The Contax IIIa light meter can be extremely responsive and accurate provided it has a fresh photocell in it. Replacement photocells of a quality high enough for the Contax have only recently become available and I have obtained a supply of them. The following picture is of a typical original Contax IIIa light meter photocell:
You can clearly see the positive electrical contact pads at the right and left. The back of the cell serves as the negative terminal. The black material covering the cell is the element selenium. The electrical contact pads sit on top of the layer of selenium. What you cannot see is a transparent layer of metal that has been evaporated in a vacuum, in the same manner as lenses are coated, on top of the selenium layer. This transparent layer of metal collects the electricity from the microscopic crystals of selenium and transmits it to the conducting pads at the right and left of the cell surface. It is the oxidation and deterioration of this microscopically thin layer of evaporated metal that is the cause of the deterioration of the photocell with age. There is no cure for this other than cell replacement.
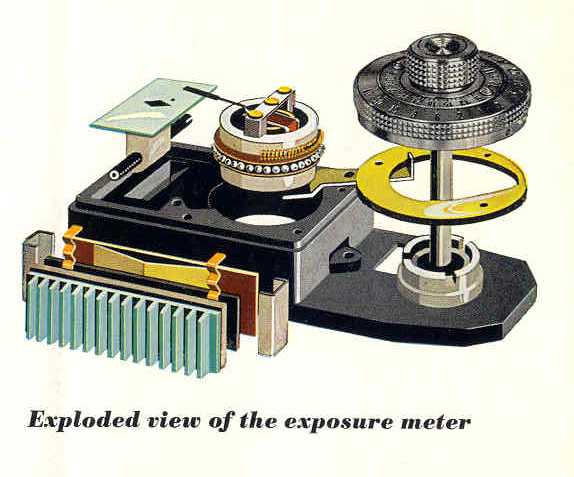
This exploded view of the IIIa light meter provides a clear understanding of how it works. The electrical meter rests in a ball bearing cage. The electrical meter itself is moved by rotation of the adjustment knob through the action of a cammed lever. So there are two movements going on at the same time. The first is the movement of the electrical meter needle in response to the electrical current generated by the action of light on the selenium photocell. The second is the movement of the electrical meter itself in response to rotation of the adjustment knob.
The electrical contact between the cells and the meter can be a source of intermittent or inaccurate operation. There are basically two models of IIIa light meters. The first model, has small friction clips that electrically attach the cell to the meter. Over time dirt, oil and corrosion can reduce or interrupt the electrical connection. Zeiss recognized this problem very late in Contax IIIa production and changed to all soldered connections. In these meters there are small wires which are soldered to the cell and then into the meter. These soldered connection meters are completely reliable and have almost no cell connection type problems. It has become apparent to me that the soldered connection method is the only way to connect new cells reliably to a meter and so it is is my practice, as of January 2007, to modify all Contax IIIa light meters with friction type contact systems so that they are changed to soldered type connections. There is a reasonable fee for this service and this is explained further in the price list.
Occasionally I will come across a IIIa with a light meter that has been worked on by an amateur. The innermost workings of the electrical meter are so delicate it requires the skills and perceptions of a trained watchmaker to be able to work on one without the possibility of irreparable damage occurring. In many cases where an amateur worker has opened the meter covering I have found the meter to be irreparably damaged. Unfortunately, it is not possible to determine if a meter is permanently damaged from an external examination of the camera. Fortunately replacement meters can be installed to correct this situation.
The next picture is of the light meter with the top removed. You can see the long thin indicating needle. This is very sensitive to shock. Many cameras I see require the needle to be very delicately and carefully bent back into normal position. A strong bump or shock to the camera can bend it upward or downward sufficiently so that it will rub and make the meter very inaccurate.
Although hidden beneath the brass "bridge" in the picture below, the indicating needle is attached to a rotating armature that is suspended on two needle point bearings. You can see the bearing mount for the upper bearing in the exact center of the brass "bridge" in the meter below. There is a very fine spring, called a "hairspring" that provides the very delicate tension suspension of the armature so that when the cell voltage increases in response to an increase the the light level, the needle will move upward and then return when he light level lowers. The hairspring is below the center of the brass bridge and also is the electrical connection between the photocell and very fine copper wire coil in the rotating armature. The hairspring has great strength when the armature is moved in a direction that coils it tighter, but it can be permanently bent if the rotating armature is rotated backward.
Please take careful notice of the long small copper coil spring that surrounds the left half of the outer circumference of the meter mechanism. This coil spring is the key to how the meter is adjusted by the meter adjustment knob. When the adjustment knob is rotated a mechanical lever causes a gear train to rotate the outer part of the electrical meter to bring the needle into alignment with the diamond mark on the meter face. So there are two moving parts in the electrical meter. In inner rotating armature and the external rotating magnet. The internal armature rotates and moves the needle in response to light, and the external magnet moves in response to changes in the adjustment knob position. It is the outermost copper coil spring that tensions the adjustment mechanism. The brass bridge is connected to the magnet by the little bolts at each end, so the magnet and the rotating armature are mechanically connected through the hairspring. And it is this connection that is the key to understanding just how easily the IIIa light meter can be destroyed.
You can also see at the upper right the small gold plated brass connection of the friction type cell connector.
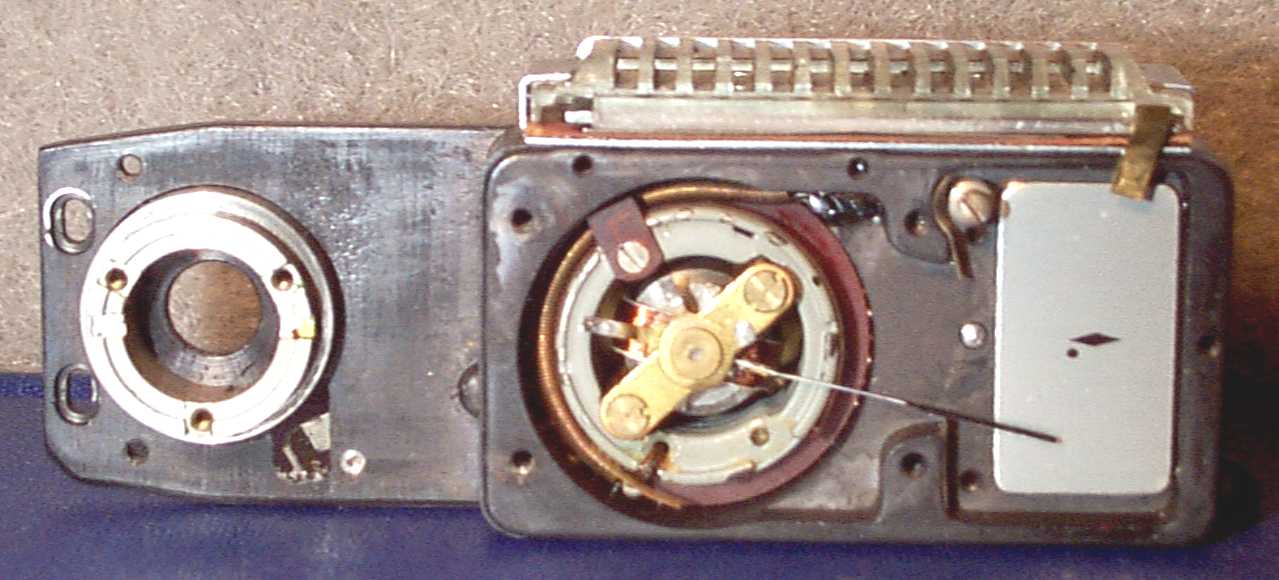
This is a picture of the underside of the type 1 IIIa light meter module. You can see the adjustment screw on the upper right of the of the brass barrel of the lower meter housing. Note also that the cell connection is with a screw. These, in addition to the manner of cell connection, distinguish the type 1 meter from the type 2.
You can clearly see how the lever rotates the magnet through a gear connection. As the adjustment knob is turned, the lever shifts position and this causes the gear to rotate the magnet. The meter hairspring will be excessively uncoiled so that it is permanently snarled and the meter is destroyed if the lever is removed and the brass barrel in the picture below is allowed to rotate backwards.
The brass barrel rotates over a set of 24 small steel ball bearings. Notice that the photocell is electrically connected to the brass barrel through a very fine copper spring. The electrical connection between the brass barrel and the upper meter electrical mechanism is the bearing balls. When these become coated with deteriorated grease and oil from the adjusting knob mechanism the electrical connection can be broken, become intermittent, or have increased electrical resistance resulting in meter inaccuracy.
Please notice that the brass barrel in the Type I meter has two steel screws at the top and bottom. These allow for the position of the magnet to be adjusted without removal of the lever. I find fewer destroyed Type I meters than I do Type II meters. There is a good reason for this.
This is a picture of the underside of the type 2 IIIa light meter module. The Type 2 module is distinguished by the riveted cell connection at the lower brass barrel of the lower meter housing and soldered cell connections.
Please notice the absence of the adjustment locking screws. The only way to adjust the Type II meter to a new cell is to remove the lever and set the brass barrel to a new resting positron. This is a very dangerous thing to do since removal of the lever without a tight control over the barrel will cause the barrel to over rotate backwards under the tension of the internal copper coil spring resulting in permanent damage to the hairspring and destruction of the meter.
Zeiss recognized this problem, and the last set of III cameras manufactured in 1963 contained a variable electrical resistor on the circuit board which allows the meter to be accurately set without removal of the lever. It is my practice to install this variable resistor in every meter that is overhauled here. This modification is included in the cost of a light meter overhaul. This picture shows this resistor:

This meter was defective from the factory and had never functioned properly. The defect was an electrical short between the meter cell connection and the meter module body. This short was located beneath insulating paint and was difficult to find.
Here is a top view of the same meter. You can see how the adjusting lever is positioned to fit into the cam underneath the adjusting knob.
IIIa Light meter Doesn't Respond to Light?
A large number of IIIa light meters no longer respond to light at all. In more than 90% of these cases, the problem is a completely dead old photocell. Even if the meter responds to light, if it has its original photocell it is most likely not responsive enough to provide meter accuracy. Most old cells I see are at least 2.0 f stops inaccurate. I have in stock brand new photocells. These new photocells incorporate the latest technology in selenium light sensing cells and have a longer life, are more responsive, respond to changing light levels faster, have a more linear output, and are an exact replacement for the original cells in fit and finish. In most cases, all that is required to bring your light meter back to better than like new performance is a servicing and the installation of a new photocell.
If your meter has mechanical or electrical problems that can be corrected without the need for replacement parts, this work is done without additional cost. All work necessary to return the meter to better than original accuracy is included in the cost of a new photocell. This includes cleaning, lubrication, and precision adjustment using a Honeywell precision light source and a Spectron Camera Tester.
Some light meter designs used in early camera production by Zeiss have electrical connection problems caused by friction type electrical connectors. It is now my practice to modify these type meters to have soldered connections. This is the only way to ensure complete reliability. The point is to provide you with an accurate, responsive and completely reliable light meter on your IIIa camera.
Less than 1% of meters have been damaged beyond repair. Usually this has happened by the meter being opened by unqualified persons. But even if the meter internals have been severely damaged, in most cases satisfactory repairs can be made. Regardless of the amount of work required to repair your meter, it is all covered by the one time fee for replacement of the cell.
If your light meter should be damaged beyond repair I have reasonably priced replacement meters available in stock so your camera can always be returned to better than like-new performance.
It is very common for people to make the observation that the needle on a IIIa light meter to stick on the bottom and require a light tap in order for it to respond to light. This behavior is actually not a problem at all, and it is easily eliminated.
The natural inclination is to operate the light meter with the adjustment knob kept rotated fully clockwise when the meter is not in use and the cap is closed over the photocell. The proper way is to keep the adjustment knob kept in the fully counter clockwise position. When this is done, and the photocell cap is opened, the needle will immediately move to the top of the range and it will not stick. Then, the adjustment knob is rotated clockwise to bring the needle to match with the point on the diamond.
When the adjustment knob is kept in the fully counter clockwise position the needle will indicate on the dot just below the diamond if it is adjusted properly when the photocell cap is closed. When the needle is on the dot it tells you the mechanical parts of the meter are adjusted properly. So keeping the adjustment knob in the fully counter clockwise position always gives you a check on your meter condition.
The reason the needle sticks when the dial is kept in the clockwise position is simple. When this is done the indicating needle is held tightly against the bottom stop. This cocks the armature, to which the needle is attached, in its bearings. When the adjustment knob is moved it takes a relatively large amount of rotation or a slight tap on the meter to free the needle bearings so that the armature can freely rotate and the needle can indicate.
So keep your adjustment knob rotated fully counter clockwise and everything will indicate smoothly and properly.
Zeiss made a lot of changes to the light meters during the years they were produced. For the most part these changes were made to the parts that make the electrical connection to the photocell. In the first models Zeiss used friction contacts made of copper to make the connections to the contacts on the front of the photocell, and a nickel plated contact to make the electrical connection to the back of the cell.. But the copper surface quickly corroded and this caused intermittent connection problems. Then the copper parts were gold plated, but then the nickel parts would corrode after a longer time and this would cause intermittent connection problems. Finally Zeiss used all soldered connections. This solved the intermittent connection problems. Most of the light meters that were produced have mechanical friction type connections.
If your light meter is having intermittent operation problems these can be solved by having your meter modified to be like the last production type meters with soldered cell connections. All Contax IIIa light meters with friction connections that are overhauled here are modified to have soldered connections.
If your light meter is having intermittent operation problems and you want this problem solved permanently, write to me.
The photocell provides the electrical current in response to light that makes the light meter needle move. The Contax IIIa light meter photocell is a thin metal sheet that is coated with the element Selenium. Selenium gives off electrons when it is exposed to light. The electrical connections to the photocell are made by making one electrical connection to the back of the photocell. An electrical connection to the back is easy because it is made of steel coated with a layer of silver. The connection to the front is much more sophisticated, and this is the reason photocells age and die. The front surface of the selenium layer is coated with a transparent layer of conducting metal, usually silver. This layer is applied in a vacuum where tiny amounts of silver are vaporized which then condenses on the surface of the photocell. This coating is in the same manner whereby anti reflection coatings are applied to lenses. Over time the thin layer of metal is attacked by oxygen in the air, and slowly with time it becomes less and less electrically conductive. This process of deterioration takes many years. But it is the reason that by now most, if not all, photocells installed in IIIa light meters are at the very end of their lives. It is not possible to rejuvenate a photocell by applying a new coating since this would only apply a good coating over a bad one. The best thing to do is to replace the photocell.
The Contax IIIa meter is highly sensitive and accurate. With a new photocell installed it is fully capable of supporting the use of films with the most narrow exposure latitudes such as Kodachrome or other reversal color films.
Color Dial or Black Dial Camera?
Zeiss made two models of Contax IIa and IIIa cameras. These are called the "Black Dial" and "Color Dial" models. The term color dial or black dial refers to the color paint that was put into the engraved speeds on the shutter speed dial. The black dial models has all the speeds filled in with black paint, and the color dial had the colors black, yellow and red.
The Color Dial model had M and X synchronization with a PC type electrical socket on the back of the camera to connect to the flash unit or strobe. The speed setting colors designate the type of flash synchronization each speed has. On the Color Dial, the speeds of T to 1/25 are black and this indicates the type of synchronization for those speeds is "M" for flash bulb type flash. The speed of 1/50 is yellow, indicating it is for "X" type electronic strobe flash, and the speeds of 1/100 to 1/1250 are marked in red to indicate that no flash can be used with those speeds. The electrical socket on the back of the camera is a PC type socket that is compatible with the modern PC type plug that comes with modern strobe units.
The Black dial model has all of the speeds on the shutter speed selection dial filled in with black paint. The camera can be used with either bulb flash or electronic strobe. But the flash connection on the back of the camera is a mechanical connector to which a separate accessory electrical switch must be connected. Zeiss made two types of switches for the Black Dial model. These switches are called "Synchrotron Schalters" and are reasonably available on Ebay on a regular basis. The model 1361 is for bulb flash, and the model 1366 is for electronic flash. Each switch has a short cable that ends in a modern PC type socket. In order to use a modern strobe on a black dial body you must obtain a model 1366 flash switch and then attach it to the flash connection on the back of the camera. When this is done the camera has "X" synchronization at 1/50 speed.
The problem with the Color Dial model is that its internal workings are much more complex than the black dial model. The flash synchronization circuit has four separate switches in it. These switches are employed in the mechanism to block flash operation if there is a problem with the shutter, and to make sure the flash is discharged only when everything is working exactly right. This means that an old Color Dial model that is full of old hardened grease is one with flash synchronization that is unreliable and which may not work at all, or if it does work, will not be properly synchronized. If you have an old Color Dial IIa or IIIa camera, and you want to use it with flash and get good pictures, I highly recommend you let me service it for you. Bending the high speed lever and squirting oil on the visible parts of the mechanism will only make flash synchronization problems worse.
If you want to buy an old Contax IIa or IIIa cheap, and you want to use it with flash and get reasonably good results without having it serviced, my advice is for you to buy a black dial model and use it with the flash switch. The Black dial flash mechanism is purely mechanical with no safety switches and is extremely simple. It will likely work reasonably well even when the mechanism is very dirty and the shutter is not properly synchronized.
Can A Black Dial Camera be Converted into a Color Dial Camera?
The simple answer to this is that a Black Dial camera cannot be converted into a Color Dial Camera. The reasons for this are many. The Color dial camera contains a very complex electrical circuit that contains five separate switches, and the shutter release mechanism is entirely different. Also the details of the casting of the shutter top plate are different to allow installation of the various switches. While it was theoretically possible to make a conversion during the time the cameras were being manufactured and all the necessary parts were available, even then it would have been expensive enough so that it would have been much cheaper and easier to simply sell your black dial body and buy a color dial body. It is the same today.
Rule number one which must never be violated is never use lens tissue. Just to make sure you remember it, here it is again, "Never Use Lens Tissue". Lens tissue is made for the sole purpose of packaging individual lens elements in a manufacturing environment. It is not made for cleaning lenses and will scratch your lens. Do not ever use it. Please do not believe the marketing statements about it. Lens tissue will destroy your lens faster than anything else you can do. Please also do not use micro fiber cloth. As it is used it picks up dust and debris and is slowly converted into sandpaper. The best thing to use is a rubber bulb blower, an old fashioned sable hair brush, and as a last resort Zeiss pre-packaged wetted lens wipes.The best way to keep your lens clean is to purchase a UV filter and then to clean it when it gets dirty. It is relatively inexpensive to replace a filter if it should be scratched. In most cases it is prohibitively expensive or even impossible to obtain a replacement front element. Please don't take any heed of the arguments that a front filter is unnecessary or expensive. You can always replace it if it gets scratched or damaged and this is its only function in my opinion. It will take all the abuse of repetitive cleaning and you can learn all the lessons you need on a good filter. When purchasing a filter buy the cheapest one you can find. They are all about the same. You would have to work very hard these days to find a bad filter.
If you must clean your lens the first thing to do is to make sure there is no grit on it. If there is grit on the lens when you polish it the grit will scratch the element surface. So the first thing to do is to use a fine brush to gently brush the lens to remove any grit. DO NOT SKIP THIS STEP! If you have a compressed air blower handy, you can use this to remove any potential grit as well.
Once you are sure there is no grit on the lens, if there are any finger marks or smudges, the next step is to clean and polish it. The best thing to use to clean the lens is non aqueous film cleaner. You don't need to use much. Use a small cotton swab moistened with the cleaner to remove any fingerprints or other smudges. GENTLY move the swab in a circular motion around the lens. It may take one or two applications to get the lens perfectly clean. Don't worry if the evaporation of the last bit of solvent leaves a mark. This is of no photographic consequence. If you don't have any film cleaner on hand use an aqueous cleaner in accordance with the next paragraph.
If your lens is so dirty that you need to use an aqueous cleaner keep one thing in mind. In most lenses the front and rear elements are not waterproof sealed. This means that if you apply too much liquid it may enter the lens barrel from the lens edge and stay there a very long time. This can cause rusting of the aperture blades and/or fogging of the internal elements due to condensation.
The best aqueous cleaner to use is lens cleaner that is available at most drug stores or in the drug section of most supermarkets. Apply it and polish the lens using a piece of very soft cloth that has been recently laundered. An old "T" shirt will do. It is a good idea to take a new "T" shirt, launder and dry it separately, and then keep it in a sealed plastic bag for emergencies. If it is a real emergency, and lens cleaner is not available use a commercial glass cleaner such as Windex; but do not make a habit of using this sort of cleaner because it is too harsh on the lens coating. Avoid Tap water. Tap water contains a lot of rust and grit particles from the piping and the use of it can easily damage a lens.
Remember always that the coating on a lens is extremely thin and fragile. It was applied to the glass in a vacuum and is even more easily scratched and damaged than the underlying glass. When you clean a lens, this is the surface you are touching and it cannot be repaired.
A filter ring dent is actually severe lens damage. If it is not corrected properly the lens will one day be useless because it cannot be serviced. The reason for this is that the damage to the threads makes it impossible to remove the lens bezel. If the bezel cannot be removed it can be very difficult, if not impossible to disassemble the lens to correct problems.
There is no sight more tragic than the front end of a 50mm Sonnar that has been badly scarred from well meaning incompetent repair work. There are many tools that have been designed and sold having the purpose of repairing filter ring dents. But all of them leave their mark. And while some of them will restore the ability to screw a filter onto the front of the lens, none of them will restore the threads further down the barrel which must be in good condition to allow the bezel to be removed. And the use of all of these tools leave an unsightly surface. Even in the hands of a master it is impossible to restore the original appearance of the lens using tools that one can buy.
My method of removing filter ring dents is to restore the lens to its original appearance and function. I have custom designed and built custom tools for this purpose that are specific to the lens of concern. If the lens is so damaged that the old ring cannot be restored I will custom machine a new lens filter ring barrel. Repairs can also involve something as simple as removing the filter ring barrel, turning it around and reinstalling it so that the damaged portion is hidden inside the lens. The simplest solution will be applied to your lens.
The economic benefits of a perfect repair to your lens are large. A 50mm 1.5 Carl Zeiss Sonnar sold on Ebay with a filter ring dent will sell for around $65.00. In perfect condition the same lens sells for $215.00. The dent makes a $150.00 difference! This effect is magnified if the dented lens is on the front of a IIa or IIIa camera body when it is sold. In this case the dent can easily make a $300.00 - $400.00 loss if the body is extremely nice. You will find my rates are very reasonable for lens repairs. And if the repair of your lens requires the manufacturing of a special tool you do not pay for the tool. I consider it my cost of doing business and an investment in the same type of work in the future. You pay only for the labor and materials applied directly to your lens.
If you have a Zeiss lens with damaged or disfigured filter ring, even if it has been "repaired" by others, and you want it made right, please contact me.
The discussions about what "Opton" actually means will probably circulate forever. But some recently available information has come to light that sharpens the focus of this topic. A book concerning the post war history of Zeiss has been published, but it is in German and has not yet been translated into English. But a very good synopsis of it in English has been published by Zeiss on their official web site and you can use this link to go there and read it for yourself: Zeiss History. This synopsis says that before the war Zeiss was a legal entity called a Foundation and the foundation held all of the rights, patents, property, factories and everything else Carl Zeiss. Just at the end of the war a group of Zeiss executives had the Zeiss-Opton company legally chartered in the American Occupation Zone. Shortly thereafter East Germany was founded by the Soviets as a communist state called the German Democratic Republic (DDR). The DDR nationalized all of the Zeiss assets within its borders which effectively wiped out the Zeiss foundation leaving only the Zeiss-Opton company in West Germany as a legally existing entity according to western law. Following this, East and West Zeiss fought each other in just about every court of law in the world over the rights to use the Carl Zeiss Trademark up until the time the DDR collapsed. During this time both East and West Zeiss used each others trademarks. The next picture is of a lens I found for sale recently in a Russian camera shop. Notice that it is marked both "Opton" and "DDR" meaning that is a lens made in Jena but marked Opton. It's also important to note this lens is made entirely of aluminum which is a characteristic of East German manufacture. The appearance of this lens is late 1960's.
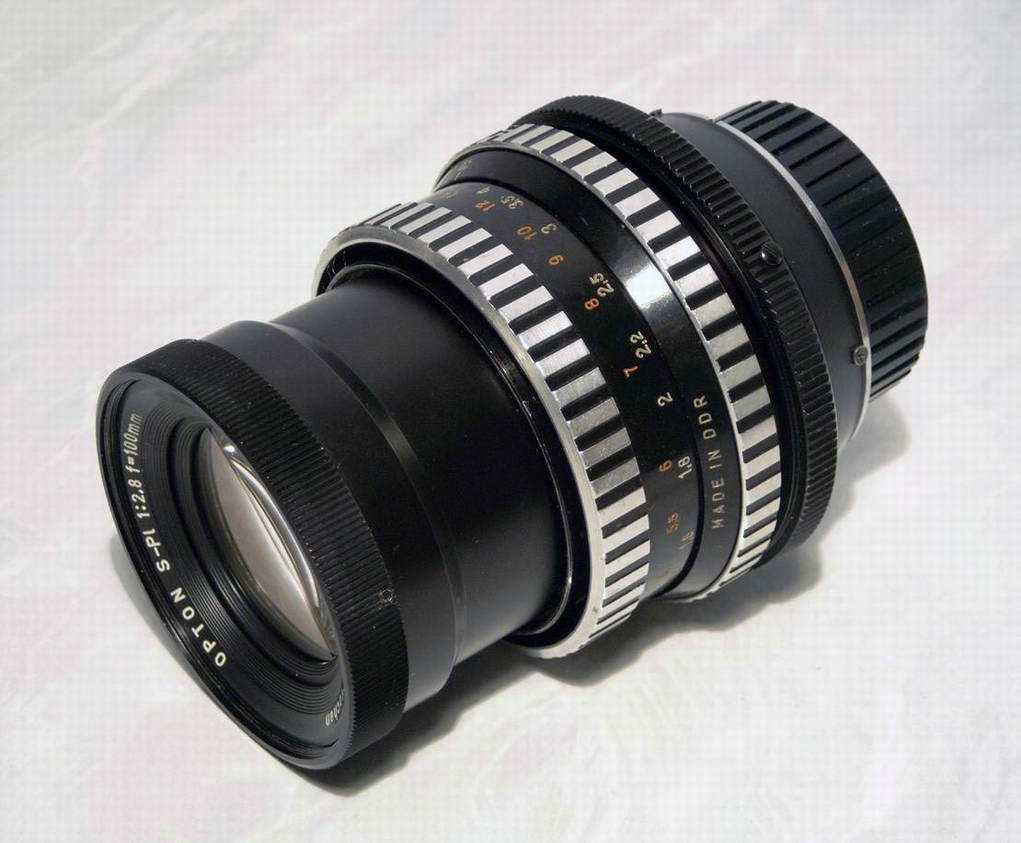
This picture is of a more recent version of the Hasselblad 50mm f4.0 CF Wide Angle lens. Notice that it's marked both Opton and Oberkochen. It is a style made from the 1980's up until the present time.
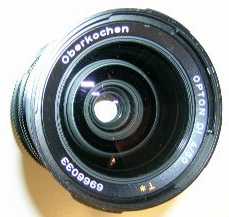
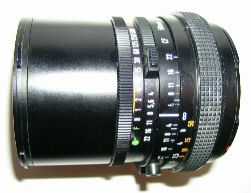
Just about everything that Carl Zeiss West made for sale in the West (America and its allies) was also made for sale in the Communist Block. So there are items labeled Zeiss Opton and Oberkochen Opton that are identical to items labeled Carl Zeiss from all times of manufacture up until the unification of Germany. It is not possible to make any generalizations about these lenses or other Carl Zeiss products based upon the trademark Opton or Oberkochen. But it is possible to make comparisons between Carl Zeiss and Carl Zeiss Jena.
The original Zeiss lens plant was located in the town of Jena. Jena was a center of lens making from the earliest days of microscope making and was the site of the original Zeiss lens factory. Zeiss lenses made before World War II are marked "Carl Zeiss Jena". After the War, the Jena factory kept working under the Communist government. This factory also made lenses for the Contax camera, and they were marked "Carl Zeiss Jena" whereas lenses made in West Germany were marked "Carl Zeiss". Now, pre-war lenses are also marked "Carl Zeiss Jena", so it can be somewhat confusing. It is sometimes not easy to tell a pre-war Jena lens from a post war Jena lens, except that the lens barrel and internal lens mounts of a pre-war Jena lens were made of brass, and most made after the war were made of aluminum with the exception that very rare wartime lenses made under military contract were also made of aluminum.
The one and only thing that is of photographic importance in all of this is that lenses made by Zeiss West which are labeled either Carl Zeiss or Zeiss-Opton or Opton Oberkochen are exactly the same in all respects. There is no optical or mechanical difference.
Zeiss invented lens coating prior to World War II in 1935
and it was kept as a military secret until after the war. Immediately prior to and for a period of time after the war the red "T" which stands for transparency, was used to designate coated lenses. The first
coated glass elements appearing in the Zeiss cameras is the window
covering the prism windows in the Contax II and III cameras. Coated
lenses started with the 50mm f.1.5 Sonnar that were introduced for sale prior to the Contax iIa..
The very earliest coated lenses bear no marking
to indicate they are coated. These lenses generally look very bad
because the coating technology used on them was experimental and was dropped.
Zeiss experimented with several types of coating technologies and the earliest
of these was a water based process that produced very thin streaked coatings.
When Zeiss discovered the vacuum evaporation coating
process and began to use it the coated lenses were still not marked.
The only way to tell they are coated is to look at them to see the bluish
tint of the coating on the front element. These lenses are wartime
made lenses and are marked "Carl Zeiss Jena".
The vacuum evaporation original coating procedure
did not apply the same coatings to all the elements in a lens. The
coatings on the exposed surfaces of the front and rear elements were relatively
hard and resistant to cleaning damage, but the coatings on the inner surfaces
of the lens elements are incredibly soft and can be damaged merely by touching
them with a cotton swab.
Shortly before the end of WWII Zeiss began to indicate
coated lenses by placing a big red dot into the front lenses bezel.
This marking is extremely rare. The more common coating designation
is the engraved red "T" symbol into the front lens bezel. In the
original lenses so marked, the coatings were the initial type with hard
coatings on the external surfaces, and easily damaged soft coatings on
the internal surfaces. You can be sure a 50mm Sonnar lens has soft
internal coatings if it is in the style of the original Sonnars made for
the Contax II and III. These are generally all chrome, with the aperture
control being smooth and not knurled, located at the very end of the lens,
and having two little tabs opposite to each other. As time progressed
after the war and into the late 1950's, the red T designation was dropped
because just about all lenses made by all manufacturer's were coated and
coatings became normal. Also, coating technology was (and is today) in a state of constant improvement.
After World War II Zeiss was split into two. The original Zeiss lens factory in the town of Jena was in the Russian occupied section of Germany. It continued making lenses with the red "T" marking and the soft internal coatings. Lenses made in Jena in Eastern Germany, later the German Democratic Republic (DDR) were continued with the pre-war marking of "Carl Zeiss Jena" and the red "T". It is not clear when the Jena factory switched to hard coatings inside and out, but they did and continued with the red "T" marking. You have to look into a "Carl Zeiss Jena" lens with a red "T' to see if has soft or hard internal coatings. The coating does not go to the edge of the internal lens elements and there is an uncoated annular area on the edge of each lens element that can be seen if you look for it carefully.
After World War II The Zeiss company in the American occupied zone opened a new lens factory in the town of Oberkochen. Lenses made in Oberkochen were initially marked "Zeiss-Opton", and carry the red "T". All lenses made in Oberkocken have hard coatings inside and out. Later the Oberkocken lenses dropped the "-Opton" and changed the name to "Carl Zeiss". When this name change happened the red "T" was also dropped. All lenses marked "Carl Zeiss" are hard coated inside and out. This applies for the Biogon, and all other focal lengths.
The issue of identifying a lens precisely can become confused by the fact that Carl Zeiss Jena made copies of the Carl Zeiss lenses after the war that are duplicates of the same lenses that were made for the Contax cameras by Carl Zeiss at Oberkocken. So don't be too surprised if you should someday purchase a Contax and find a lens on it that is coated but which is of a style and markings entirely different from those described here. I know that I'm still being amazed by the things that show up on the cameras customers send me to be repaired.
A sure way to tell if a lens has the soft internal coatings is to look into it with a magnifier. The internal surfaces were not coated to the edges, and there is an outer annular region on the internal surface of the front element that is not coated. The edge of this uncoated area is a little beyond the lens bezel and can be seen with a magnifying glass.
You have to watch out for a unmarked coated lens or "T" marked coated lens with soft coatings that has been serviced by a person unequipped to handle these lens elements without damaging them. It is normal for people who have found out they have damaged the coatings to remove the internal coatings completely. This can be done easily and quickly with a soft cloth. In such a lens there will be a hard coating on the external surfaces, and no coating on the internal surfaces. It's hard to tell such a lens by itself. But if it is held next to a coated lens with the internal coatings intact, the lack of coatings on the internal surfaces will immediately become evident by comparison.
Coatings can be restored at a cost of about $65.00 per lens surface.
Be very careful about buying a lens with soft internal coatings. If you buy such a lens you will need to be especially careful about who you have service the lens. Most people who service such lenses will simply remove the internal coatings rather than live with the problems of cleaning them properly so the coatings are preserved.
I have serviced a large enough number of various Carl Zeiss Jena, Carl Zeiss and Zeiss-Opton lenses made for the Contax camera to know the types of problems they tend to have. There are a number of typical problems.
Sometime in the 1960's Carl Zeiss (West) decided to experiment with the use of Epoxy type lens cement. Previous to this change the type of lens cement used was a natural purified tree sap called "Balsam". There is a big difference between the two types of lens adhesives. Balsam basically never hardens completely. Being tree sap it's always sticky. But it melts at a fairly low temperature of about 140 degrees Fahrenheit. The Epoxy type cement hardens completely and continues to harden and cure for a great many years until it's finally just one huge molecule. As it hardens it tends to loose its stickiness and will separate from the glass. This separation can be delayed for a very long time if a bead of the epoxy is left at the exposed part of the lens joint, but Zeiss didn't do this and so over time the lenses that have been cemented together with epoxy type cement tends to start separating from the edge. The iridescent edge separation one sees in many later lenses marked "Carl Zeiss" without the red "T" designation is caused by separation of the epoxy cement.
Balsam cemented lenses are subjected to darkening from high temperature oxidation, and to separation indicated by large bubbles in the center of the lens, which typically appears when the lens is exposed to temperatures in excess of 180 degrees Fahrenheit. Epoxy cemented lenses are subject to the iridescent edge separation which can occur instantaneously at any time without any warning. Epoxy cemented lenses tend to separate when they are temperature shocked by being moved from a high to low temperature environment.
Zeiss continued using the epoxy lens cement in the Contarex lenses.
There can be a problem is with the iris mechanism on the Carl Zeiss
(West) or Opton 85mm f2.0 lens. This problem is not evident to most
buyers because the oil on the iris blades masks the problem. It only
becomes evident when the lens is serviced and the iris mechanism is cleaned
of its oil and is dried. When the oil is removed I have noticed that
in about one of every four lenses the iris mechanism will not open to full
aperture. In every case the iris has stopped opening about one stop
from full open. The problem is there is a single iris blade with
a small bend in its inner tip or an edge catch. This tip or edge
catch, if it is not lubricated, will interfere with the opening of the
iris. This is why an old lens with oil on the blades will not disclose
this problem to the buyer. The solution is to apply a very small
amount of very fine oil to the iris mechanism pivot points for each blade.
There is no mechanical solution
There can be a problem which is most photographically significant, is severe misalignment of the central element in its frame in the postwar 50mm f1.5 Sonnar lens. In pre-war 50mm Sonnar f1.5 lenses the central element fits into the lens barrel as bare glass element. So there can be no misalignment. It fits precisely in its precision machined barrel as do the other elements. In the postwar Carl Zeiss and Opton lens, the central element is fit into a separate brass frame. The brass frame is made of two parts, one is threaded male and the other female so that the central element is held tightly in its frame when the two parts are screwed together. The problem comes about because the threads may be badly formed on one or both pieces of the frame. When this happens the assembler will have tightened the frame parts until they bind, which is well before they would seat with each other normally. And in order to keep the lens from rattling in its frame, an excess of lens blacking paint is used to "glue" it into place. In every such case the element has been glued in an improper position resulting in a lens that cannot take a good picture. I am convinced there are many "MINT" condition Contax cameras in the world with an Opton or Carl Zeiss lens on it that is fuzzy, and the owner was convinced it was a problem with the range finder that could not be corrected. It is possible to correct this problem completely.
While the outside appearance of the postwar 50mm f.1.5 lens remained
the same throughout its production life the inside changed a great deal.
Zeiss kept experimenting with the mount of the front element and central
triplet. My feeling is that they did this in an attempt to obtain
the best possible optical alignment of these two elements. In the
very last production lenses both the front and central elements are held
in a single brass frame. In the earlier versions the front and center
elements are held in separate mounts that fit into each other.
Modern glass making has changed a lot in modern times.
It wasn't so long ago that the bubbles in the glass were a sign the lens
was of the highest possible quality. How quickly we have
gotten used to photographic lenses that do not have bubbles in them.
When optical glass is made all of the ingredients
are mixed in a container that can take high temperatures called a crucible.
The ingredients are melted at very high temperature. Even when it
is melted, glass is very viscous and thick. When the melted ingredients
are stirred to mix them together, the mix tends to pick up air which forms
bubbles. Also, some of the ingredients in high tech. optical glasses tend to give off gasses when they are melted. The bubbles are removed from the glass by allowing the crucible
to sit in the high temperature furnace while the bubbles rise to the surface
of the melted glass as the melted batch is slowly stirred..
Up until about 25 years ago the materials of which
crucibles for optical glass making were made could not withstand the effects
of the extremely high temperature at which glass is made for very long.
There was a time limit on how long the crucible could stay in the furnace.
In order that the crucible not fall apart it was necessary to remove the
crucible from the furnace before all of the bubbles had time to rise through
the melted glass and escape from it. Another problem is that the
melted glass was corrosive to the inner surface of the crucible.
It was necessary to remove the crucible from the furnace before corrosion
of the inner surface of the crucible caused impurities to ruin the batch
of glass. Another problem is that making the highest quality optical
glass required higher temperatures than did lower quality optical glass.
So it was possible to make lenses without bubbles, but only if the glass
was of a lower quality. Back then, no bubbles in the glass meant
it was cheap.
The overall effect of these factors was that
for a very long time small bubbles in the glass of a lens were an indicator
of the highest quality. It is still such an indicator today
for lenses which were made prior to around 1975.
Sometime around 1975 crucibles for optical glass
making were developed which could withstand the high temperatures
required for making the highest quality optical glass long enough so that
the molten glass could be left in the furnace until all of the bubbles
had risen out. These crucibles were also resistant to the corrosive
effects of molten glass on the inner surface of the crucible. Since
then high quality optical glass has been virtually bubble free.
So when you are looking deep into a Zeiss lens for your Contax camera, and you see some little bubbles deep inside, rejoice because you have found a rare and special jewel that will take most excellent photographs. The bubbles are photographically insignificant and do not affect the quality of the pictures the lens will take. They are merely an indicator of great quality.
Also keep in mind that when a lens blank contains bubbles it is only natural that during the grinding and polishing process where glass is removed that some of these bubbles will become partially exposed. These exposed bubbles will appear to be small tiny pits on the surface of the glass on both the front and rear elements. These are natural, to be expected and cannot be avoided. They are an artifact of the lens glass being superior.
There are many forms of fungus that like to live in conditions where the oxygen level is low, and where there is petroleum oil to consume. The conditions are perfectly provided in a lens which has been in storage for a long time, or which is otherwise sealed so that fresh air cannot easily enter it.
The grease used to lubricate the aperture control ring threads tends to separate into its basis oil and other components over time. Most lenses made in the 1950's, and which have not been serviced since them contain separated grease. The oil that separates from the grease spreads through the lens and coats all surfaces of the lens elements. This thin layer of oil over glass is an ideal spot for fungus to grow.
There are basically two types of fungus. There is oxygen loving fungus, and fungus that grows only when there is little oxygen. There is a big difference in the effect of these two fungus types. Oxygen loving fungus gives off carbon dioxide as it feeds and digests its food and is relatively harmless, and the other type of fungus gives off liquid acid. It is this acid that can etch the pattern of the fungus into the coating of the lens upon which it grows.
A lens that is used often, and has an action which tends to facilitate the exchange of fresh air into the lens, will usually become colonized with the oxygen loving form of fungus. This oxygen loving fungus does not produce acid, and can usually be cleaned from the lens without any damage to the lens coatings. This is what usually happens with Zoom lenses or fixed focal length lenses with long focusing helicals. The normal appearance of this type of fungus is like a haze of fine filaments growing in the air space between the lens elements.
A lens that is sealed, such as a 50mm f1.5 Sonnar or f2.0 Sonnar, will usually develop the type of fungus that grows when the oxygen level is low. This acid producing type of fungus typically grows on the element surface itself. It usually takes a clear and crisp fine branch like form spreading from the edge of the lens elements inward toward the center. The acid generated by this fungus has a number of bad effects upon the lens. The most obvious effect is etching of the lens coating. If left to grow too long this etching can attack the glass surface itself. The acid also tends to weld the threaded elements of the metal lens parts together with a film of corrosion. Lenses that have had an acid fungus infection can be extremely difficult to take apart to clean. The acid can also etch patterns into the aperture blades and cause cracking of the blades. Acid will also remove plating on brass parts, and etch aluminum parts making them impossible to separate.
Removal of the fungus must be thorough. Each and every part of the lens must be cleaned so that it is disinfected. If the lens is not disinfected, the fungus will continue to grow once the lens is resealed. It is also important to remove all traces of the original lubricant and replace it with synthetic lubricants that are highly resistant to mold growth.
It is possible to restore many fungus infected lenses to perfect condition. Some, sadly, are unsalvageable because the threaded components have been permanently welded together by acid corrosion of the fine threads. The only way to find out if your lens can be saved it to have it examined as quickly as possible after you notice the fungus growth in it. Time is of the essence with a fungus infected lens. It is important not to assume that a fungus growth has taken a long time to develop, or that there is time to wait. A week or two of delay can make the difference between a valuable lens perfectly restored and one which is only good to be cut apart so that the lens elements can be salvaged for parts.
If your lens has fungus, write me now. Don't wait.
It is possible to re polish the front or rear element
of a lens. This is a fairly drastic technique to use on a lens.
It is not possible to reverse it if the results are not good. Hence
it is usually appropriate to re polish a lens only when it is so badly hazed
due to cleaning scratches that it cannot produce an acceptably sharp image
otherwise.
When a lens surface is re polished the figure of
the lens element is changed. If one is very very lucky, the lens
was originally out of specification and the polishing will actually bring
it into a closer correspondence with the ideal figure. But in most
cases this will not happen and it is generally not the result that the
lens is restored to its original sharpness performance potential.
But, in most cases, a lens that produces a fuzzy picture can be restored
to produce pictures that are acceptably sharp.
There are two compensations. The first is
that it has been my experience that most lenses for the Contax cameras
were not critically adjusted for focus in their mounts at the factory.
My experience is that most normal 50mm lenses are at least 3 to 4 feet
out of adjustment towards infinity. This simply means that when the
range finder is indicating 10 feet the lens is focused at 13 to 14 feet.
Mostly this goes unnoticed because most people rarely use a lens at its
full aperture and so depth of field usually covers the gap. But after
a lens is re polished I critically focus adjust the lens at full aperture
and this usually obtains a degree of compensatory focus adjustment sharpness
which compensates for the loss of it due to the deterioration of the lens
surface that has been scratched and re polished
The second compensation applies to the 50mm f2.0
Collapsible Sonnar. Most people who use this lens use it incorrectly.
When it is mounted on the camera it is necessary to twist the lens barrel
counterclockwise (facing the camera front) to seat the lens in the camera
mount. Following this it is necessary to twist it clockwise to set
the lens barrel firmly into the lens mount and set the lens firmly into
its three infinity locks. Most people who use this lens fail to twist
the lens clockwise after it is mounted on the camera, and the result is
it is used out of alignment. This deficit is approximately another
4 to 5 feet towards infinity. I think this explains the poor reputation
of the lens. It is truly a superlative lens and is razor sharp, but
it must be twisted clockwise after it is mounted to the camera to get this
performance. A critical adjustment followed by proper usage after
a front element polishing usually produces a great improvement in the original
performance of the 50mm Collapsible Sonnar lens.
What is Lens Element Separation/ Cement Failure and What can be done about it?
The Zeiss Sonnar 50mm f1.5 has six lenses in three groups. There is one group of two cemented elements, one of three cemented elements, and one of one un cemented element. When lenses were cemented together from the beginning of photography and up until the most recent times, the cement used was balsam, which is a form of highly refined resin obtained from pine trees. Balsam softens as it warms. Lenses were cemented at a temperature of about 150 degrees Fahrenheit and then allowed to cool. The nice thing about balsam is that errors in the lens element positioning can easily be corrected by heating the lens to about 125 degrees Fahrenheit, and the carefully manipulating the lens. The bad thing about balsam is that a closed car in summer can get hot enough to cause the balsam to melt and for the lenses in a cemented group to separate. The following picture is of a 50mm f1.5 Sonnar that spent too much time in a closed car in Summer:
The group of bubbles in the center of the lens is not fungus. It is cement failure. The lens got hot enough for the balsam to melt and to allow bubbles of air to come in from the side of the lens. The failure in this lens is not in the front element. It is in the second element that is made up of three lenses cemented together. I know it looks like it is in the front element, and that some people call this fungus, but it is definitely not fungus and is not in the front element.
There is a fix for this problem. The lens must be disassembled. The center element must be removed from its brass frame, cleaned of its black paint, then heated and separated into its three individual elements. Then these must be each cleaned of residual balsam, and reassembled using modern lens cement that hardens under ultraviolet light. Assembly must take place in a very clean area using a special high precision alignment jig to make sure all three elements are properly aligned before the new cement is permanently hardened.
If your Sonnar or any other lens has a separation problem it can be repaired and the lens restored to perfect quality. Write me.
There is another lens problem that involves the cement. Zeiss experimented with the use of Epoxy cement to join lens assemblies during a period of several years in the 1960 - 1970 period. The problem with the epoxy cement is that it becomes too brittle with time and partially separates from one of the lens surfaces. This is a fairly common defect. This type of separation looks like an iridescent crescent at the edge of the lens. Recently I have developed a method of correcting this problem that allows for the lens to be cleanly separated without affecting the coatings or the glass in any way.. The following two pictures show a before and after center triplet from a Carl Zeiss 50mm f1.5 Sonnar:
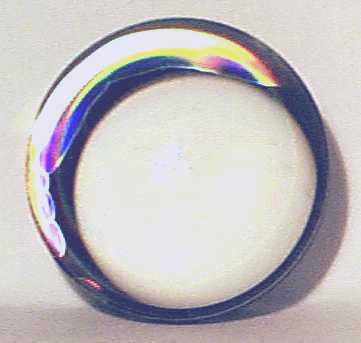
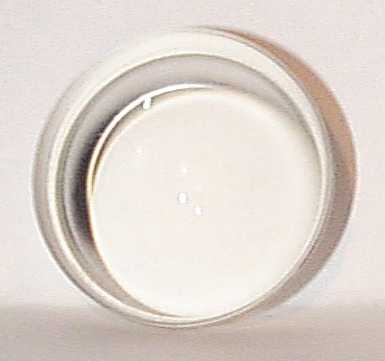
You can find out a lot more about the recent developments in the use of high tech. lens separation processes, high tech. lens cement and ultra high precision lens centering in the Lens overhaul page by using this link to it:
If your lens has this problem and you want it to be corrected write to me at superwide@earthlink.net by using this link:
Oil on the Aperture Blades, Is this Important?
Oil on the aperture blades means that the damping grease used to lubricate the aperture control threads has deteriorated and has disassociated. Damping grease is used to give camera controls their smooth positive operation. The oil on the blades is an indication that there is also an oil film on the outer surface of the inner lens elements. The oil film is not usually visible on the external surfaces because the lens elements sit tightly enough in their mounts to provide a good seal between the inside of the lens and the outside elements, so the oil tends to stay in the inner section of the lens.
This oil film on the inner lens elements severely deteriorates the photographic quality of the lens. The reason for this is that the lens elements were formed with the most extreme precision to bend the light properly with clean and dry surfaces. Even a microscopic oil film will ruin the performance of the lens. Typically this oil film is not visible to the naked eye under normal light.
The oil can serve as a source of food to mold and bacteria. Once this growth is established, damage to the coatings quickly follows.
The oil can become acidic and cause cracking of the aperture blades. All of the instances of such cracking have been in the vicinity of the aperture blade pin. This damage is not repairable because repair parts are no longer available. The oil will mask the presence of this damage because it also lubricates the blades so that they will slide over each other easily and will not get caught on the crack in other blades.
It is imprint to have your lens serviced if you notice oil on the aperture blades.
The lens mount on the early Nikon S series of rangefinder cameras as well as that of the very recent Nikon S limited edition commemorative camera is identical to that of the Contax I, IIa, IIIa, II and III camera bodies. Unfortunately, the focusing helical thread pitch is different between the two makers. This can cause a rangefinder to lens mismatch when Nikon lenses with focal lengths greater than 50mm are used on Contax cameras or when Zeiss lenses are used on a Nikon camera. The only exception to this are 135mm lenses made by Nikon expressly for the Contax cameras. These lenses are marked on the barrel with an engraved red "C" to indicate they are calibrated for use on Contax cameras. It is normal for all Nikon Nikor lenses with the Contax type mount to have a red "C" marked on the lens bezel to indicate the lens is coated. For example: the designation of the 35mm f2.5 Nikor Lens for Contax is "W-Nikor-C".. Zeiss made no lenses for the Nikon S camera.
There have been an increasing number of ever cheaper Russian made Jupiter lenses on the market lately. The one thing to keep in mind is that the Jupiter wide angle lens is not a Biogon and the 50mm f1.5 lens is not a Sonnar. Mechanically they are extremely rough. Large amounts of extremely thick damping grease hides the the roughness of the helical threading.
Optically the quality varies widely. You can easily obtain a very bad lens or a very good one. There's just no way to determine the lens optical quality from its external appearance. The only way to find out the quality of the lens is with the camera and with film, and by then it may be too late to be able to return it.
If you find your recently purchased Russian lens will not focus at infinity this can usually be corrected.
Can I Have a Contax Camera Custom Built?
Perhaps the first question to ask is what are the risks associated with the purchase of an old Contax camera?
When you purchase a used Contax camera, regardless of its exterior appearance, you can have no idea of its internal condition. I recently serviced a IIIa black dial Contax camera that had an excellent appearance, the focusing was smooth and the viewfinder/range finder was clear. But the owner noticed the film advance would grind to a halt after three or four exposures, so he sent it to me for a servicing. When I opened the camera I found that the previous seller had opened the camera, had cleaned the focusing helical, had cleaned the range finder/viewfinder and had damaged the light meter in an attempt to make it work with a dead cell. The shutter mechanism and film advance mechanism were filthy with old dirty degraded grease and had been left untouched. A part had broken off from the light meter from the force applied to the adjusting screw, it had fallen into the shutter control and timing mechanism and this part was shaving brass off of the shutter parts whenever the film was advanced. Now this is a true horror story, and it is the worst case. But it can happen to anyone.
I expect that one out of every five Contax cameras I buy will not be suitable to rebuild and sell. I expect that one out of every three I buy will be missing parts, will have damage due to unqualified personnel working on them, will have mold, or will have serious original factory defects.
When you buy a used Contax off the open market you take the same risks that I do when I purchase them for my purposes. You are making a bet that you won't get burned, and the chances are 1 out of 3 that you will get a really good camera. It is entirely possible for you to pay good money for a camera with defects that cannot be completely corrected. Many defects in Contax cameras are due to misplaced holes for screws that hold critical shutter parts in alignment. A difference of 0.005 inch. in a critical screw hole location cannot be seen with the naked eye, but it can make the difference between a camera that has a maximum shutter speed of 1/450 and one that has a maximum speed of 1/1250.
If you have a camera built for you it will cost more than it will for you to buy a camera on Ebay and then have it serviced by me. The reason for this is that it takes about 1 1/2 bodies to make one really exceptional looking and performing camera. You will have to pay for this including my time and trouble. But then you assume no risk.
If you want a Contax IIa or IIIa color dial or black dial camera that is 100% built for you, write to me about it. I will be happy to make a dream Contax for you to enjoy for many years of fantastic picture taking.
Zeiss Chrome
The chrome on Zeiss cameras and lenses is not known for its durability. There are some good reasons for this. The normal chrome plating process involves three metals. First a layer of copper is applied, next a layer of nickel, then finally a layer of chrome. This method provides the greatest durability. This is because the sequential layers provide a flexible base for the chrome which is incredibly brittle. Also the nickel is very corrosion resistant so pin point corrosion is unlikely to start underneath the chrome layer. Zeiss abbreviated the process and plated chrome directly onto brass. This makes the chrome liable to flake due to stresses between the brittle chrome layer and the underlying brass. Also the brass is not nearly as corrosion resistant as nickel is, so the chrome is likely to flake due to pin point corrosion of the brass that starts in little pores in the chrome layer. The chrome plating on the Contax cameras is unusual. It is not "decorative" chrome as is used on car bumpers and other consumer equipment. It is a type of chrome known as "hard" chrome plating. Hard chrome plating builds up a very heavy layer of chrome. When chromium is plated thickly it cracks. It is this microscopic cracking that forms the very fine patterned surface of the chrome on the Zeiss cameras. Unfortunately, these cracks trap the highly corrosive chrome plating solution and allow the entrance of oxygen and contaminants to pass through the chrome layer into the base surface where corrosion can begin. This makes the chrome liable to flaking and pitting.
Can Anything be Done for Bad Paint?
Some Contax IIa/IIIa bodies have flaking, bubbling and separating paint. There can be several reasons for this. The most common cause of bubbling is excessively high humidity. All paint has pores and moisture can enter through these and contact the underlying metal. This process usually happens on bodies whose metal was not treated to make it more corrosion resistant before it was painted. The corrosion that forms underneath the paint separates it from the body and lifts it causing blisters. But there is a downside to treating aluminum so that it resists corrosion and this makes it more difficult to get paint to adhere.
At some point in time Zeiss began to treat the cameras to eliminate the corrosion problem by anodizing the metal body before it was painted. Anodizing is a process used on aluminum that oxidizes the new metal surface to form a very thin and hard layer of oxidized aluminum. Anodization typically involves two steps, first is the chemical treatment to form the oxide layer and the second is to dye this layer with a colored dye. In most cases the dye used is black, but there are a great number of different colored dyes available. The dye chemically combines with the oxidized aluminum and is permanent. The problem with this process is that it makes it extremely difficult for enamel paint to adhere properly. Paint is a chemical formulation that requires a specific surface chemistry in order to bond satisfactorily to the surface to which it is applied. Anodized aluminum is perhaps the hardest material to paint because it is absolutely chemically neutral and normal enamel paint cannot adhere to it. My experience with Contax bodies is that Zeiss used a number of different paints in an attempt to overcome this difficulty. Some were more successful than others.
Fortunately, it has become possible to make hand made paint that is the original Zeiss used on the Contax. It turns out this paint is very special in that it is over 50% genuine amber. The amber makes the paint extremely hard and long lasting. But it is very expensive to make and can only be made in extremely small quantities. However, if you have a camera with great sentimental or other value to you where the expense of a paint job is not a major barrier the right paint for the job is now available.
What Should be Done if The Camera is Dropped in Water?
Send me an email as quickly as you can. In the email tell you your name and the address where the camera is. I will schedule the earliest possible Fedex pickup at that location and will have your camera shipped to me by overnight express using my Fedex account number.
Here's the Emergency Procedure:
Your camera is worth a lot of money and is a very rare thing. If it is dropped in water you need to act very quickly so that the potential for irreparable damage is minimized.
- Step One:
The first thing to do once the camera is out of the water is to remove the film immediately. If left in the camera the film emulsion will get into the camera works and make restoration much more difficult than it needs to be. The film is ruined anyway, so get it out of the camera as fast as you can.
- Step Two:
The second thing to do is to remove the lens. Even if you can't see it between the lens elements, there will be water in the lens. Shake the lens carefully to remove as much water from it as you can.
- Step Three:
Hold the camera very tightly and then shake it to remove as much water from it as you can. Keep shaking it until no more water comes out of it.
- Step Four:
Get to an electric hair dryer as fast as you can. Buy one if you need to. If you are a long way from one, but you are near to an automobile, use the automobile heater. Drive the car and warm it up. Hold the camera and lens in front of a heater air outlet and set the heater and fan on their maximum settings. Put the camera so the air blows into the front lens opening. Hold the lens so the air blows towards the front of the lens.
If you are using a hair dryer you will need to carefully dry the lens and camera for about two hours or more. Do not allow the camera or lens to get so hot they are hard to hold. You can check your progress by letting the lens sit for awhile after it is heated. If it still has water in it you will be able to see condensation inside it. Keep heat treating the lens and camera together until the lens does not show condensation after it is allowed to cool for fifteen minutes or so.
DO NOT PUT THE CAMERA OR LENS IN AN OVEN! USE BLOWING HEATED AIR ONLY!
- Step Five:
Once you are finished heat treating the camera and lens get a box and newspaper. Carefully package the lens and camera body separately. DO NOT WRAP THE CAMERA OR LENS IN PLASTIC BUBBLE WRAP, OR PUT THEM IN A PLASTIC BAG.
- Step Six:
Send me an Email as quickly as possible. In your email let me know your name and the address where the camera will be on the next day. I will schedule a Fedex overnight shipment of the camera to me from your location using my Fedex account number.
How Should I Care for My Contax?
The reason your recently overhauled Contax looks so good is that it was covered with a film of oil that was released from the deteriorated grease within it. During the overhaul the camera body was carefully cleaned, inside and out, so this protective oil film is no longer present. You need to do a little preventative maintenance to keep your Contax looking beautiful.
- Do not ever use any type of solvent such as alcohol, acetone, tar remover, or dry cleaner on any part of your Contax. Do not use furniture cleaner, dust off or other commercial cleaner.
- Do apply a high quality paste wax to the leather from time to time. Use a soft rag or cotton swab to apply and polish it.
- Use a soft cloth lightly moistened with water or Windex or other clear water based glass cleaner to clean the chrome occasionally.
- Use a cotton swab and some Windex to clean the viewfinder windows.
- Clean the lens surfaces as seldom as you possibly can. Do not develop the habit of cleaning the lens regularly. The Coatings on your lenses are not very hard and can be damaged easily. Use a fine Sable brush from an art supply house to dust the lens before you clean it. Use a professional lens cleaning fluid from your optometrist to clean the lens. Use a very soft cloth and a very light touch. Never ever clean your lens without brushing it with a clean soft brush beforehand to ensure any grit particles on it are removed.
- When your Contax is not in use, store it in a clean dry place. Do not store it in the kitchen, a bathroom, a darkroom, the garage or other room where water is regularly used. Do not store the camera in an air tight case such as a Pelican case. If you use a Pelican type air tight case when you travel with your camera, be sure to leave it open when you put it away. A tightly closed case will encourage the growth of mold.
- Use it as often as you can.
- Have the camera serviced at least every five years.
The phenomena commonly called "Zeiss Bumps" are typically hard bumps under the leather of the camera back. These bumps are caused by the growth of waxy hard lumps of a chemical product that is the result of the reaction between the copper in the rivets holding the pressure plate and/or the film roller to the inside of the back, and the chemicals used to tan the leather.
Zeiss used a thick coating of shellac based glue to hold the leather on the back. Holes due to incomplete coverage of this glue allow contact between the exposed rivet heads and the leather. The growth of the chemical causes hard lumps under the leather. The material is a deep green hard waxy substance that does not adhere to either the leather or the metal.
In most cases Zeiss bumps can be removed. The success of this operation depends upon the condition of the leather. The better the condition of the leather, the more successful the removal.
It is important to understand that my process for bump removal consists of removal of the leather without damage to the leather or its surface. Once the leather is removed, the leather and metal are cleaned and three coats of a sealant is applied to the rivet top to prevent a new bump forming. Then the leather is re cemented in place in one piece.
Out there in the rest of the world the standard method of bump removal is to use a razor to cut slits on top of the bump. Then the bump material is extracted from the hole in the leather, and the leather is re glued in place so that hopefully the cut damage won't show for a while. My opinion of this method is that it is destructive of irreplaceable original Zeiss leather, is indicative of stupid lazy work that has only profit in mind and is just plain old fashioned camera butchery at its worst. It doesn't take long for the bump to re grow when removed by this method, the new bump spreads open the cut, and the only way to properly correct the situation is to replace the leather. Here is a picture of the results of this kind of camera butchery:
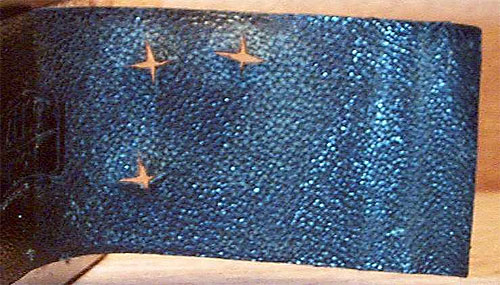
The next two pictures are a before and after example of Zeiss bump removal from a back as this process is practiced here. These pictures illustrate a typical back and the type of results that can be expected provided the leather is in good condition and the bumps are of moderate size.
Before
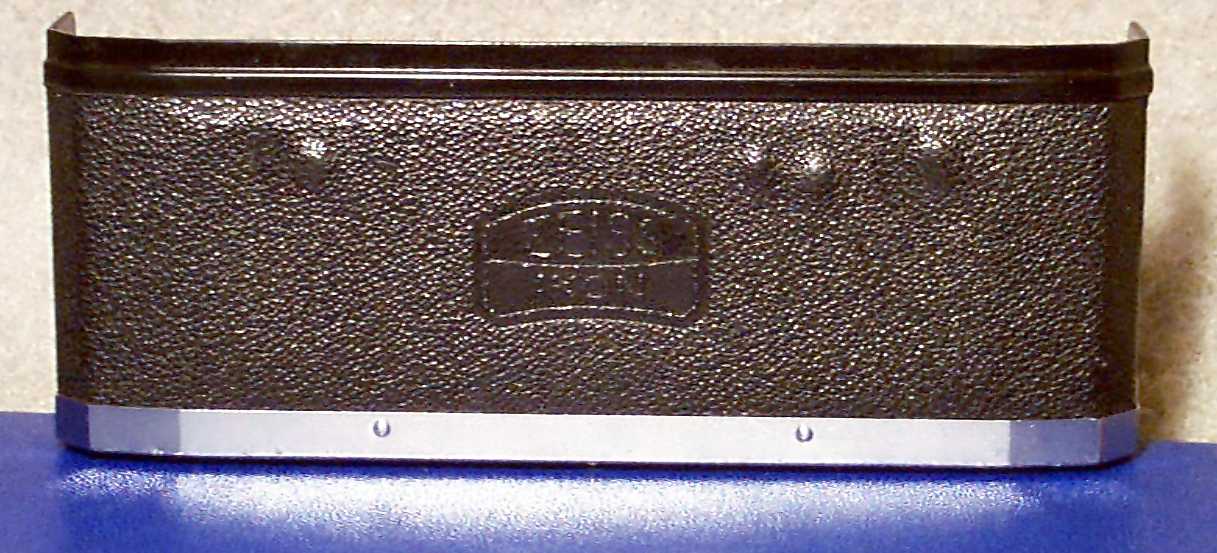
After
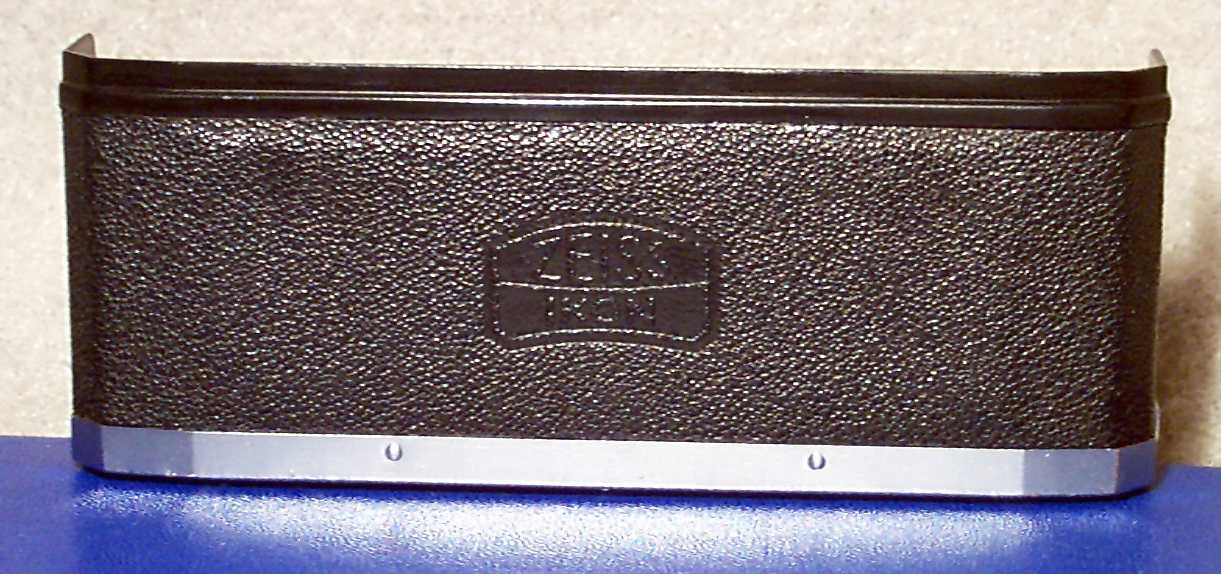
If the bumps are large the leather can be permanently deformed and there will a mark remaining in the area where the bump was due to changes to the leather texture caused by the pressure caused by the bump growth. If the bumps are extremely large a small depression can remain where the bump was. This is caused by the consummation of the leather in the bump material.
In some cases the leather is in such poor condition it is not possible to remove it from the back. In this situation the only remedy is removal of the leather followed by leather replacement.
Many people have inquired about the availability of cases for their cameras. Unfortunately the old cases are over 50 years old, and leather that old has lost most of its strength. There are almost no original Contax cases available that are serviceable for regular use today. New custom made leather cases are available for the Contax I, II, III, IIa and IIIa model cameras here and now.
It is possible to recover a camera with new leather completely or to replace individual front or bach panels individually. Replacement leather of the same quality as the original Zeiss leather is available and can be tightly fit to the camera. Custom leathers are also available such as snake skin, ostrich, or other leather textures and colors you may require. In addition we have custom stamps so that all the original Zeiss logos will be permanently embossed into the replacement leather.
Perhaps the first question to ask is what are the risks associated with the purchase of an old Contax camera?
When you purchase a used Contax camera, regardless of its exterior appearance, you can have no idea of its internal condition. I recently serviced a IIIa black dial Contax camera that had an excellent appearance, the focusing was smooth and the viewfinder/range finder was clear. But the owner noticed the film advance would grind to a halt after three or four exposures, so he sent it to me for a servicing. When I opened the camera I found that the previous seller had opened the camera, had cleaned the focusing helical, had cleaned the range finder/viewfinder and had damaged the light meter in an attempt to make it work with a dead cell. The shutter mechanism and film advance mechanism were filthy with old dirty degraded grease and had been left untouched. A part had broken off from the light meter from the force applied to the adjusting screw, it had fallen into the shutter control and timing mechanism and this part was shaving brass off of the shutter parts whenever the film was advanced. Now this is a true horror story, and it is the worst case. But it can happen to anyone.
I expect that one out of every five Contax cameras I buy will not be suitable to rebuild and sell. I expect that one out of every three I buy will be missing parts, will have damage due to unqualified personnel working on them, will have mold, or will have serious original factory defects.
When you buy a used Contax off the open market you take the same risks that I do when I purchase them for my purposes. You are making a bet that you won't get burned, and the chances are 1 out of 3 that you will get a really good camera. It is entirely possible for you to pay good money for a camera with defects that cannot be completely corrected. Many defects in Contax cameras are due to misplaced holes for screws that hold critical shutter parts in alignment. A difference of 0.005 inch. in a critical screw hole location cannot be seen with the naked eye, but it can make the difference between a camera that has a maximum shutter speed of 1/450 and one that has a maximum speed of 1/1250.
If you have a camera built for you it will cost more than it will for you to buy a camera on Ebay and then have it serviced by me. The reason for this is that it takes about 1 1/2 bodies to make one really exceptional looking and performing camera. You will have to pay for this including my time and trouble. But then you assume no risk.
If you want a Contax IIa or IIIa color dial or black dial camera that is 100% built for you, write to me about it. I will be happy to make a dream Contax for you to enjoy for many years of fantastic picture taking.
Lubricating Oil
Here is a photograph of the special lubricating oil I use to service Contax cameras that are winterized. This oil is absolutely the finest quality available anywhere. Although it is extremely expensive, only a small amount is require to service a body. One of the restrictions with such an oil is that the metal surfaces must be absolutely clean. This is why camera disassembly and ultrasonic cleaning of all moving parts is mandatory for its use.
For Arctic service this special oil is used. The bottle shown holds approximately one quarter of one milliliter of oil. This is very rare and special oil.
This is the special grease used for winterization and arctic service. This is another extremely expensive lubricant that requires absolutely clean and bright metal surfaces to operate properly.

The 85mm f2.0 Sonnar is the lens about which I receive the most inquiries. It is the lens people tend to want to purchase as their first accessory lens following the purchase of a camera body with a normal 50mm Sonnar or Tessar lens.
All versions of the 85mm f2.0 Sonnar are color corrected. This includes the 85mm f2.0 Sonnar made in 1932 for the Contaflex TLR up to the last production 85mm f4.0 Sonnar made in 1964. In modern words "Color Corrected" means "APO". An 85mm f2.0 Sonnar can be used to make very high quality color split negatives for the antique methods of color printing such as Tri-Color Carbo or Dye Transfer and it will provide excellent results with modern color films like Kodachrome. The only effective difference between all the various 85mm f2.0 Sonnar versions is coating. Coating greatly reduces flare but has no effect upon the color correction of the lens.
There are basically six 85mm f2.0 Sonnars. These are:
1. The Contaflex TLR version made before World War II. Marked Carl Zeiss Jena.
2. The Contax I black paint version made before World War II. Marked Carl Zeiss Jena.
3. The Contax II and III chrome plated version made before World War II. Marked Carl Zeiss Jena.
4. The Contax II and III chrome plated coated Wartime version. Marked Carl Zeiss Jena with a red dot.
5. The Contax IIa and IIIa aluminum lacquered body with T coated optics. Marked Carl Zeiss Jena with a red T.
6. The Contax IIa and IIIa aluminum chrome plated body with T coated optical. Marked Carl Zeiss with our without a red T or Zeiss-Option with or without a red T.
The following discussion will be concerned only with the postwar lenses, versions 5 and 6 above.
Zeiss officially restarted Contax rangefinder camera production following the end of World War II with the Contax IIa. It was introduced to the world at the 1951 Photokina. The Contax IIa body was manufactured by Zeiss (West) in Stuttgart, and the lenses were produced by Zeiss (East) in Jena. The initial lenses and other optical accessories made for the Contax IIa were made in Jena.
The Postwar Carl Zeiss Jena T Coated 85mm f2.0 Sonnar:
The first 85mm f2.0 Sonnar made for the Contax IIa was the Carl Zeiss Jena T coated lens. It is an extremely sharp high contrast color corrected lens. There is almost no Zeiss literature available about it and so it must be assumed that the optical characteristics of this lens were intended to match or be better than the pre-war 85mm f2.0 lens. It is typical for this lens to have a variety of small original factory cosmetic optical defects such as bubbles in the glass, residual grinding marks, inclusions in the optical cement and coating defects. But in spite of these this lens is the best performing 85mm f2.0 Sonnar ever made by Zeiss. The insignificant cosmetic optical defects are a consequence of the very bad industrial, societal and political circumstances in Germany at that time. Germany had been totally smashed to pieces during the war and this lens was being made in factories that still did not have windows in them. But, in spite of these difficulties, the lens making artists at Jena did as all truly great artists do in hard times; they produced stunning paramount works of the lens making art. This lens is very rare because political developments in Germany quickly made it impossible for the Eastern and Western Zeiss companies to openly cooperate. It is almost impossible to find one of these lenses in pristine external cosmetic condition. Being a truly great lens it got used a lot. Lenses that get used a lot tend to look like they were used a lot.
The Postwar Carl Zeiss or Zeiss-Opton 85mm f2.0 Sonnar:
I am having lenses presented to me for overhaul that indicate there is a strong possibility that Zeiss issued two versions of the postwar 85mm f2.0 Sonnar made in Oberkocken.
The First Version:
The second 85mm f2.0 Sonnar made for the Contax II was made at the Zeiss factory in Oberkocken. It appears that with the appearance of this lens production of the Jena version ceased. This lens is marked either Carl Zeiss or Zeiss-Opton. Early production is marked with a red T and later production does not have the T mark. There is a lot of Zeiss literature about this lens. Zeiss advertised it to be a "Portrait" lens. At that time when a lens was called a Portrait lens this meant it was a soft focus lens. This lens is a soft focus lens. I have only seen one that focused as sharply as does the Jena version. The fact it is a soft focus lens explains to me why it is so easy to find one of these lenses in almost pristine exterior cosmetic condition. Soft focus lenses don't get used much. These lenses were made later during the German postwar recovery period and so don't tend to have so many optical cosmetic defects as do the earlier production postwar Jena lens. This lens tends to have aperture blade defects which require lubrication of the aperture blades to correct and allow the aperture to open fully. Being chrome plated over aluminum the chrome plating tends to suffer badly if the lens has been stored in high humidity circumstances.
The Second Version:
Over the past five years I have examined two Oberkocken made Zeiss-Opton marked 85mm f2.0 Sonnars which were made to allow the focusing of the lens to be set so that the lens is not a soft focus type. Both of these lenses were externally in all ways identical to the first version described above except for an additional marking consisting of a caponized old German Script "F" engraved on the lens bezel as shown here: "f=85 mm F Zeiss-Opton". Both lenses had been very hard used and showed it as is typical of Contax lenses that performed well when originally made.
The Workroom
Finally, here is a picture of the workroom where your camera will be serviced with care, skill, craftsmanship and patience. It is equipped with every tool and resource needed to repair, replace or manufacture any part your camera may need. It contains every special testing tool required to ensure your camera, lens and light meter is reliable and accurate.
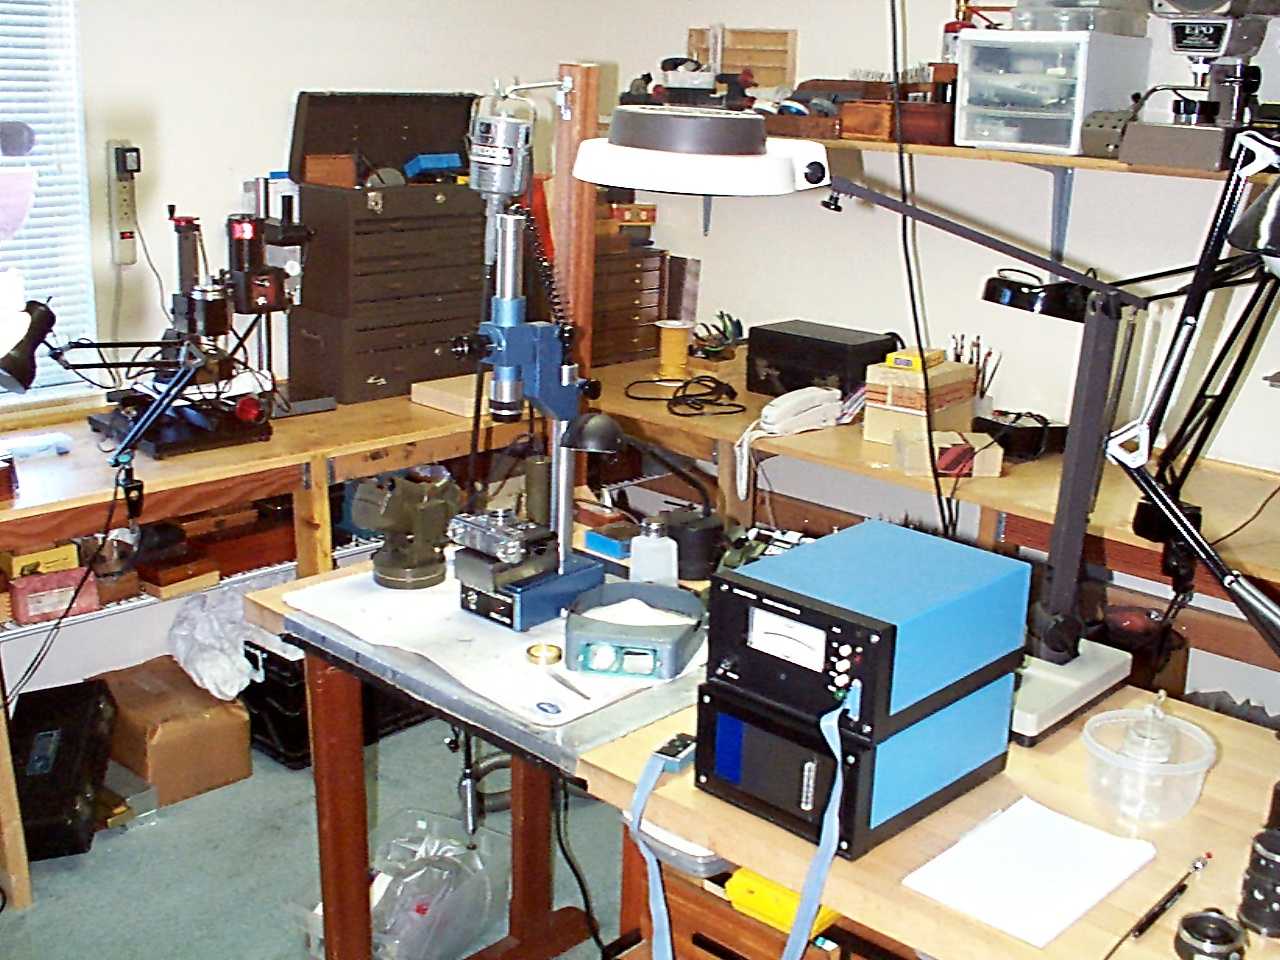
Purchasing a Contax IIa/IIIa
The simple fact of the matter is that Contax IIa and IIIa cameras are truly rare. In the days before Ebay it used to be a special event to see even one of them at a very large camera show. Ebay has made them seem to be relatively abundant but they are not. Because of this rarity there are not a lot of abundant sources from which one can choose. I have had personal experiences with all of the sources and have listed them below for your use.
1. A good local camera store. It is an historic stroke of luck to find a Contax IIa or IIIa of any quality for sale at any camera store other than those in the camera district of New York City. I have never seen one in any camera store other than those in New York. I have never seen one in the large camera stores of Los Angeles or San Francisco. There's a good reason for this. Most of them don't work right and they're more problems to a store than they're worth.
2. An Internet Camera Store: You can find a small selection of Contax IIa and IIIa cameras, lenses and accessories at highly inflated prices at camera stores that advertise their inventories on the Internet. I regularly review these stores and have found that a Contax IIIa body with a 50mm f1.5 lens rated Excellent with a 50mm f.1.5 lens will sell from $675.00 to $875.00 in these locations. But you need to be aware that all may be as is advertised. I have serviced several Contax IIIa cameras which were purchased from prominent Camera Stores on the Internet who advertised the cameras to have been "serviced" or "overhauled". When I opened them they were in completely original condition and they'd been sent to me because they didn't work properly. One was even sent to me from Japan. So understand that any camera you may buy from these sources will need a complete overhaul to be reliable and operate properly.
There's a huge list of Internet camera resources on the Internet. You'll find many Camera Stores on this list and you will find Contax IIa and IIIa cameras at some of them. The list is known as the Jeff Albro list. Here's the link to the Jeff Albro List: ALBRO CAMERA LIST
Here's a little tip about what USA Camera store "Excellent" really means. I know a Japanese seller who travels the camera show circuit around the nation. One day he confided to me that in Japan it is the saying that USA Excellent really means "Well Used". They're right.
3. Ebay: You will find more Contax IIa and IIIa cameras on Ebay, on a regular basis, at lower prices than anywhere else. But as Ebay clearly states, "Caveat Emptor: Let the Buyer Beware". The prices on Ebay are the best and it is possible to obtain a camera of very high cosmetic quality for about one half to one third the price you would pay at an Internet camera store. But just like the cameras from the Internet Camera stores you will find that they all need an overhaul to be reliable and operate properly. I have also overhauled cameras that were supposedly serviced and were advertised and sold on Ebay. I found them to be in completely original condition.
Many people are hesitant to purchase a camera from Ebay because of the difficulty should there be a problem requiring a return and with the seller not being scrupulously honest and honorable. Everyone has heard an Ebay horror story. I've experienced several of them myself. I can always use my mistakes as part camera bodies and lenses.
There is a way around the Ebay difficulties as you will see in section 6 following.
4. Flea Markets: I have never seen a Contax IIa or IIIa at a flea market and I've been to a great number of them looking for Contaxes. So I don't advise you to waste any time on this source. They're just not there.
5. Estate Sales: A great number of the Contax cameras that get sold on Ebay are identified to have come from estate sales. But then there are never any more than a maximum of perhaps eight to twelve Contax IIa and IIIa cameras sold on Ebay in any one month. Simple mathematics says that in all the Continental USA this is the number that are found at estate sales in any one month and so the statistics are not good. It is highly unlikely that you will find a Contax IIa or IIIa at an Estate Sale because the statistics are that you are more likely to win the lottery.
6. Contract with me to obtain and overhaul a camera, lens or accessory for you: This is the easiest, best, most reliable and secure way to obtain a Contax IIa or IIIa camera and its lenses and accessories. I will find a camera, lens or accessory on Ebay that meets your cosmetic requirements and will purchase it and have it delivered here. I will question the seller and make certain it is the type, model and condition you want. If there are any problems with the seller I'll take care of them. Once the camera or other item arrives here it will be completely overhauled. If it's a IIIa model I will overhaul and replace the photocell in the light meter. Your total price will be the price I pay for the camera on Ebay plus the normal overhaul costs that would apply to a camera, lens or accessory if you purchased it somewhere else and sent it to me yourself. There are no additional fees or surcharges. Depending upon the closing bid price on Ebay what you will pay for a camera in like new mechanical and optical condition, with a no nonsense one year guarantee, will be about the same as you would pay at a regular Internet Camera shop for a camera that needs an overhaul and has no guarantee. All that is required is a small deposit and I do all the rest. There is absolutely no risk to you.
7. Have your Camera Professionally Evaluated: If you decide to purchase your camera on Ebay or from another source where it is advertised to have been serviced and to be in perfect working condition why not consider buying a little peace of mind insurance? I will check the operation of your camera, open it and check that the internals are complete and will verify that the work you have been told was done has actually been done, and will write you complete report about your camera. There have been several instances where just the mention of my name to a seller has caused a rapid devaluation of the camera's condition. Just purchase the camera with a return/refund guarantee and have it shipped to me. I will quickly evaluate it and write you a report. If the camera needs an overhaul and you decide to keep the camera and have me do the work there will be no charge for this service. If you decide to have the camera returned I will charge only $25.00 plus the actual return shipping costs to return the camera to you or the seller by insured priority mail.
It is possible for an extremely fine looking Contax to have spent a lot of time in a very humid atmosphere while it was in storage. A great many Contax IIa and IIIa cameras have been in storage for more than 20 years before being sold at an estate sale so that they can be sold on Ebay or the Internet. An excessively humid atmosphere is very good for the leather and has no effect on the chrome, but it is very bad for the internal components that are made of steel. I see a fair number of very fine looking cameras that have rust problems internally. Having me check your newly purchased camera will ensure you don't inadvertently buy a rust bucket.
Here are a couple of good reasons to have me check your camera:

This is a picture of the inside of a Contax II with Mint external cosmetics. The plastic electrician's tape is holding the shutter in place. There is a screw missing on the left and a metal brace missing on the right. If you look very carefully just behind the focusing knob you can see the little slot that holds the broken part of the brace that is still remaining. The screw and the metal brace should be holding the shutter in place. The owner of this camera purchased it from what he considered to be a very reputable Internet Camera store. The tape is very fresh. I have the parts to make this camera right and will use them at no additional cost as part of the camera overhaul. Do you suppose this owner would have purchased this camera if he knew it was held together with tape?
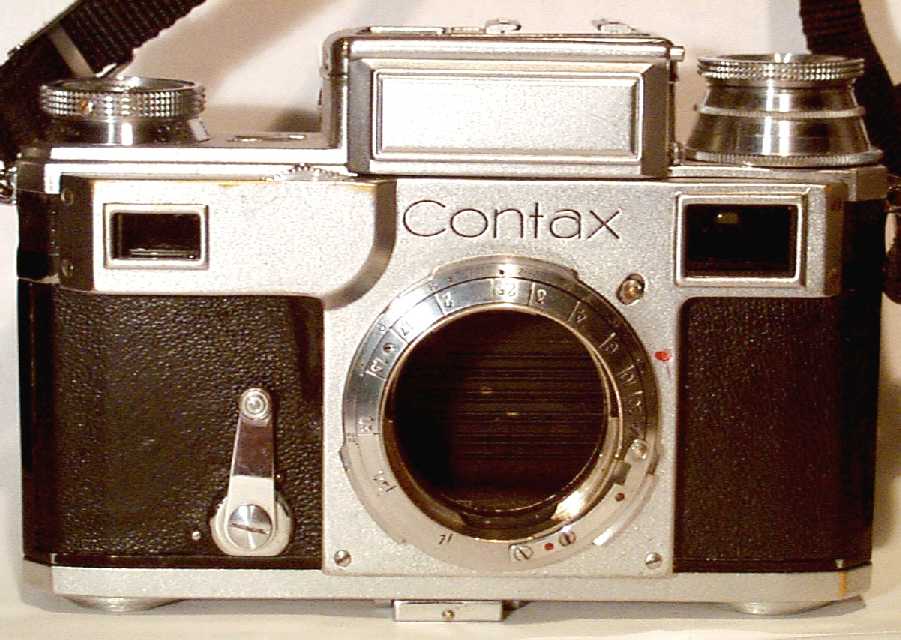
From the outside this is a true Excellent cosmetic condition Contax III. It is a real German made Contax body and all of its parts are German and original except for the shutter. It has a Kiev shutter in it. Kiev shutters range in quality from a "10" (equivalent to German quality), to a (1) (real trash). The shutter in this camera is a "-5" and is the worst I have ever seen. The winding shaft on the shutter is too short. In order to make the wind knob fit on the camera the shutter speed indicator bezel (the angled piece just below the winding knob) was ground down on its bottom. So much metal had to be removed from this bezel that its inner lip, by which it is held into place with two screws, was completely removed. The result is that this bezel is held into place by very cleverly made spring clips which provide just enough friction to keep it from flying loose when the film winding knob is lifted and rotated to change shutter speeds. The clips do not keep it from rotating if you pinch it in your fingers and twist.
There once was a time when there was only one kind of Contax I, II, III, IIa or IIIa and this was a factory fresh unit. But about 50 years have elapsed since Zeiss suddenly announced the end of rangefinder camera production. Since then every Contax IIa and IIIa has obtained a history of source, use and maintenance. Today, when a person sets out to find and buy a Contax IIa or IIIa, these factors need to be kept in mind in order to avoid cameras that have a bad history.
When Zeiss announced the end of Contax IIa and IIIa rangefinder camera production it came suddenly and without any notice. A catalog was issued to announce the start of the Contarex line and this catalog announced the end of rangefinder camera production and then end of all lenses and accessories for rangefinder cameras. At that time the Contax IIa cost the same as a brand new Chevrolet automobile. It was not just a "big ticket" item, it was a "huge ticket item" and there were people who had scrimped and saved for years to have one. The sudden demand was gigantic and dealers screamed to the distributors for cameras. In response to this demand spare parts were scavenged from every repair depot to produce cameras for sale.
A Contax I, II, III, IIa or IIIa camera is hand made out of hand made parts. This means that the parts from one camera will not necessarily fit into another. There are very wide differences in parts sizes from camera to camera. When cameras were made at the factory the assemblers had a very large assortment of parts from which to choose to assemble a camera. But when the spare parts or multiple parts cameras were used there were not so many parts from which to choose and some cameras were made that could not possibly work right.
Another element of complexity that enters this mix is that Zeiss introduced many internal changes to IIa and IIIa parts during the period of production between 1950 and 1964. There were three improvements to the mid range speed controller, five improvements were made to the rangefinder module, parts which were once bare brass became nickel plated, gold prisms were changed to platinum, the shutter tape was changed twice, all these are to name but a few. When a camera was made out of spare parts, parts from every time of production were incorporated into the camera resulting in a camera made out of parts that reflect the entire production history. So for a person like me who sees a great many Contaxes they are not at all difficult to identify.
The Contax IIa and IIIa are so valuable today that people are engaging in the same process now. Non working cameras are purchased at a low price so that parts from two or three of them can be combined to produce a high priced Contax for sale to unsuspecting victims.
The Contax IIa and IIIa:
My experience with these repair shop made Contax IIa and IIIa cameras is that they are always a lot of extra work and trouble to make right.
The question is, how can one avoid becoming a victim of a modern greedy camera butcher who is busy manufacturing Frankenstein Contaxes? The answer is that sometimes it's easy and sometimes its not, but it can be done and here are the main things to look for to avoid being stuck with a Frankenstein Contax IIa or IIIa:
1. Always check the back leather carefully. If it has bumps that have been removed by cutting slits above the bump to extract it the camera has been assembled by a true camera butcher and its going to be nothing but expense and trouble for you over the long run. It is a true Grade "A" Frankenstein and you will regret it very much if you buy it. Anyone who will butcher the valuable back leather on a Contax will butcher anything and this includes your trust.
2. If the leather looks good, but the camera has a black dial speed control knob on a body with a Color Dial type PC flash connection on it, it's a Frankenstein. If it has a Color Dial type speed control knob on a Black Dial type body it's also a Frankenstein.
3. If the distance markers on the lens mount are in English units, but the tripod socket is European, it's a Frankenstein. If the markers are in meters, but the tripod socket has 1/4-20 American threading, it's also a Frankenstein.
4. If the camera looks okay and has passed all the above tests, have the camera checked on a shutter speed tester. If the 1/250 speed is greater than 5.5 milliseconds the camera is a Frankenstein because it has a 1950 era shutter curtain module in it or it has bad shutter springs that cannot be replaced.
Thinking of Sending your Camera to Russia?
There has been a lot of talk on the Internet at the various camera sites about the availability of cheap camera repairs that are can be obtained in Russia. I have visited the most prominent of these sites and have seen for myself that the advertised price for a Contax Camera overhaul is $30.00. Imagine that, a complete overhaul for $30.00. The only question that matters is you know you are sending a Contax there so what are you actually going to get back?
The Contax cameras that I have seen to this point that have been sent to Russia for a $30.00 servicing demonstrate to me the way a Contax camera is rebuilt in Russia is to remove the genuine German made Zeiss Contax shutter, throw it away and then replace it with a Kiev shutter.
The following picture is of the top of a Kiev shutter that was removed from a Contax III that had been sent to Russia for a $30.00 overhaul:
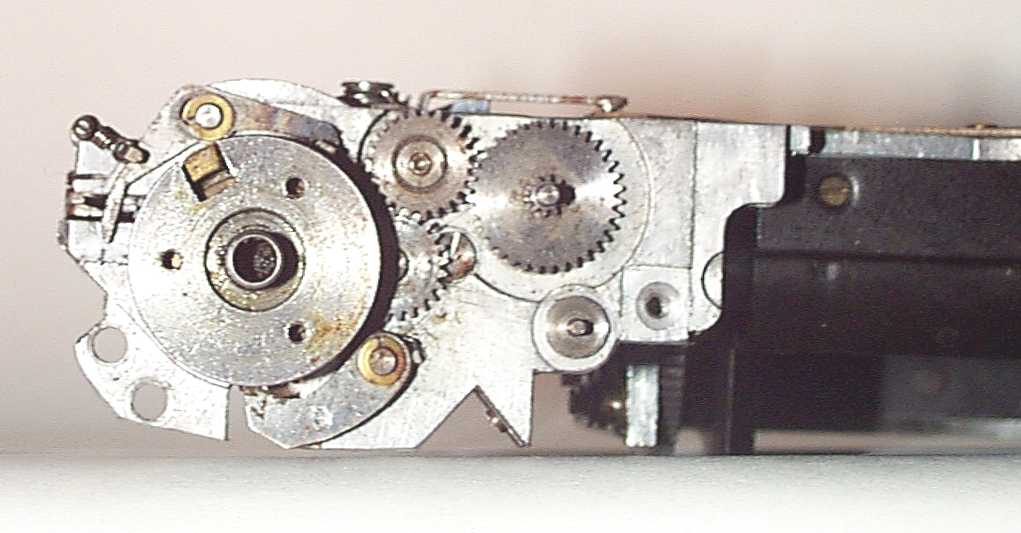
At the very top left you can see a small screw holding a small spring in place and a brass pinch washer holding a lever in place (The spring is connected to the lever). These two items are small design changes made by the Russians to the original Contax shutter design to make it easier to manufacture. These two design changes were made very early in the history of Russian production of the facsimile Contax shutter.
Here's a picture of a genuine Zeiss made Contax shutter from a Contax III:
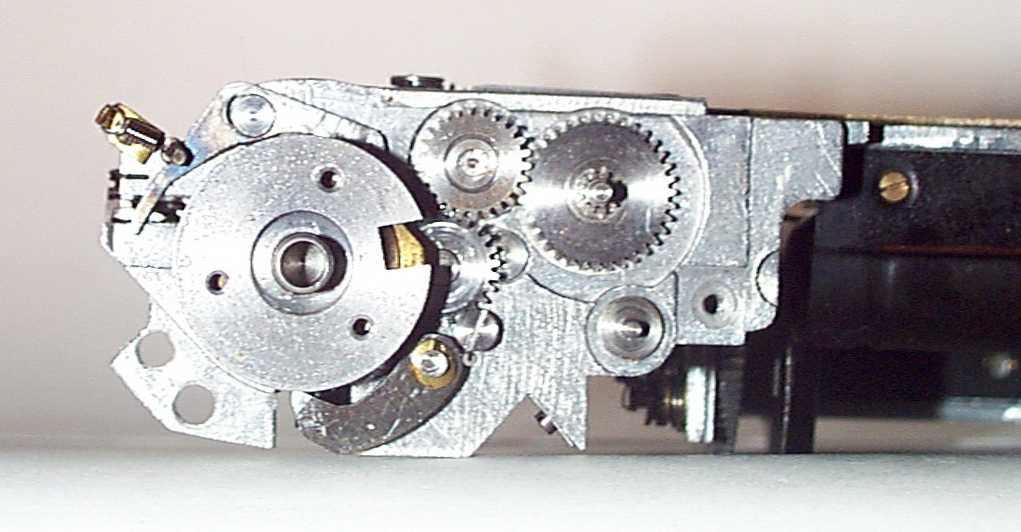
You can see that the small spring is held in place with a brass clip and the lever is held in place with a steel rivet. This shutter belongs to a customer who sent his camera to me for an overhaul and clearly shows what a good job of metal surface restoration a prolonged ultrasonic cleaning will do.
The digital picture does not clearly show how dirty the Kiev shutter is with original lubricant. It is apparent that absolutely no effort was taken to restore the shutter from its original condition when it was put into the Contax body. It also smells very badly from the badly oxidized crude Russian lubricants. The shutter has its original worn tape installed in it and this is nylon tape.
The main point is that a Russian overhaul of your Contax completely destroys its value as a collectable camera. It cannot be called a Contax with a Kiev shutter in it and no one will want to pay a Contax price for a camera that has a substitute shutter in it. Recently a mint quality Contax II sold on Ebay for $850.00. If this camera happens to contain a Kiev shutter in it its true value is roughly $49.00.
I have recently seen three cameras that were sent to Russia for overhauls. Two are the Contax III model and the other is a Contax IIa.
Here's the reason the Russians switch shutters in a Contax II or III: 99.9% of Contax I, II and III cameras that are presented for repair need replacement shutter tape. The extremely precise and custom woven Japanese made silk tape Zeiss used when it made the Contax IIa and IIIa shutters has never been available in Russia except for a very short while immediately at the end of W.W. II.. Once they had used up the silk tape they got when they seized the Zeiss factory at the end of W.W.II they switched to a cruder larger Russian manufactured tape made of Nylon fiber. This happened very quickly. The original German shutter design was changed to accommodate this tape, and all Kiev shutters, with the exception of those very few that were made in 1945 - 1946 use the Nylon shutter tape. The Russian made Nylon tape will not work in an original Contax shutter. It is too thick and the shutter binds and will not perform at speeds higher an 1/5 sec. So the answer is simple. Kiev shutters are very plentiful and cheap in Russia. They will, perhaps with some modifications that are not visible to the camera owner, fit in a Contax body and will present a nice performance appearance. This is what you get for $30.00. Send a Contax to Russia and get a Kiev back. If you want to see what a Contiev or Kievtax looks like here's a picture of one:

It took me three years and $6000.00 to get a manufacturer to precisely identify the 1 of 1500 silk fiber types used in the original Zeiss tape, to identify and set up a custom machine to weave this tape, and to manufacture it to the same exact quality standards Zeiss used in the tape it used when it manufactured the cameras. I know of no one else anywhere who has this tape and I know that there is absolutely no way to get the original shutter performance without it. I would not have worked so hard and spent so much money for it if exhaustive testing had not demonstrated conclusively that Zeiss was fiendishly complex with its shutter tape to the same degree as it was with everything else and that no substitution would provide original results. You can't get this tape in Russia.
The Russians are good mechanics and are not afraid to open a Contax IIa or IIIa. Here's a copy of the email I sent to a customer who sent me a Contax IIIa that had been sent to Russia for an "overhaul":
- "Dear T.,
- It's not irreparable. There's no such thing. It's just the camera had obviously been recently "serviced" and it was the most wonderfully carefully done worst work I have ever seen. Very skillfully done, very complete and totally devoid of any understanding of how the camera works. The best thing you could do to protect the rest of humanity is to contact the seller and inform him he has absolutely no business opening a Contax camera. His work goes far beyond mere incompetence. It is truly stupid.
- Is the seller, by any chance, in Russia or the Ukraine? This would make a lot of sense. The camera was completely filled with nasty smelling crude grease and oil that has the raw petroleum smell of Kiev all over it. And this stinking lubricant had been very carefully applied in locations where it was absolutely useless and of no effect. It was amazing to see just how carefully the nasty grease was applied. Nothing else was done other than to paint the nasty stuff all over. The camera was not disassembled to any degree or cleaned at all.
- The only problem that's going to cost you some extra money is the light meter. The last person who worked on it installed a very strange photocell. While this photocell made the meter respond to light, it could not possibly be accurate or linear. Your meter needs a new photocell and this will cost an additional $65.00.
- What's the name of this seller?"
Subsequent investigations confirmed that the camera had been serviced in Russia prior to sale on Ebay. I'm sorry I didn't take any pictures of it. I was just too stunned. The next camera from Russia that I receive will be captured in pictures so that you also may enjoy the memories. It's just too bad that the problem of smell and pictures has not yet been solved. Russian grease smells just like an old refinery.
If you have lost at Russian Roulette you can send your IIa or IIIa camera to me. I will only charge the normal overhaul price to clean up the stinking mess and do the job right. A real German made overhauled replacement shutter for a II or III camera will cost $250.00.
Thinking of Doing your Own Work?
There are some sites on the Internet that have been written with instructions to help people who want to do their own work on the Contax cameras. There are sites for the pre-war II and III models and there are sites for the IIa and IIIa models. I would include links to these sites except it is a fundamental precept of good teaching never to demonstrate how to do a thing incorrectly. If you have the money, and you want to see what the inside of a Contax looks like, and you don't care how reliable it is when you're done, I'm sure you can find these sites on your own.
The Russians could not copy the II and III model cameras. What they did was to have the original German technicians at the Jena factory construct for them a complete set of tools, dies and jigs used to manufacture the Contax II and III cameras. Then, just to make sure, they had these technicians actually use these tools, dies and jigs to make some cameras. So it's a myth that the Russians "copied" the Contax II and III. They couldn't do it. The camera was just too subtle and complex and too precise. They needed the Germans to make the tools for them.
Zeiss was, and still is a gigantically huge manufacturing conglomerate with virtually unlimited design and manufacturing capabilities. Everything they make is extraordinarily complex and anyone can be excused for not initially being able to look past the exterior beauty of their equipment to see the fiendish complexity within. Zeiss knew all about industrial espionage and product copying. There are many good and valid reasons why no one was able to copy their cameras until they were forced to make a complete set of tools, dies and jigs for them to do it with. When you open a Contax camera you have been anticipated by the designers long ago. Zeiss wanted their broken cameras to be sent back to them and built them that way.
With regard to the Contax IIa and IIIa cameras please note there are a great many Leica copies and they are avidly collected. But there is no such thing as a Contax IIa or IIIa copy made by anyone. I'm absolutely certain that when it designed these cameras Zeiss had in mind the Russian capability to produce crude II and III copies. I firmly believe that they thought out the design of the IIa and IIIa with great care and designed each and every part so that there was absolutely no possibility of successful copying. The operation of the Contax IIa and IIIa shutter is incredibly complex and sophisticated. It's action is completely unlike any other design ever. There is very little chance of success for a reliable camera being the result of tampering with it if you do not understand completely the action of each and ever little piece of it.
If you have had some education with your Contax I, II, III, IIa or IIIa and the results are not as you would like them to be you can send the parts and pieces to me. I will not charge any additional amount. You will only pay the normal overhaul price for me to put everything back together properly and correctly and to return a completely accurate and reliable camera to you. The only additional charges will be for any missing or broken parts and I am very reasonable about my parts prices for an overhaul.
I recently reassembled a beautiful Contax I that had been disassembled by its owner over 20 years ago. All those years the camera pieces sat in a box while he worried about it and missed taking the great pictures he remembered taking with it. Finally he sent it to me. Three weeks later he told me that he hadn't realized just how much he had missed it all these years until he opened the box and held it in his hands complete once again. He told me he could not describe his joy when he heard the shutter zip through its speeds and he felt the smoothness of the controls. If you have a camera that's in pieces you don't need to wait 20 years.
There is a famous textbook for watchmakers. Its title is, "The Adjustment of Complex Watch Mechanisms". This book contains this wonderful starting statement, "Before beginning any work on a watch whose design is new to you study its mechanism and completely understand the operation of all of its parts before undertaking any work.". This is wise advice that is far too simple to be immediately understood.
Ask Me for Advice
I am always very pleased to be complimented by a new friend writing to ask me for advice or information concerning Contax rangefinder cameras, their lenses and accessories. I am always happy to be able to give you good advice concerning items and issues related to these things that are of interest to you and at no cost.
I occasionally hear from someone who would like me to evaluate a camera, lens or accessory being sold on Ebay or elsewhere on the Internet or to relate my personal opinion concerning a seller. I'm sorry but I am unable to do this. What I can offer you in this regard is a risk free process whereby you can obtain the Zeiss Contax items you need with the highest quality and at the lowest possible cost.
If you are interested in obtaining a camera, lens or accessory from the Internet and you do not want to have to deal with the difficulty and uncertainty of finding what you need on your own there is a method by which I will do this for you. Please check out my buying program instructions using this link: Custom Buying Program.
Testimonials
Here are some testimonial letters from recent customers:
- Hi Henry:
- First tests are in!!! I do not know if this is something that you have heard before, but I am totally surprised at the difference in "personality" between both camera bodies. It's hard to decide which I prefer after only a couple of rolls. I used 200 ASA Fuji print film, and I have to say that the results are well within expectations. I only used the built-in meter. As for the lenses, the Tessar 3.5 is delightful, and there is absolutely nothing else to say about it. All in all, it has been a great experience. I look forward to taking my time now with each item. Thanks a lot for your help. I'll let you know how things continue to move along, and I'll keep in touch.
- Regards,
A.G.
- Dear Henry,
- I am so delighted with the work you've done to the camera! It arrived this morning. Thanks so very much. The shutter sounds just terrific, so much quieter that I now realize I've never heard one as it should sound. Very pleased also with the smooth focusing and the work you did on the rangefinder. It's as you said, like new. Will bring another body into work with me tomorrow and FedEx it off to you for arrival Thurs PM if that's ok. Thanks again.
- B.P.
- Dear Henry,
- When it comes to these Contax machines you are the best! Your ability to create superb cameras is second to none. Also I appreciate the factual way that you describe the camera's attributes and even , sometimes the the news that is not so good. But still you managed to improve even on the worst of them as in the case of the Contax II BD. Thanks again for servicing all my cameras and lenses. I'll let you know when I receive the camera.
- Best regards,
- R.
